Content
Categories
- General SWPanel (38)
- Administration (14)
- Database (14)
- SSL Certificates (15)
- Cloud (59)
- Cloud Storage (2)
- Containers (1)
- Backup Copies (6)
- Mail (33)
- DevOps (55)
- Domains (33)
- FTP (6)
- Hosting (32)
- Migrate Services (6)
- DNS Registers (13)
- Security (12)
- Services (7)
- Support (5)
- Users and privileges (2)
- Web (15)
- WordPress (23)
How to activate and use the Gestinable Fail2Ban on my Cloud with SWPanel
What is the Manageable Fail2Ban?
The Fail2Ban system is an intelligent analysis system applied to your server that acts in a managed way, depending on the configuration you have applied, to restrict erroneous or illegal access attempts against your service.
How can I activate the Fail2Ban system on my cloud?
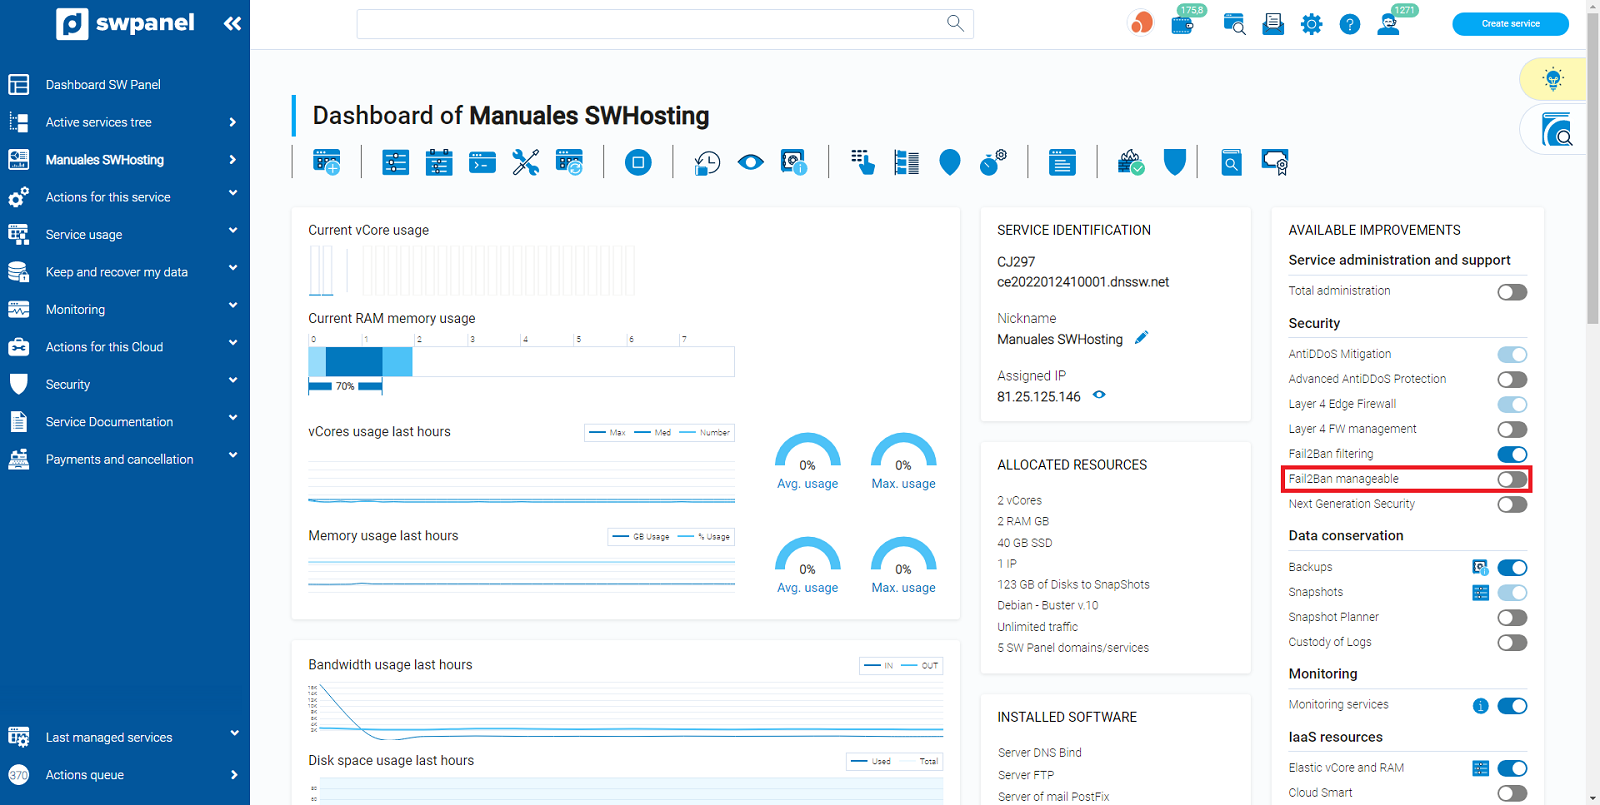
To activate the Fail2Ban system, you must first go to your cloud. Click on your Active Services Tree and, once you are in it, select the cloud on which you want to activate it. Once inside your cloud, go to the section Available improvements, on the right side of the dashboard, and here you will find the option Fail2Ban Manageable.

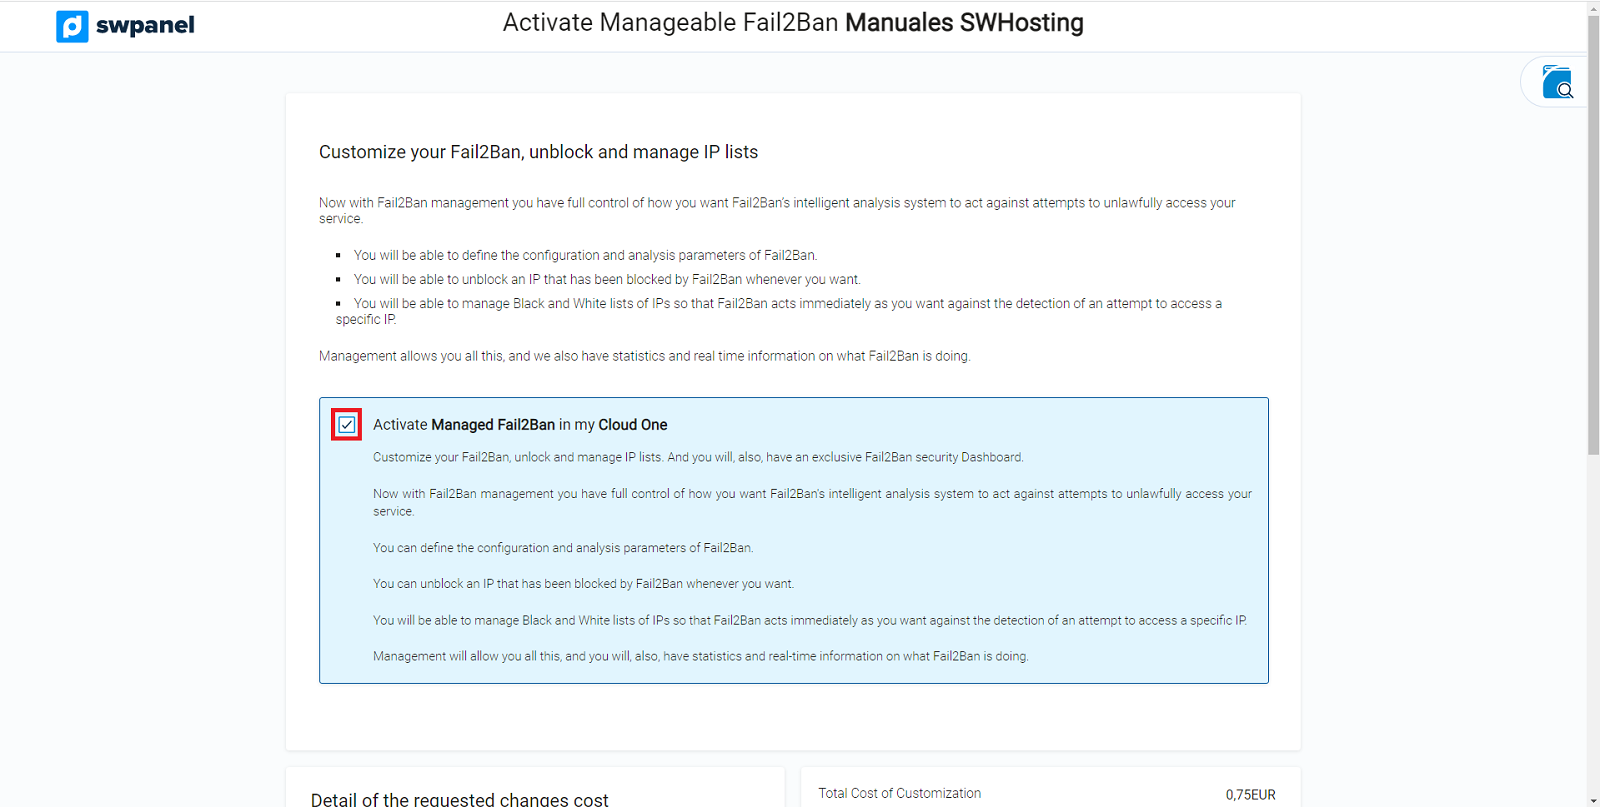
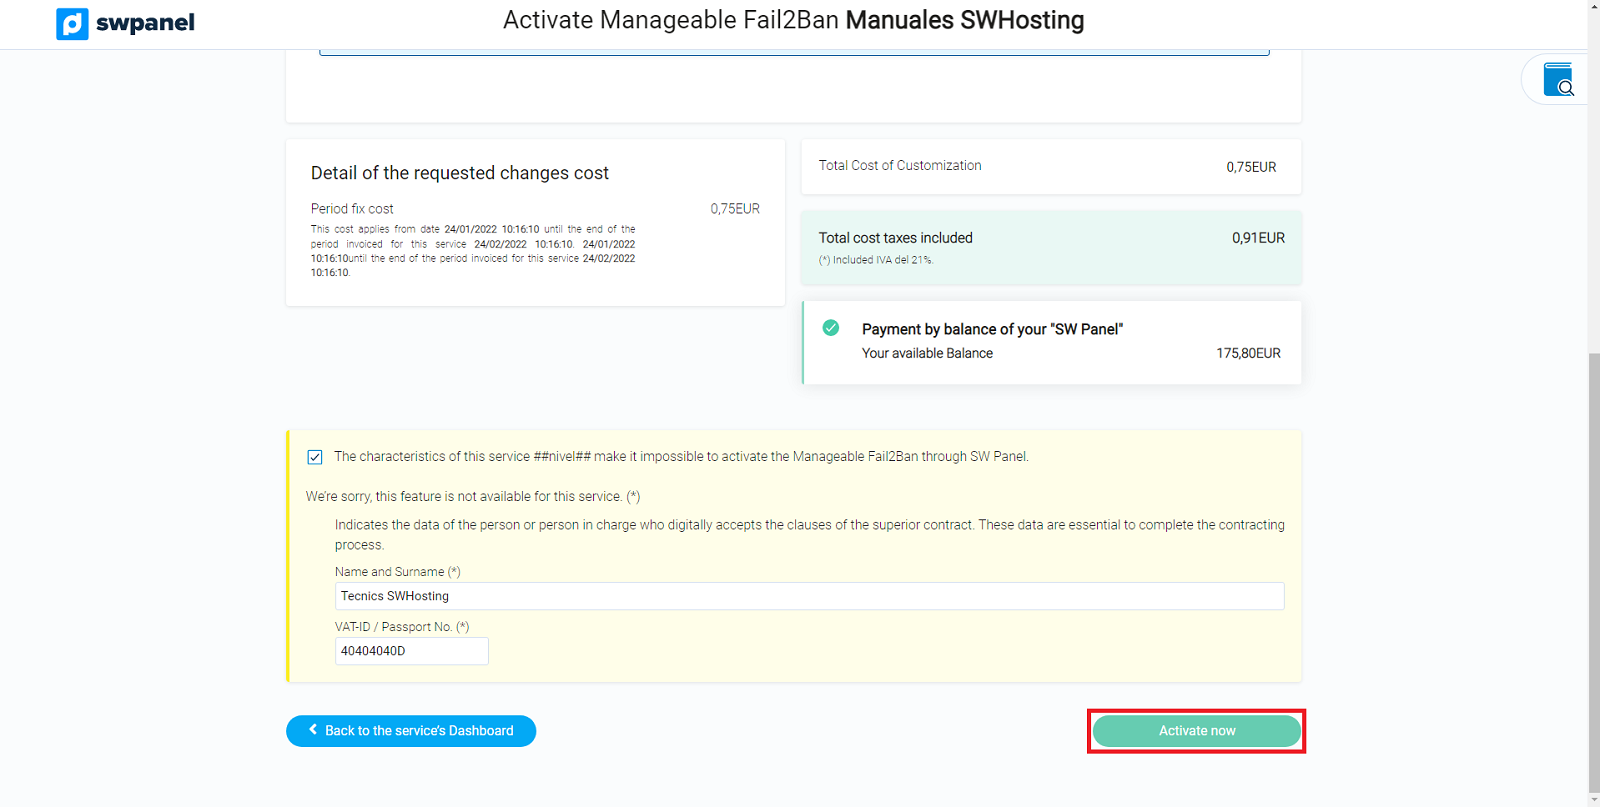
Once you press the activation button, you will be automatically redirected to the activation section. In this section you will find information about what you can manage with your Fail2Ban, and you can activate it by clicking on the check Activate Manageable Fail2Ban in my Cloud and accepting the contract.
What parameters can I configure in my Fail2Ban and how?
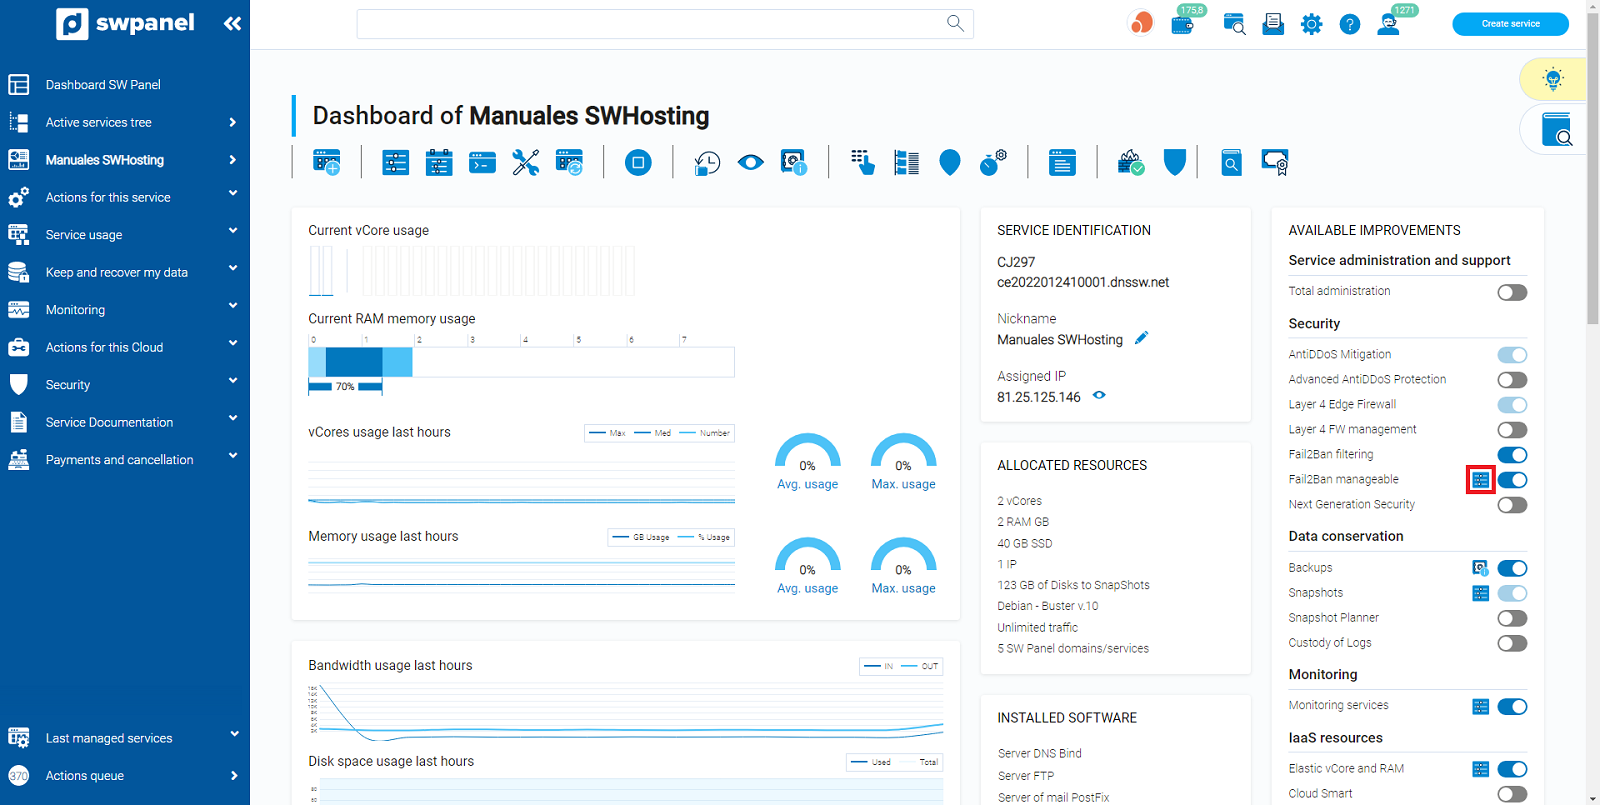
To modify the configurable parameters of your Fail2Ban, go to your cloud dashboard, and in the same section of Available improvements where you made the activation, you will see the option Fail2Ban Manageable, this time with an extra icon that will allow you to configure the parameters.
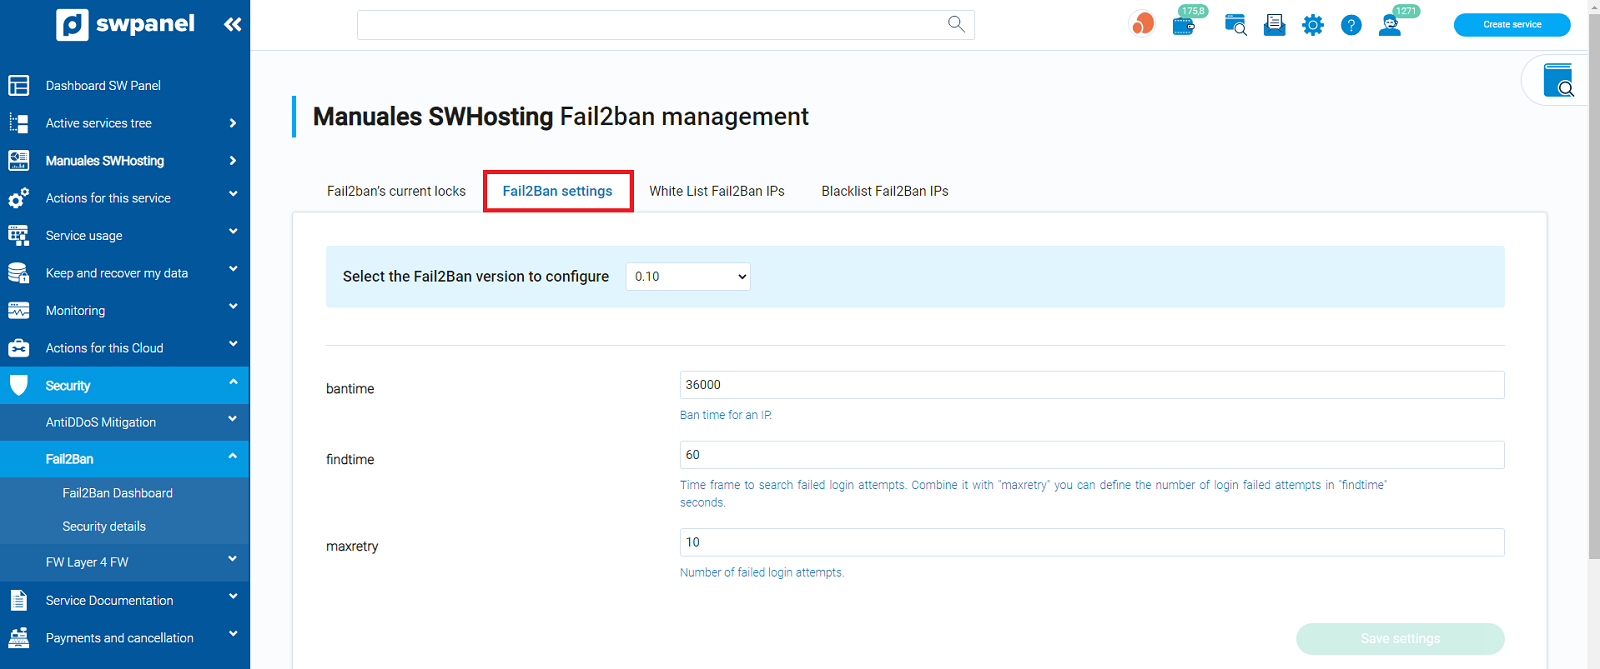
Fail2Ban settings
Within this section you can configure the parameters of the blockade applied to failed access attempts.
-
Bantime: The time that the lock lasts once it is applied, the value must be entered in seconds. By default this value is 36000, that is 10 hours.
-
Findtime: The time window over which the number of failed attempts is examined. That is, the period during which if more unsuccessful requests are made from the account, the attempt will be blocked. The default value is 60, that is 1 minute.
-
Maxretry: The number of failed attempts that must not be exceeded during Findtime or else the attempt will be blocked. The default is 10 attempts.
(The combination of Maxretry and Findtime is what governs the number of attempts in a given period that, if exceeded, will proceed to apply the blocking system).
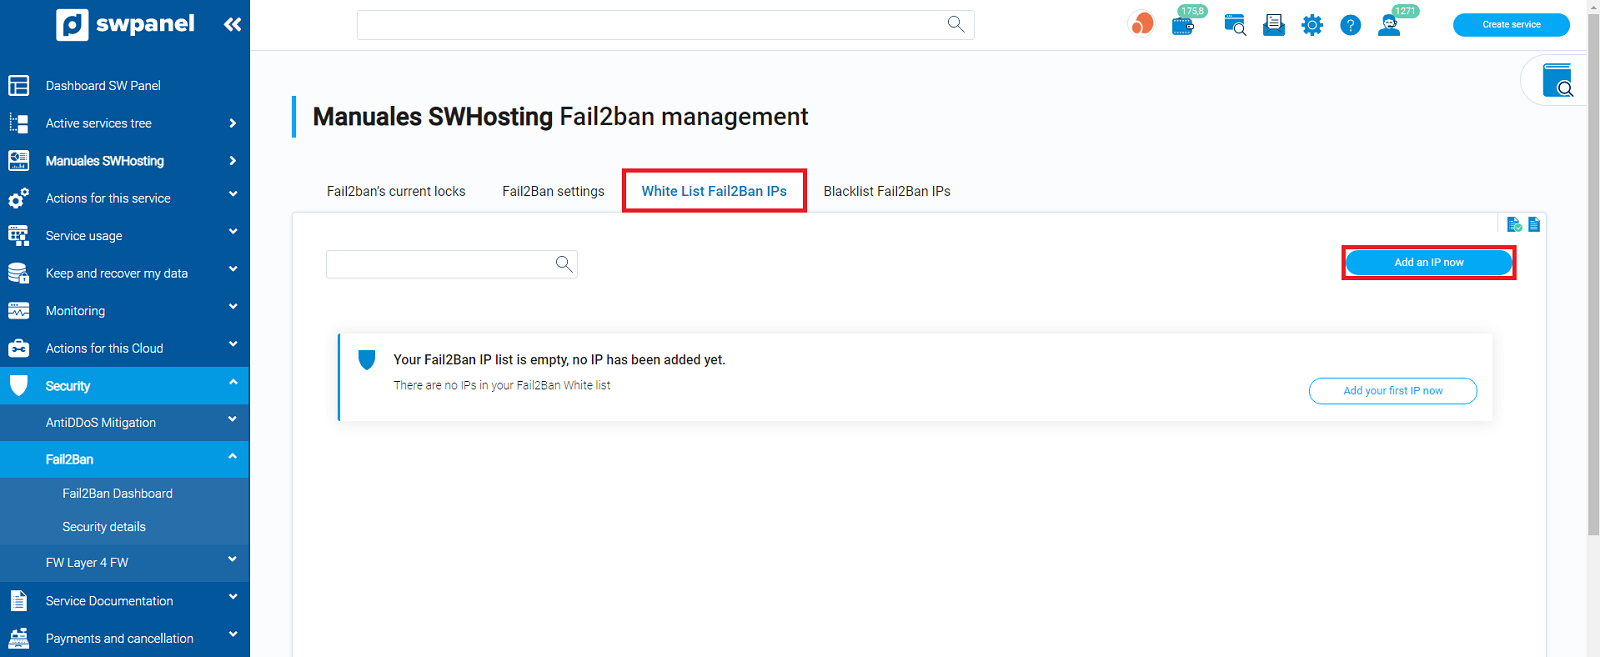
White List IPs Fail2Ban
In this section you can add IPs to which you do not want the Fail2Ban system lock to be applied, regardless of the failed attempts. To add new IPs to the whitelist, click on the blue button Add an IP now to your right.
Once you press the button, a window will open in which you can enter the IPs you want in the text box.

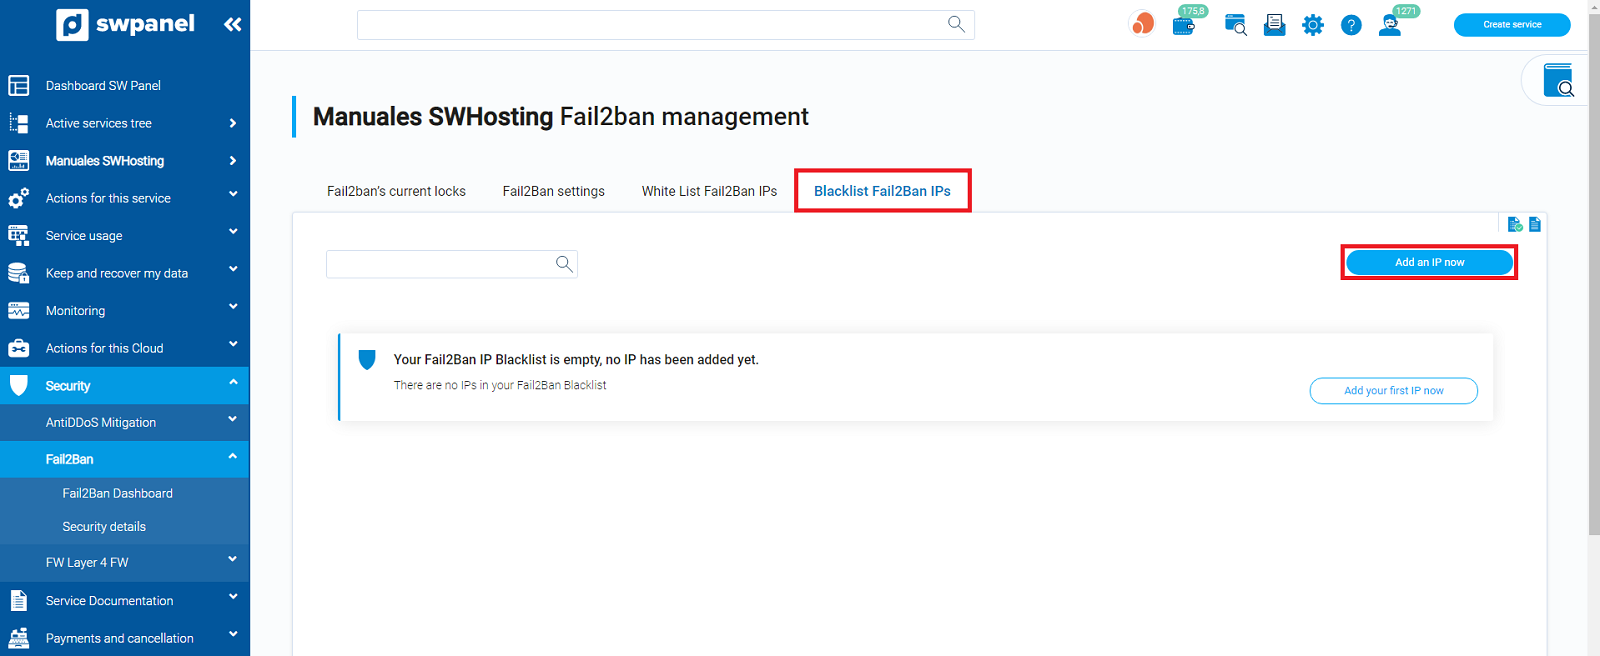
Blacklist IPs Fail2Ban
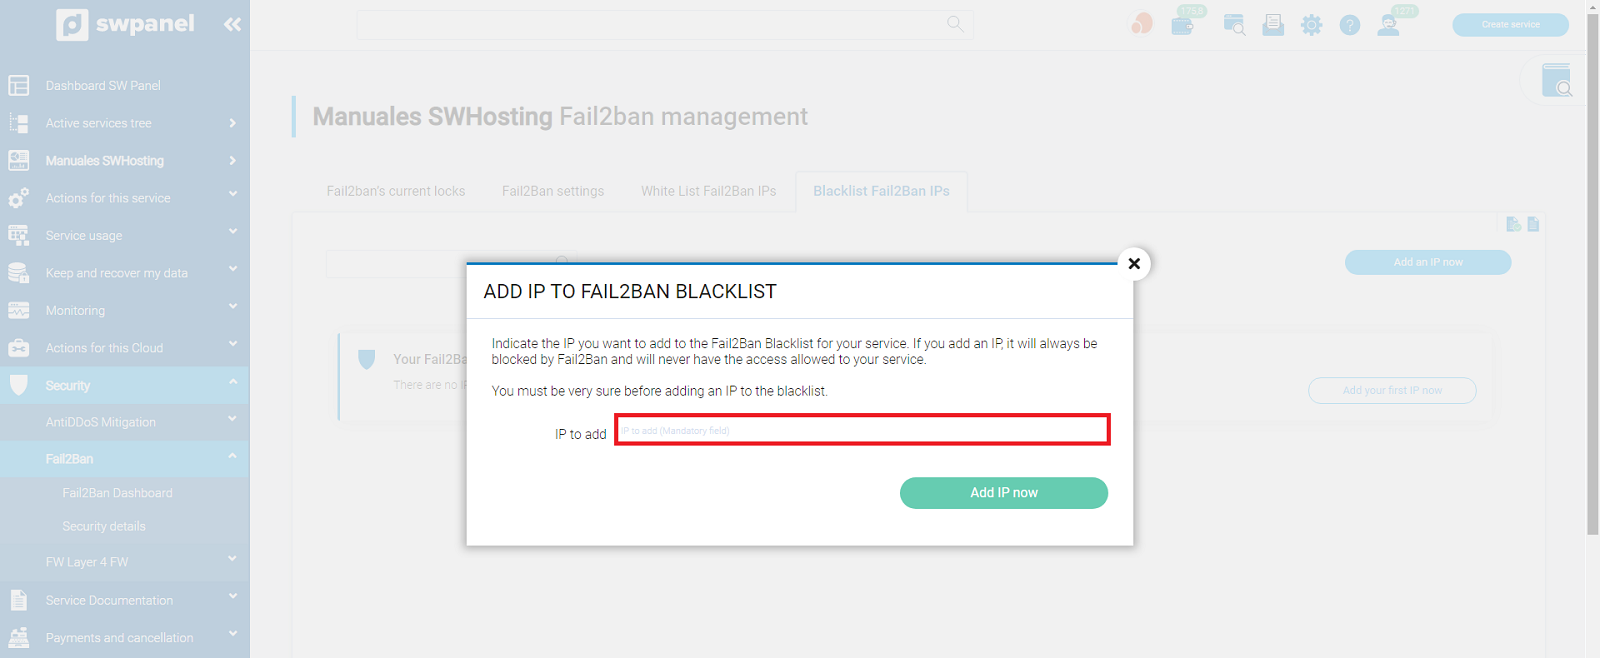
In this section you can add the IPs to which you want the Fail2Ban system lock to be applied, regardless of failed attempts. To add IPs to the black list, click on the blue button Add an IP now located on your right.
When you select the button, a window identical to that of the white list will open in which you can enter the IPs you need in the text box.
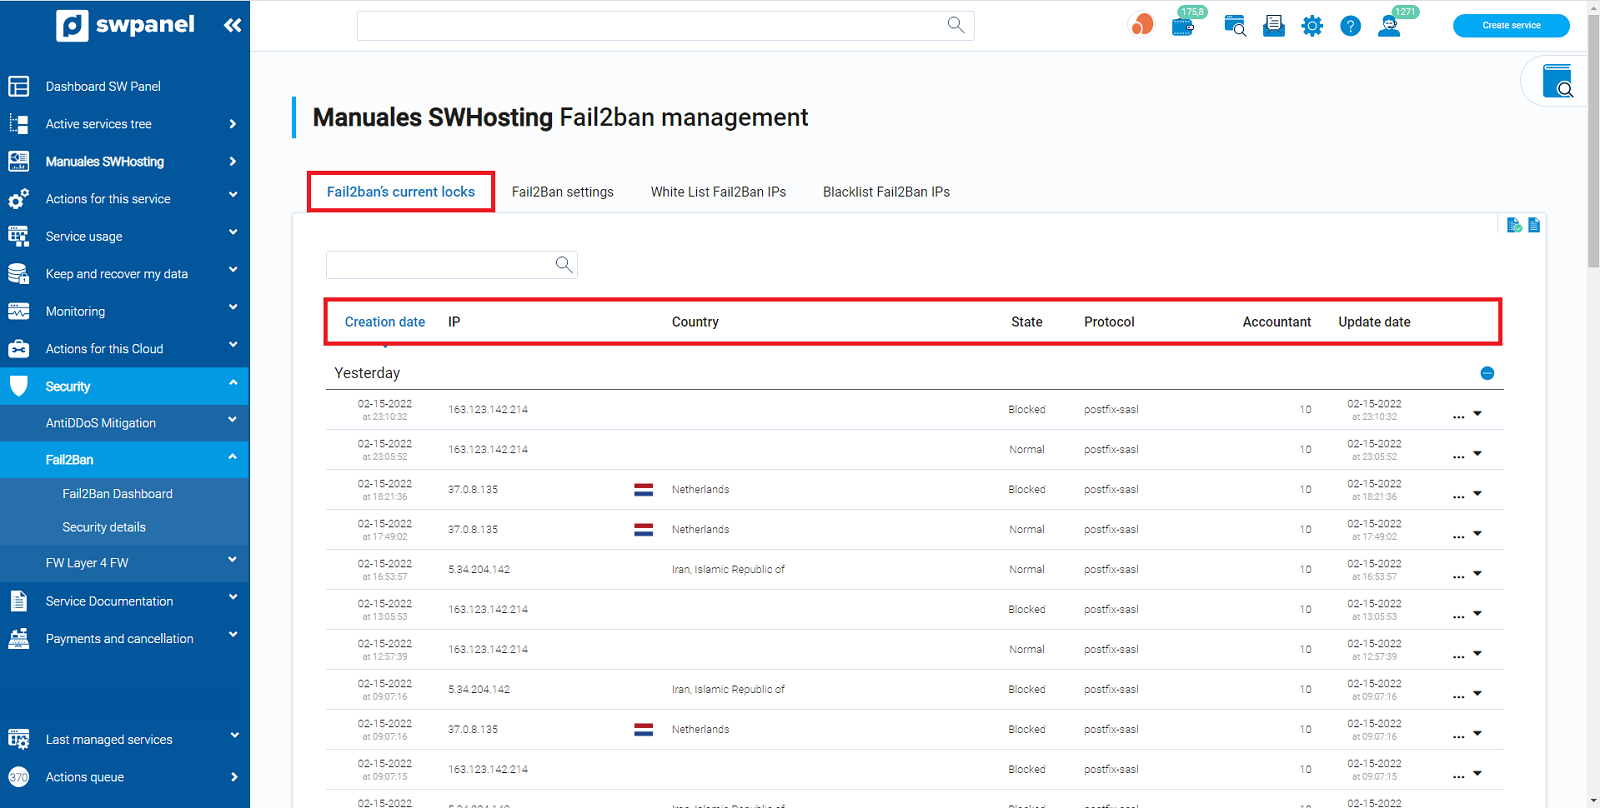
Current Fail2Ban locks
In this section you will be able to monitor the IPs that your Fail2Ban system has been blocking according to the configuration previously assigned in the section Fail2Ban Settings.
You can view the IPs according to the filtering you want, either: Creation date of the block, Code of the IP, Country from which the IP tries to access, Status of the block, Connection protocol used, or Date of last update on IP *.
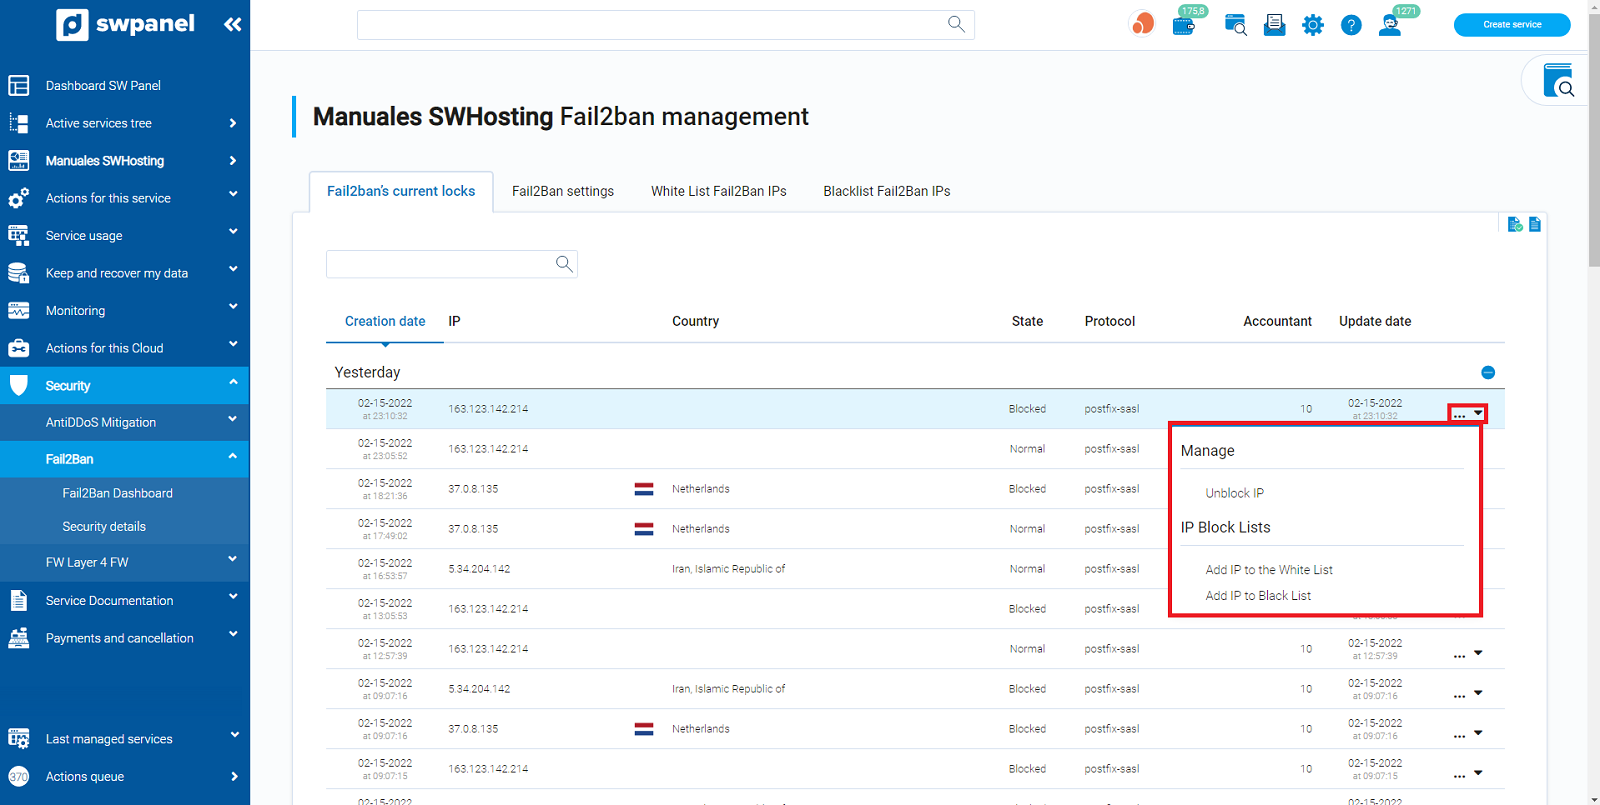
In addition to simply viewing and monitoring the IPs blocked by the Fail2Ban system, you can also manage those IPs that you already have comfortably from this same section. You will have the options to Unlock them, add them to the White List, or add them to the Black List.
To manage the IPs from this section, go to the "..." drop-down menu that you will find to the right of any IP, and select the option you want.
Unblock IP
By selecting the option Unblock IP, in the aforementioned drop-down menu, you will be shown the following confirmation window, where, if you wish, you should simply continue to confirm the unblocking action on the managed IP.
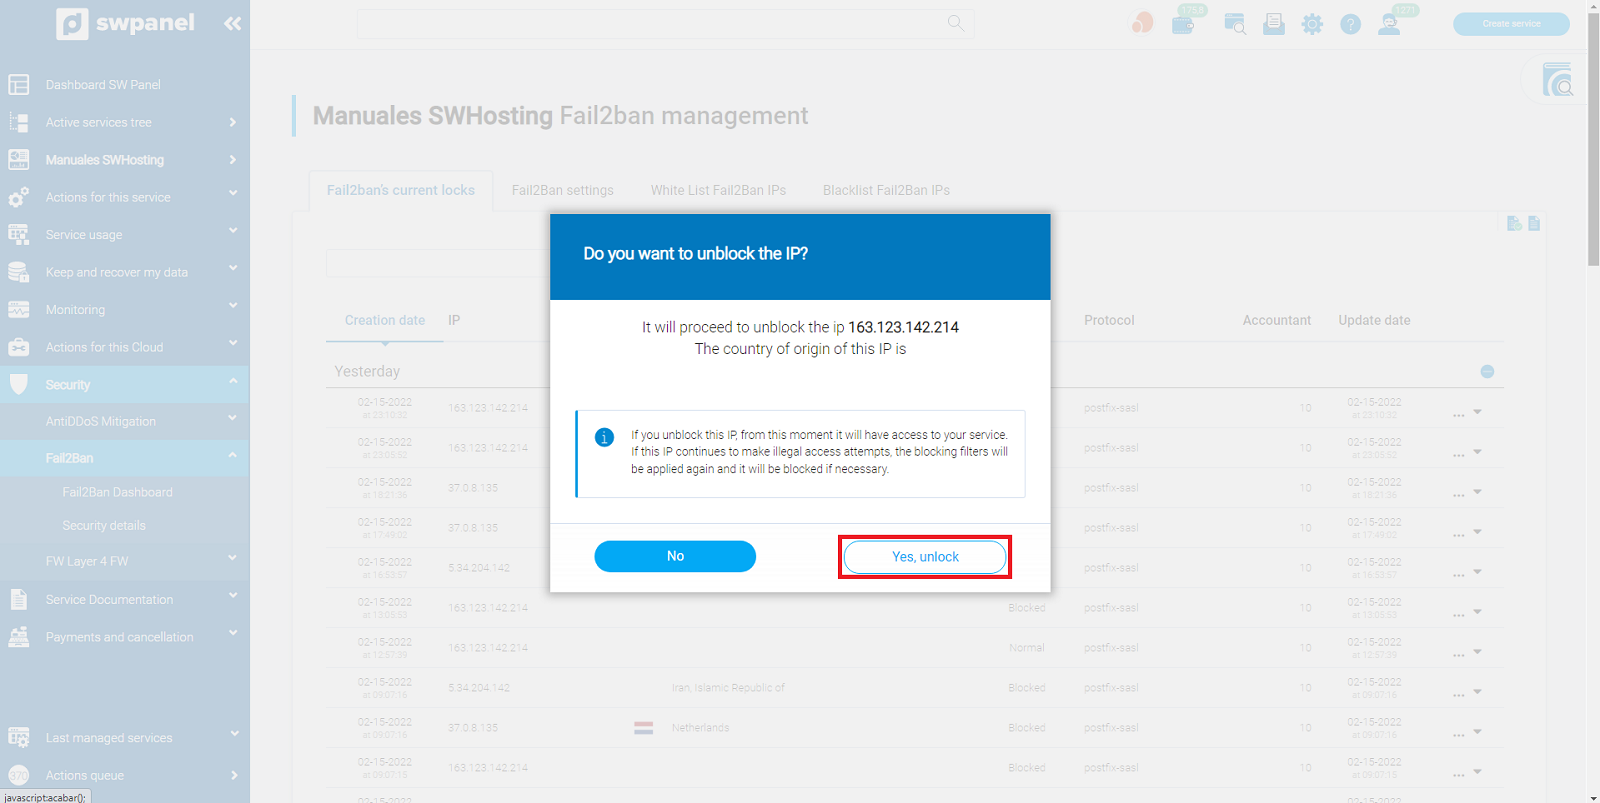
Notice
As indicated in the confirmation text box, unblocking the IP does not imply that it will never be blocked again, it is simply a temporary unblocking. If it meets the setting conditions to be blocked by the Fail2Ban system again, it will be blocked again. To prevent it from being blocked again, it would be necessary to add it to the list of IPs in your White List.
Add IP to White List
If you decide to add the managed IP to the White List, by selecting the corresponding option in the drop-down menu, the following window will open, with the text box showing the IP to unblock:
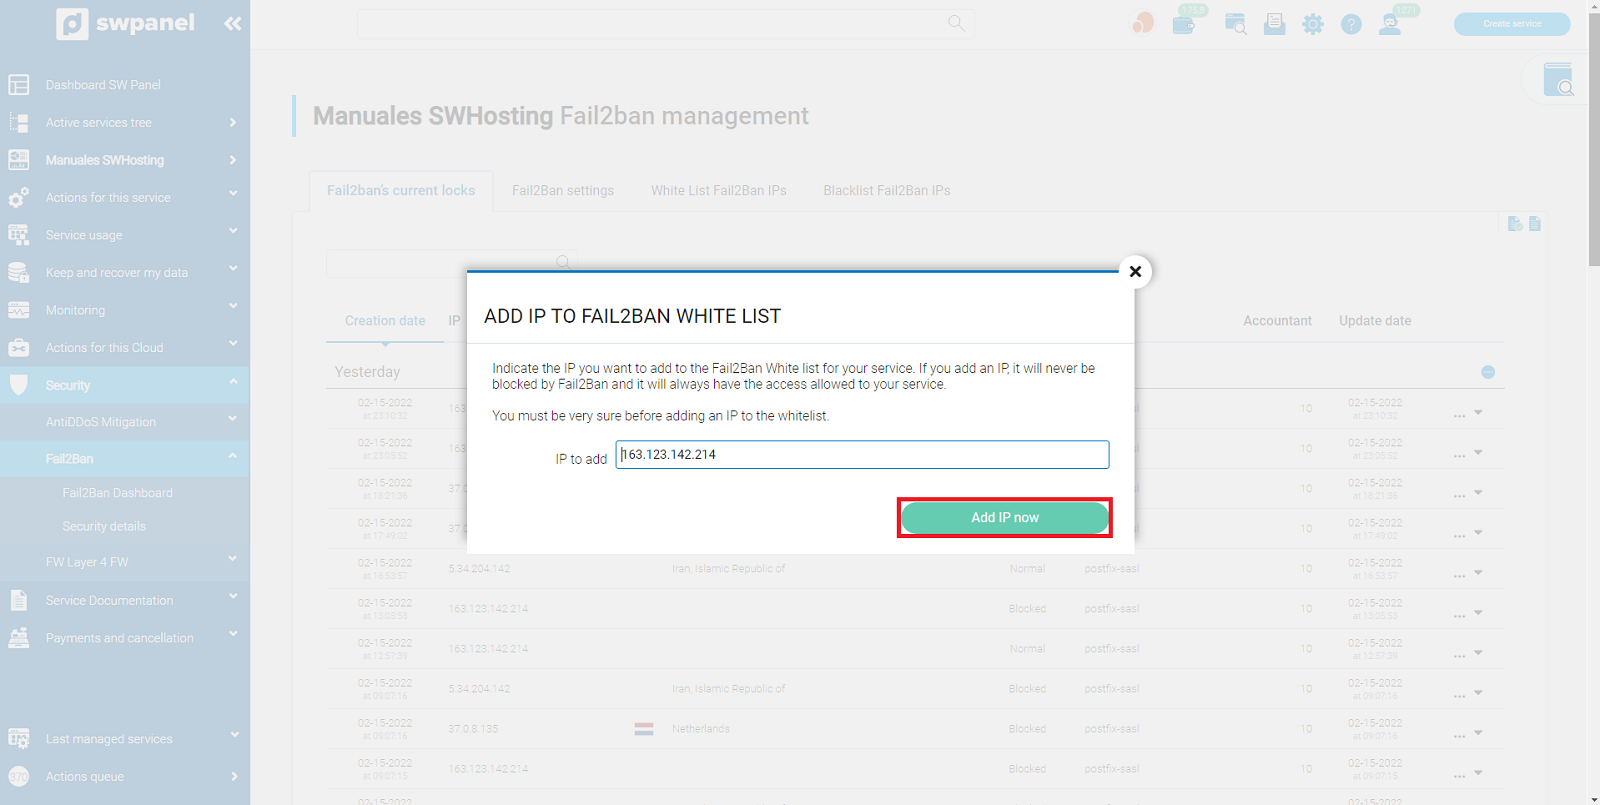
You can modify the IP in the text box, although it does not make much sense, since what we want when choosing this option is to add the IP that we are managing, not another.
Add IP to Black List
If you want to add the managed IP to the Black List so that it does not try to connect again, when you select the option in the drop-down menu, the following window will open, again, identical to the white list, with the text box showing the IP to block:
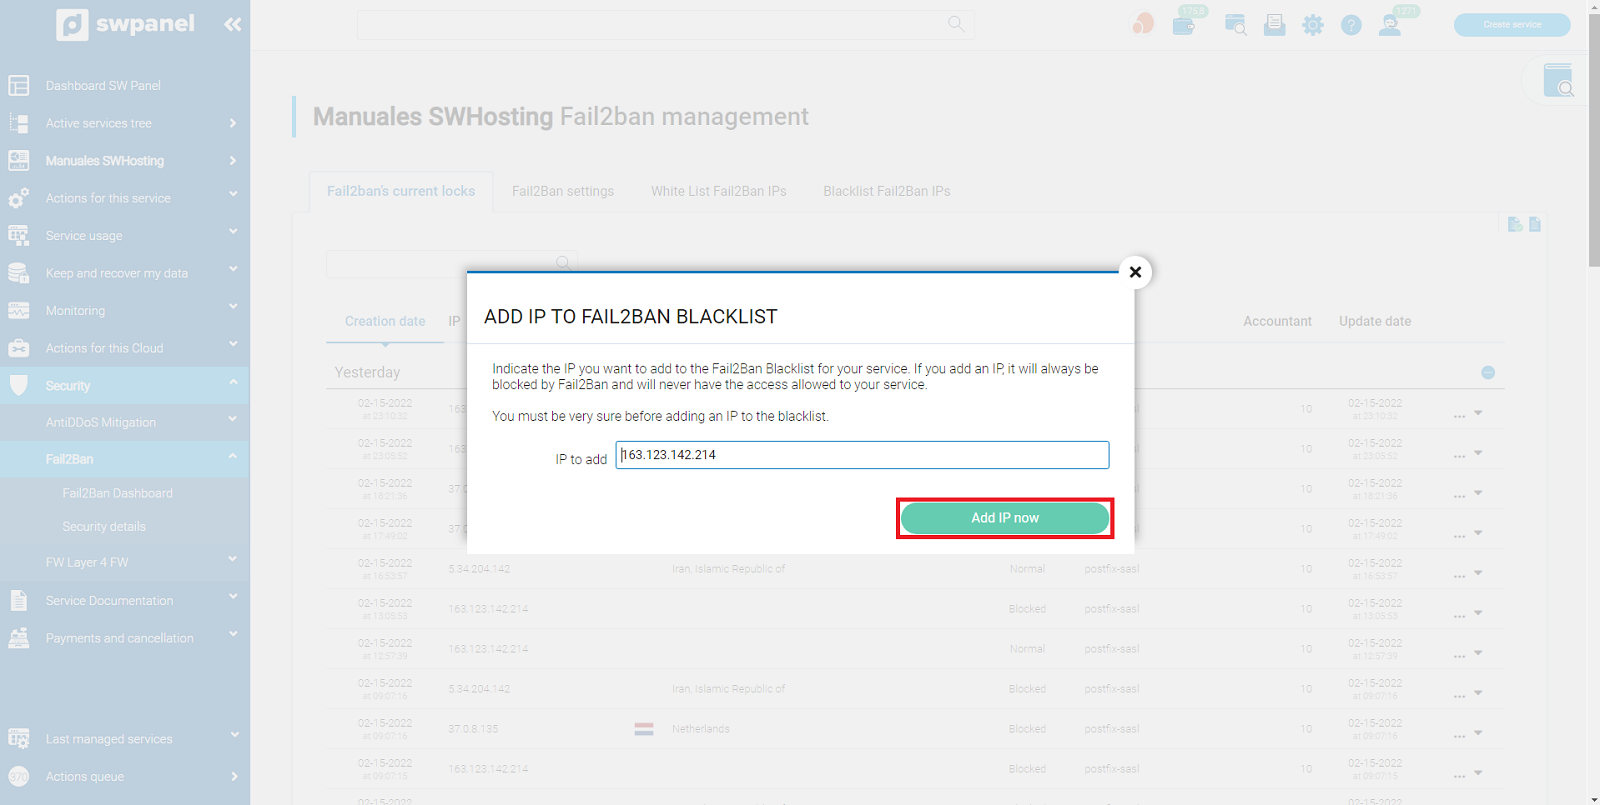
Here you can also modify the IP in the text box, but again it doesn't make much sense, as we want to add the managed IP in question to the blacklist.