Content
Categories
- General SWPanel (36)
- Administration (28)
- Database (13)
- SSL Certificates (15)
- Cloud (57)
- Cloud Storage (2)
- Containers (1)
- Backup Copies (6)
- Mail (33)
- DevOps (54)
- Domains (33)
- FTP (6)
- Hosting (31)
- Migrate Services (4)
- DNS Registers (11)
- Security (12)
- Services (8)
- Support (5)
- Users and privileges (2)
- Web (10)
- WordPress (23)
How to create Crons in SWPanel
Cron is a time-based scheduling service used in Unix-like operating systems. Users who configure and maintain software environments use Cron to automate different tasks. These tasks are made up of commands or shell scripts. You can configure the Cron service to periodically run the created tasks at fixed times, dates or intervals.
Create a CRON
First, you must find the Cloud server on which you want to create the new Cron. To do this you can locate it in our SWPanel service finder.
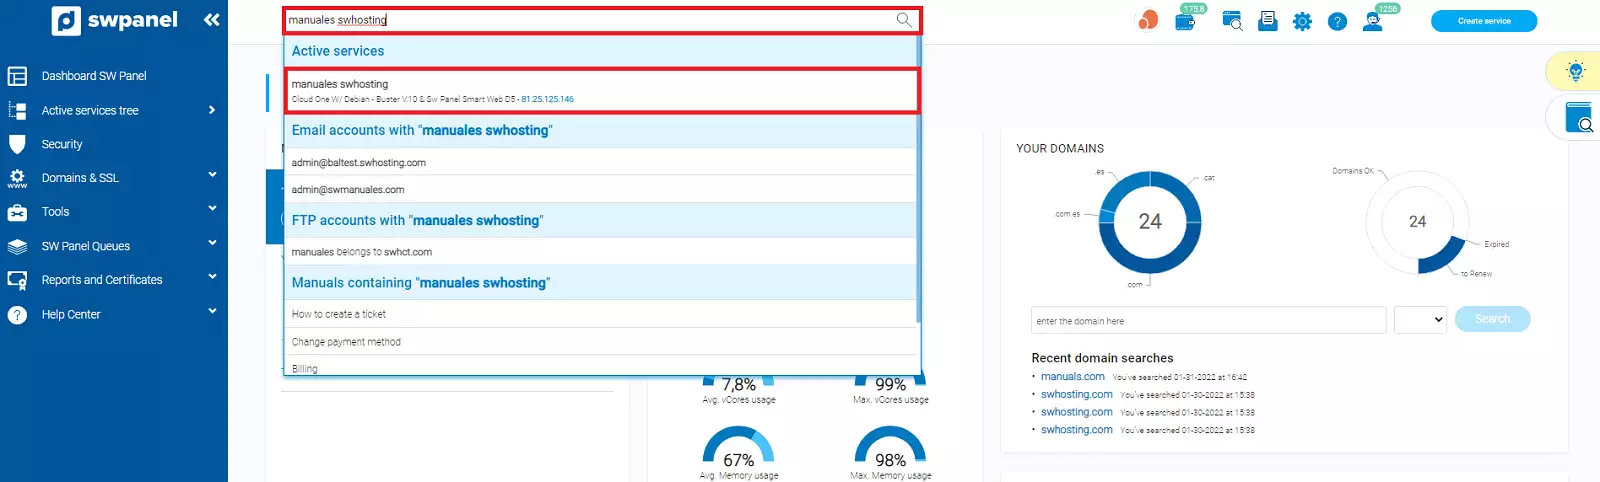
info_capture The screenshot is for guidance only. It was taken on version 2025.00.0017 with date 02/01/2025. It may differ from what the current version of SWPanel displays.
Or select the services tab, located in the blue menu on the left side of your screen, and select the server on which you want to create your new Cron.
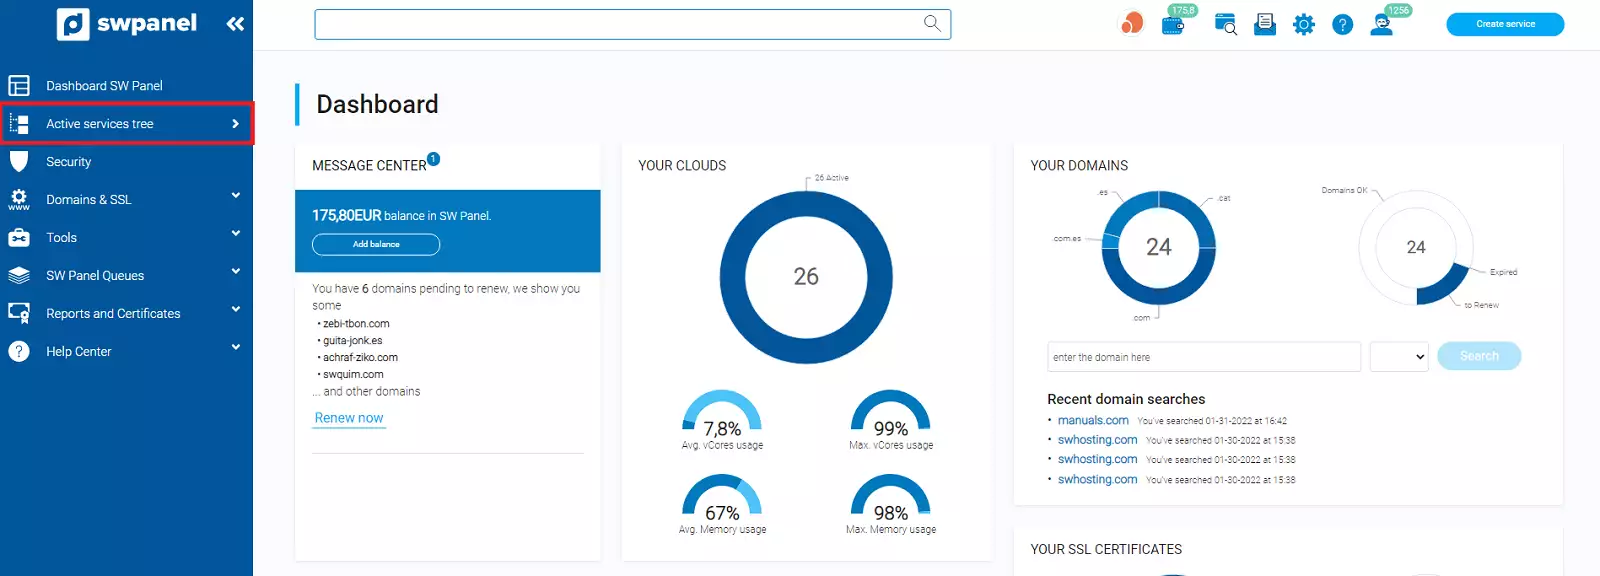
info_capture The screenshot is for guidance only. It was taken on version 2025.00.0017 with date 02/01/2025. It may differ from what the current version of SWPanel displays.
Once located in All my Services, you have to select the desired server.
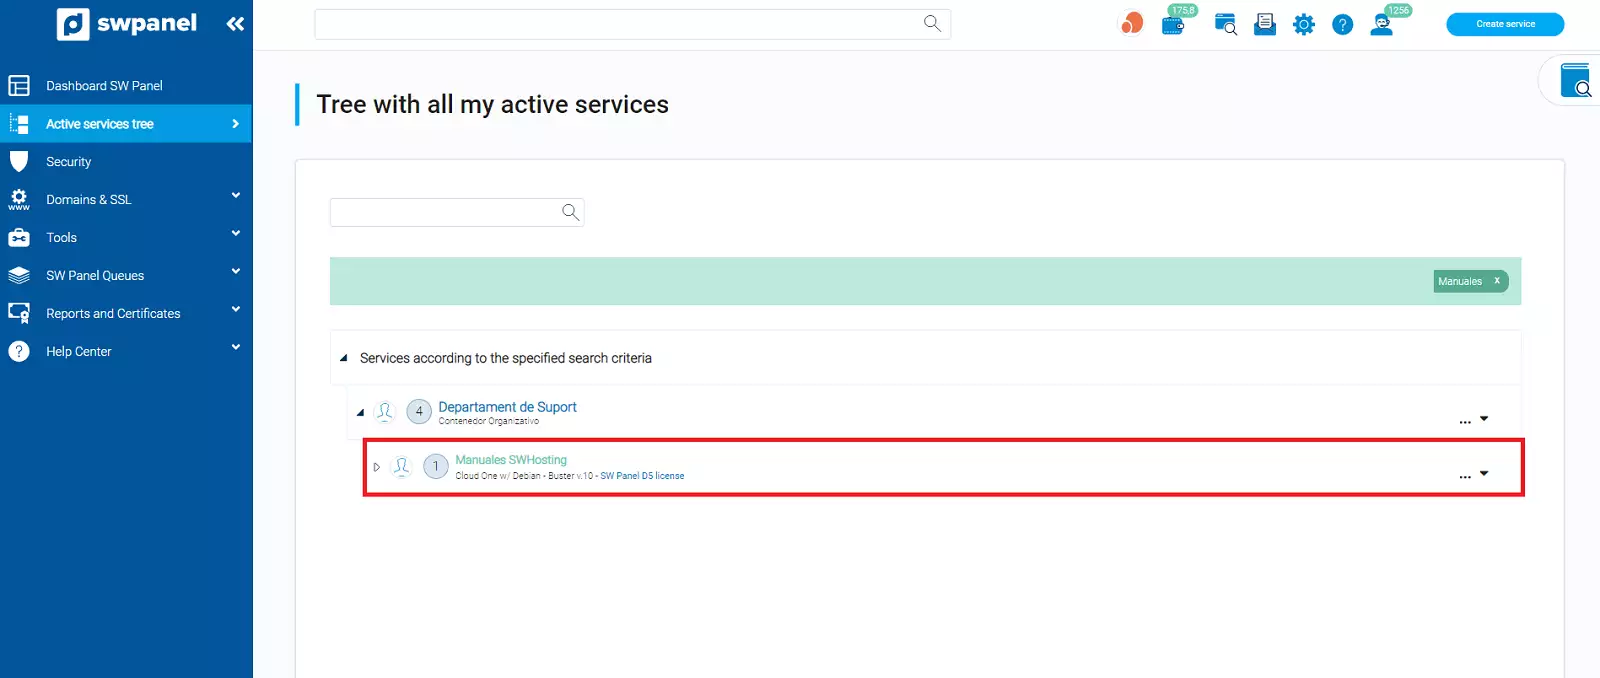
info_capture The screenshot is for guidance only. It was taken on version 2025.00.0017 with date 02/01/2025. It may differ from what the current version of SWPanel displays.
Within the selected service, you have to go to the left blue menu and click on Actions on this service > Cron Management.
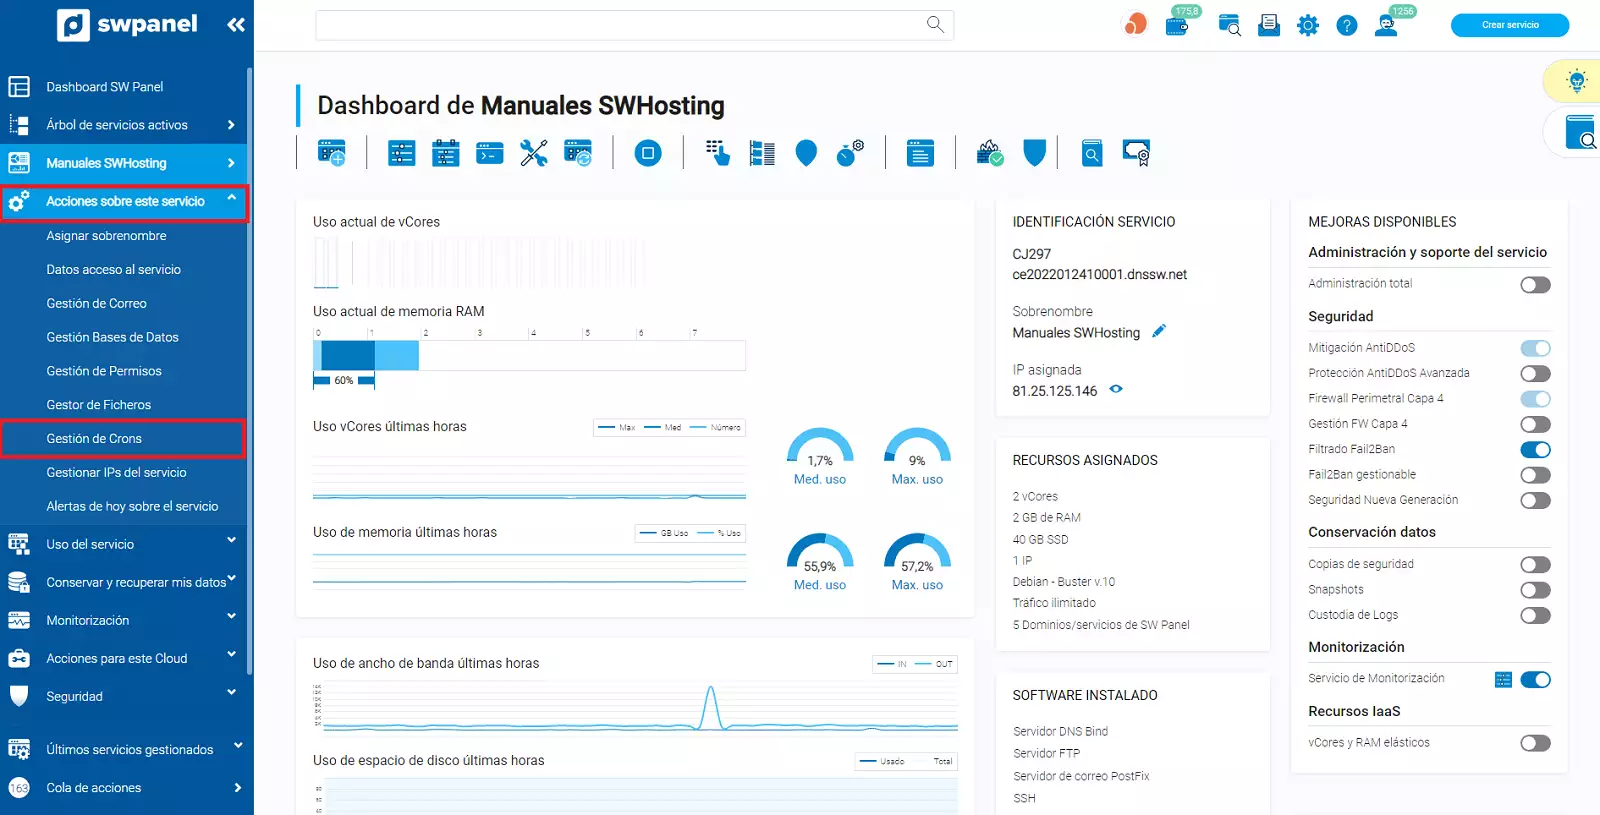
info_capture The screenshot is for guidance only. It was taken on version 2025.00.0017 with date 02/01/2025. It may differ from what the current version of SWPanel displays.
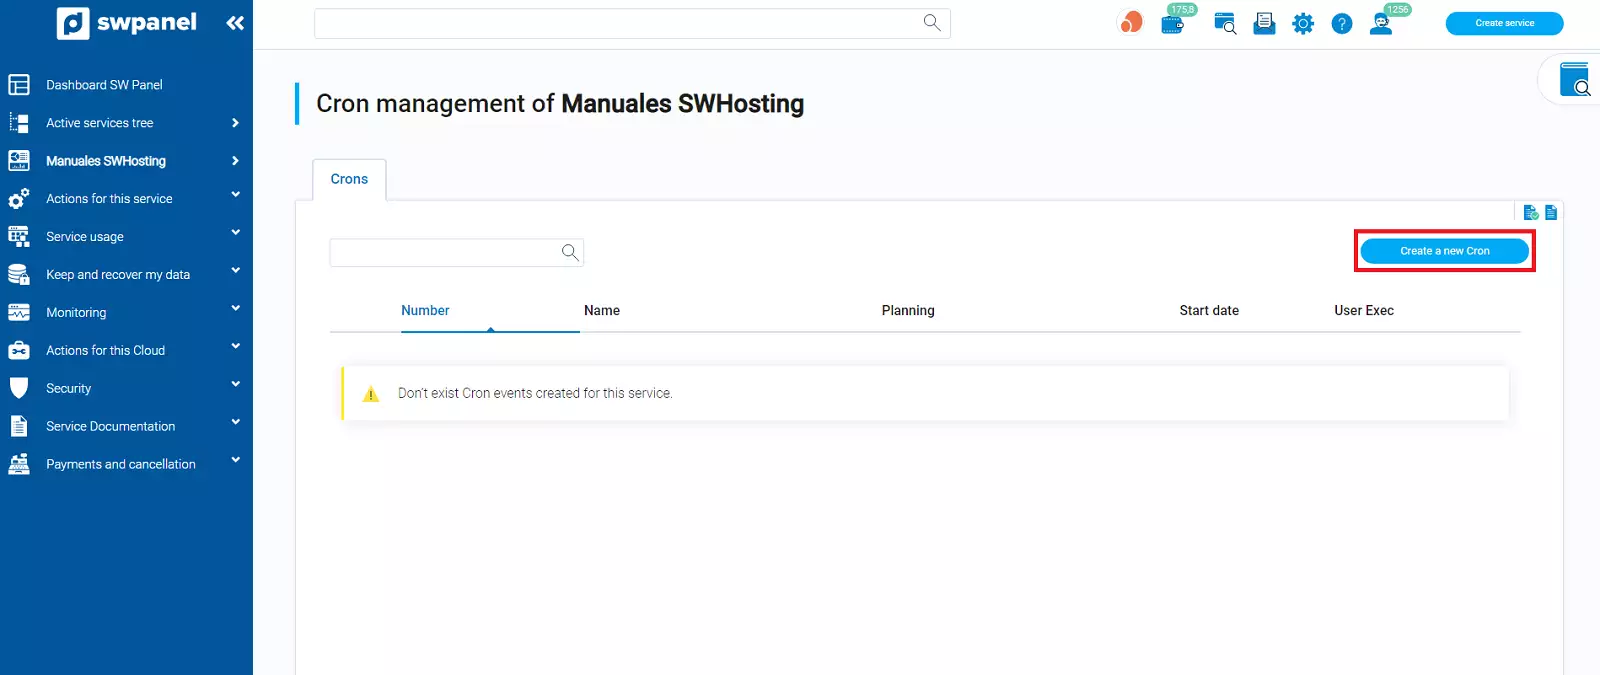
In "Cron Management", you will see the list of all Crons created.
To create a new Cron, you have to click on the Create a new Cron button.
info_capture The screenshot is for guidance only. It was taken on version 2025.00.0017 with date 02/01/2025. It may differ from what the current version of SWPanel displays.
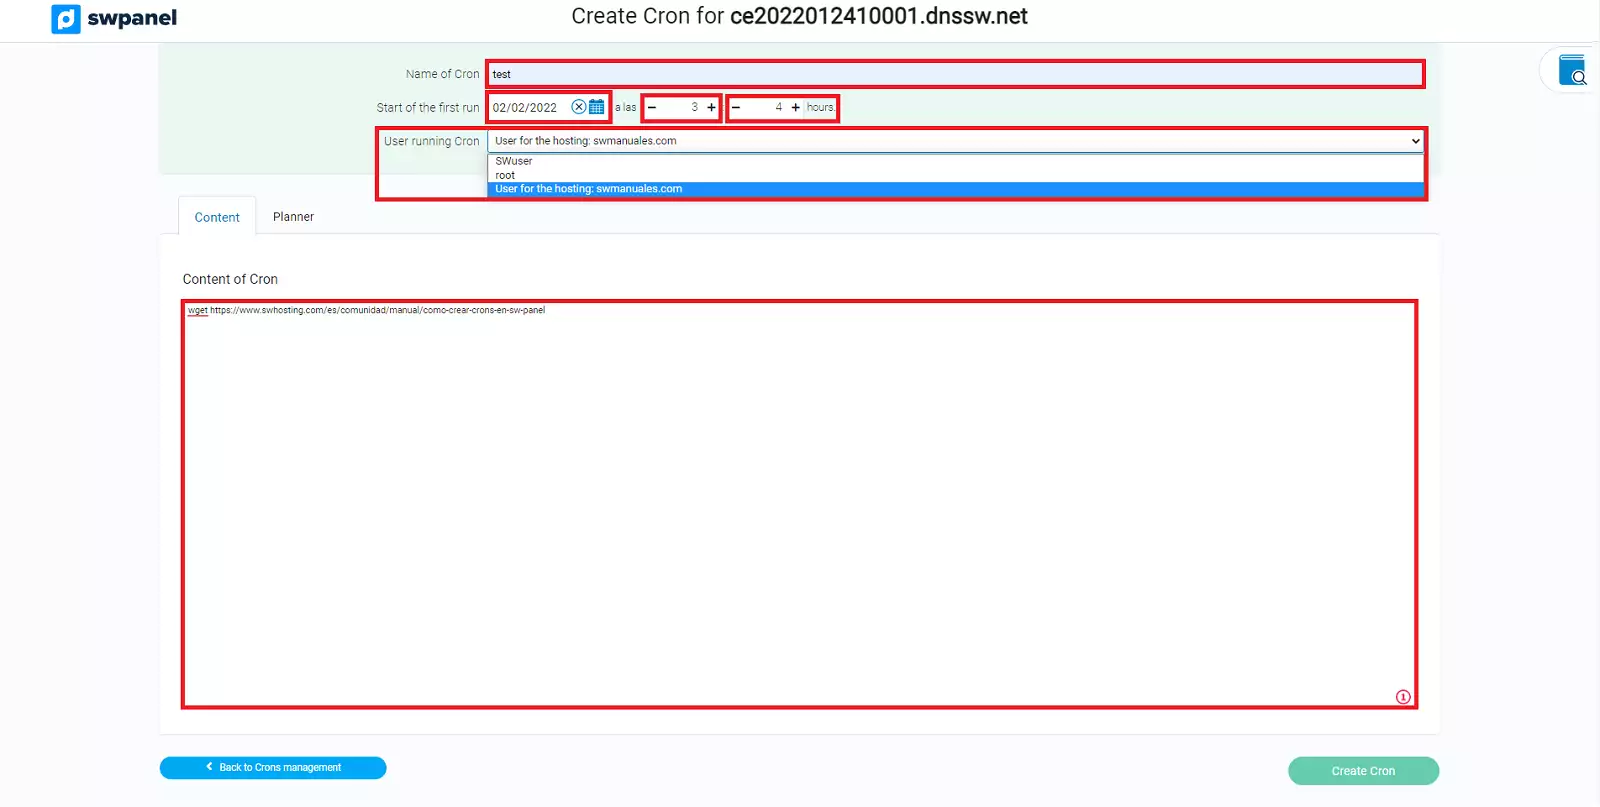
First of all, you must define a name for the Cron and set the date you want it to start, together with the time you want it to run (it will not be created until the defined date and time).
In the Cron content section, you have to define the commands to be executed.
In the section of User Cron execution, you can choose several users like for example, the root user that has administration permissions, swuser that only has maintenance tasks and not modification and also you can create tasks for each of the users of the different hosting services that you have, for example swmanuales.com.
info_capture The screenshot is for guidance only. It was taken on version 2025.00.0017 with date 02/01/2025. It may differ from what the current version of SWPanel displays.
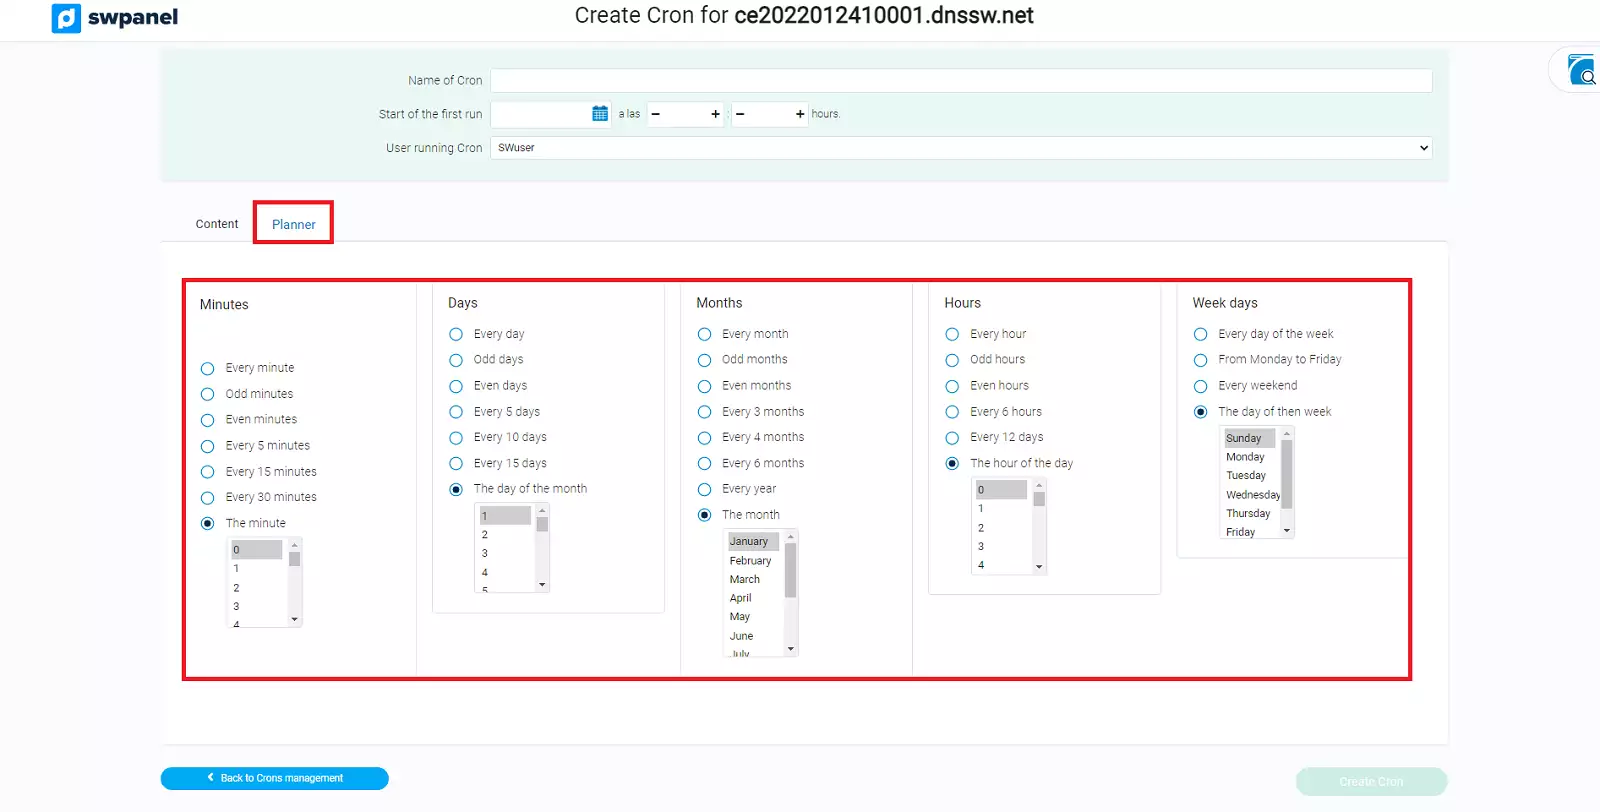
In the Scheduler tab, you can define how often the Cron will run. You can define it by minutes, hours, days, days of the week or months.
info_capture The screenshot is for guidance only. It was taken on version 2025.00.0017 with date 02/01/2025. It may differ from what the current version of SWPanel displays.
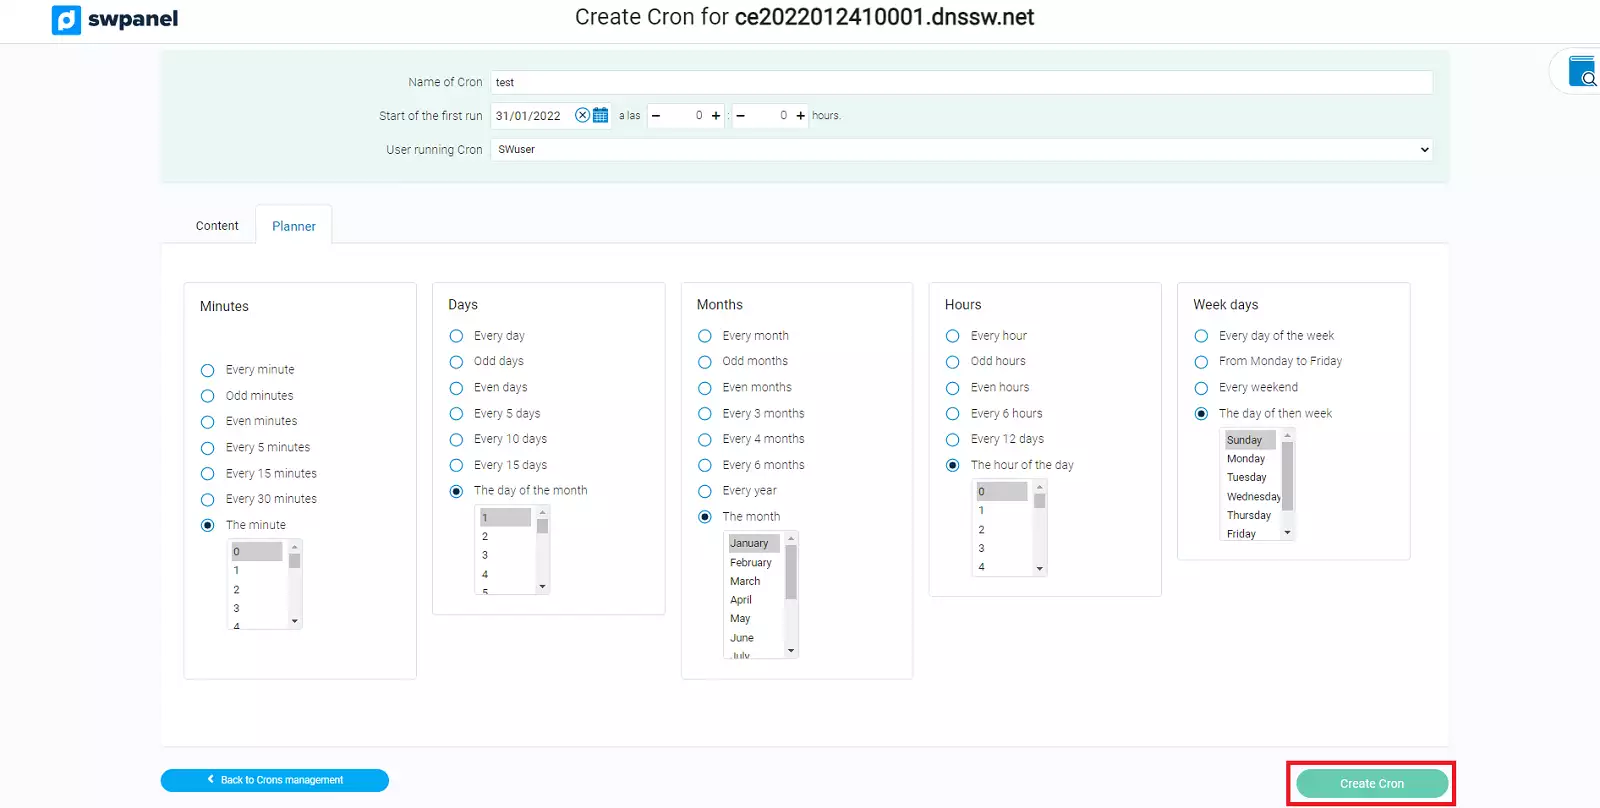
Once all the data has been entered, check that they are correct and, finally, press the Create Cron button.
info_capture The screenshot is for guidance only. It was taken on version 2025.00.0017 with date 02/01/2025. It may differ from what the current version of SWPanel displays.
Manage a CRON
Once the CRON has been created, to manage it, you can go to the management menu [...], on the right of the screen and a drop-down menu will appear to select the desired option (delete or modify).
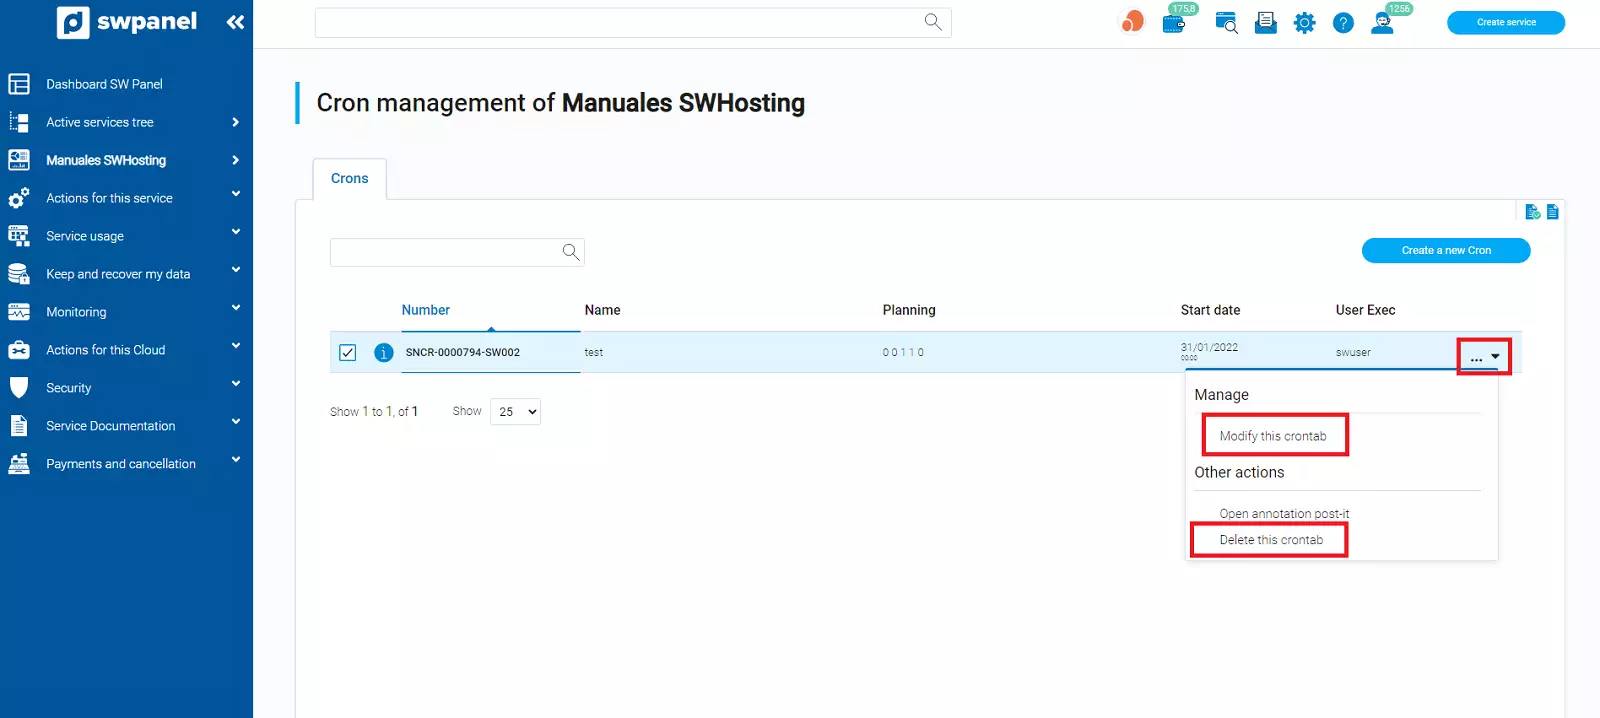
info_capture The screenshot is for guidance only. It was taken on version 2025.00.0017 with date 02/01/2025. It may differ from what the current version of SWPanel displays.