Content
Categories
- General SWPanel (38)
- Administration (14)
- Database (14)
- SSL Certificates (15)
- Cloud (59)
- Cloud Storage (2)
- Containers (1)
- Backup Copies (6)
- Mail (33)
- DevOps (55)
- Domains (33)
- FTP (6)
- Hosting (32)
- Migrate Services (6)
- DNS Registers (13)
- Security (12)
- Services (7)
- Support (5)
- Users and privileges (2)
- Web (15)
- WordPress (23)
How to create a Cloud from SWPanel
To create a Cloud service from your SWPanel, you must first log in to your SWPanel , entering your username and password. Once you are in the Dashboard of your SWPanel, click on the "Create Service" button, located at the top right:
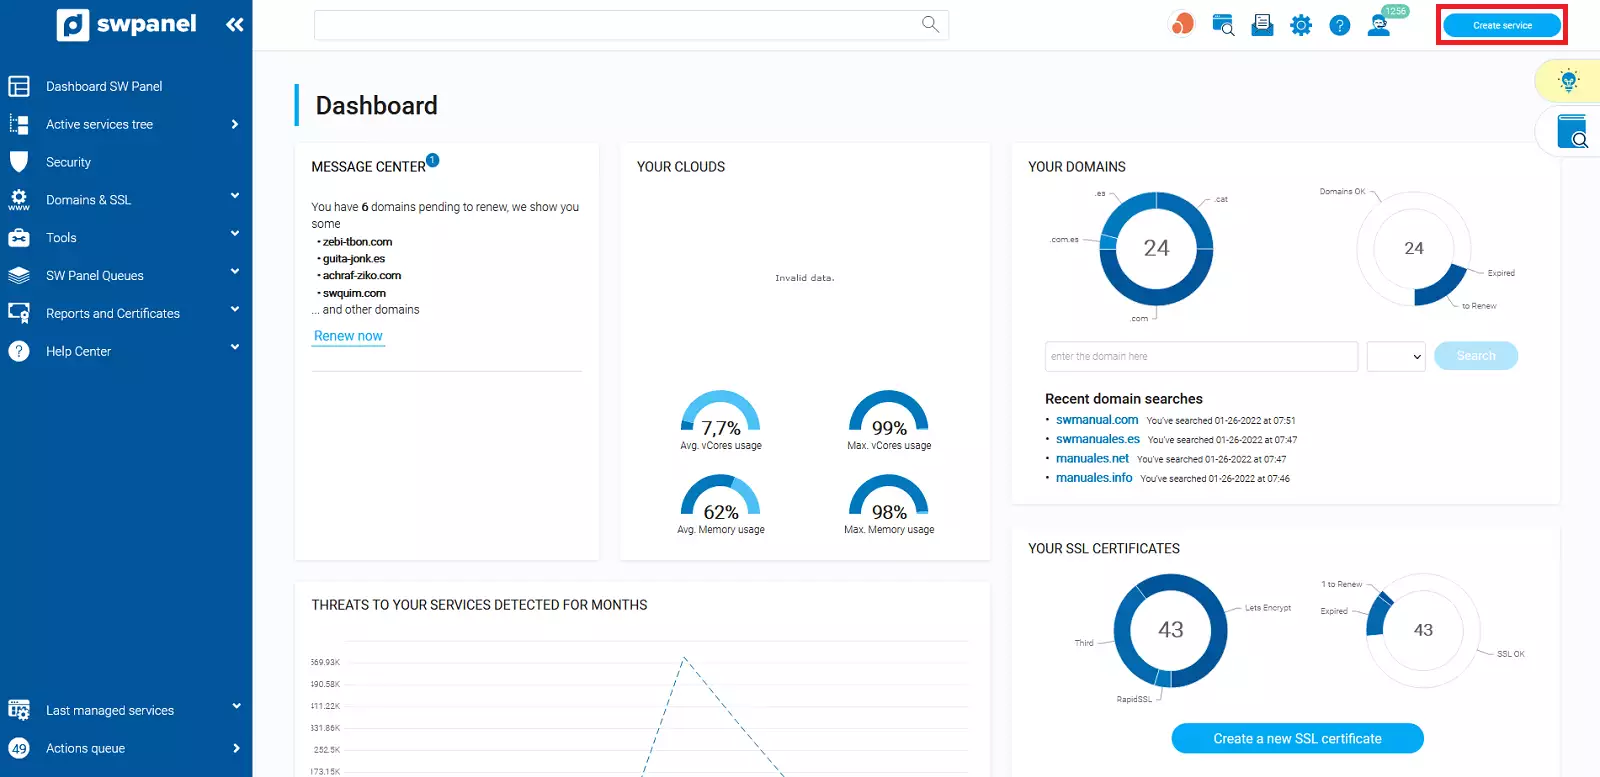
info_capture The screenshot is for guidance only. It was taken on version 2025.00.0017 with date 14/12/2024. It may differ from what the current version of SWPanel displays.
Here you will choose the Cloud service that best suits your needs:
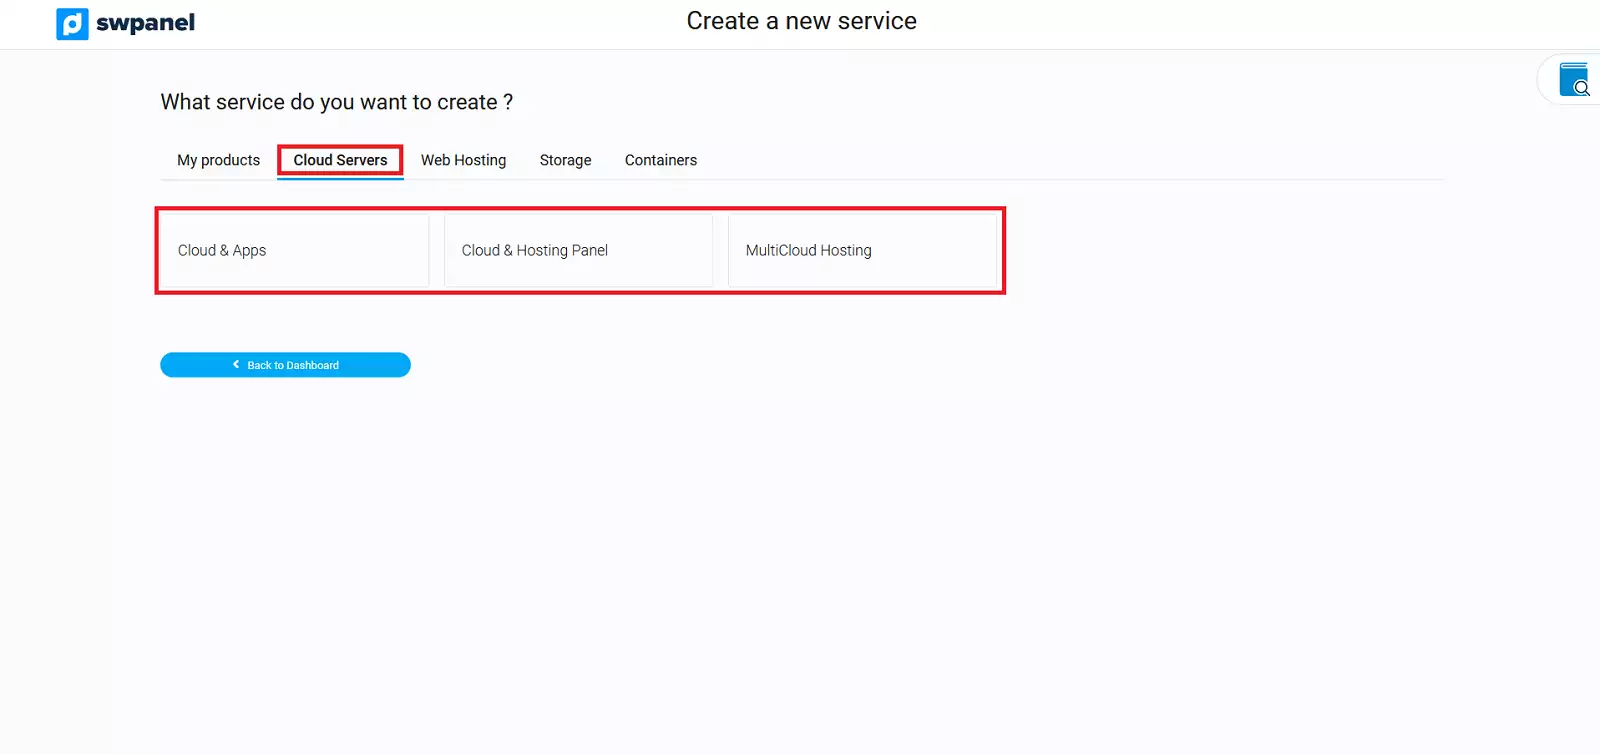
info_capture The screenshot is for guidance only. It was taken on version 2025.00.0017 with date 14/12/2024. It may differ from what the current version of SWPanel displays.
-
Cloud & Apps: Cloud servers in which you can choose the operating system, or with different pre-installed applications (Apps).
-
Cloud & Administration Panel: Cloud servers with different management panels to manage the server and the hosting services hosted on it.
-
Cloud & Engineering Support: Cloud servers that include the SWPanel as a management panel to manage the server and the hosting services hosted on it, in addition to 24/7 level 2 support from SW Hosting engineers.
As an example, we will choose the first one: Cloud & Apps. The next step will be to select the type of operating system you want for your Cloud server as well as the version:
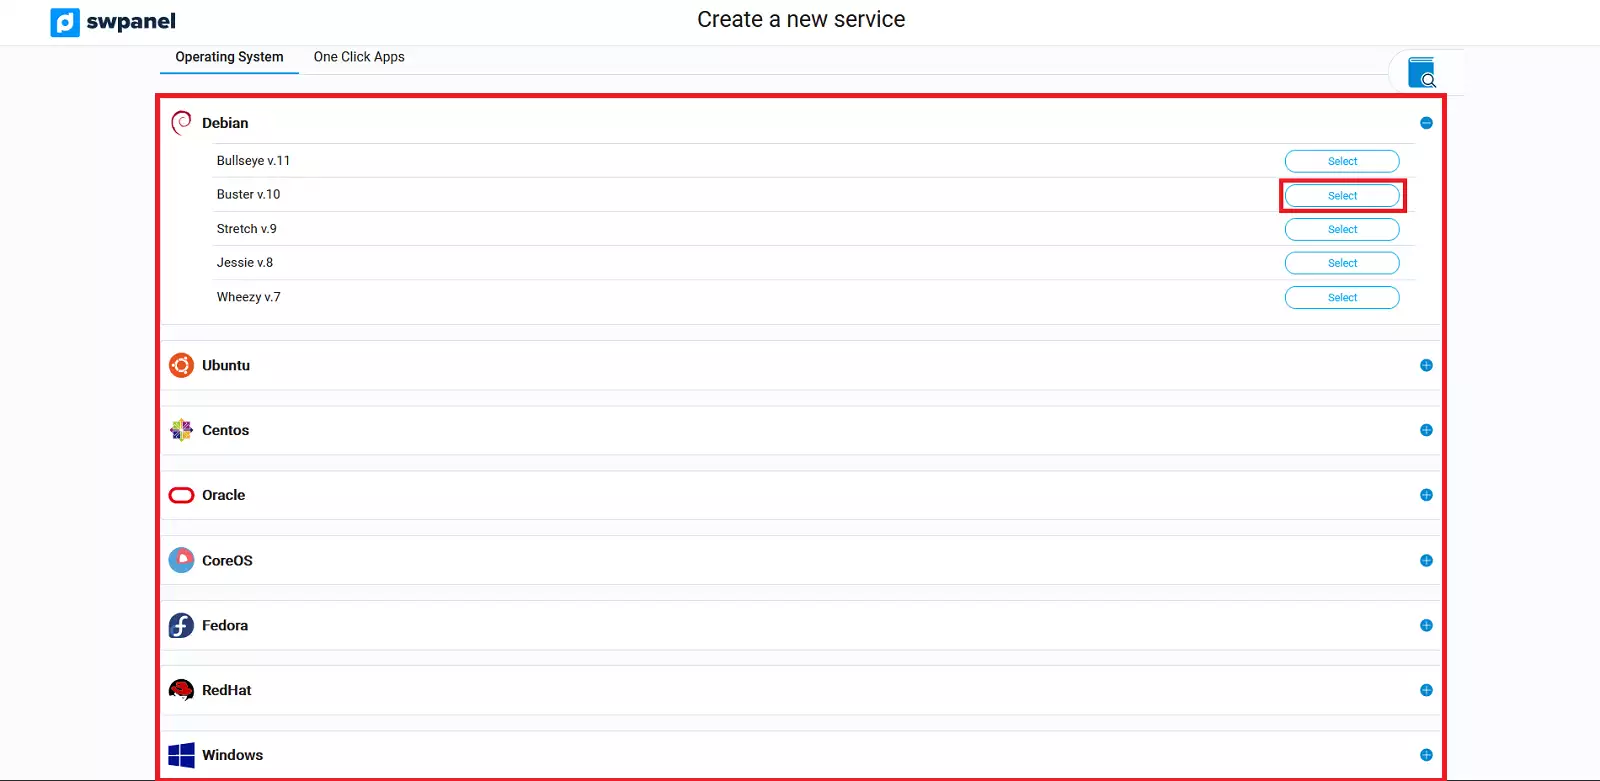
info_capture The screenshot is for guidance only. It was taken on version 2025.00.0017 with date 14/12/2024. It may differ from what the current version of SWPanel displays.
Next, add the size of the cloud to be created:
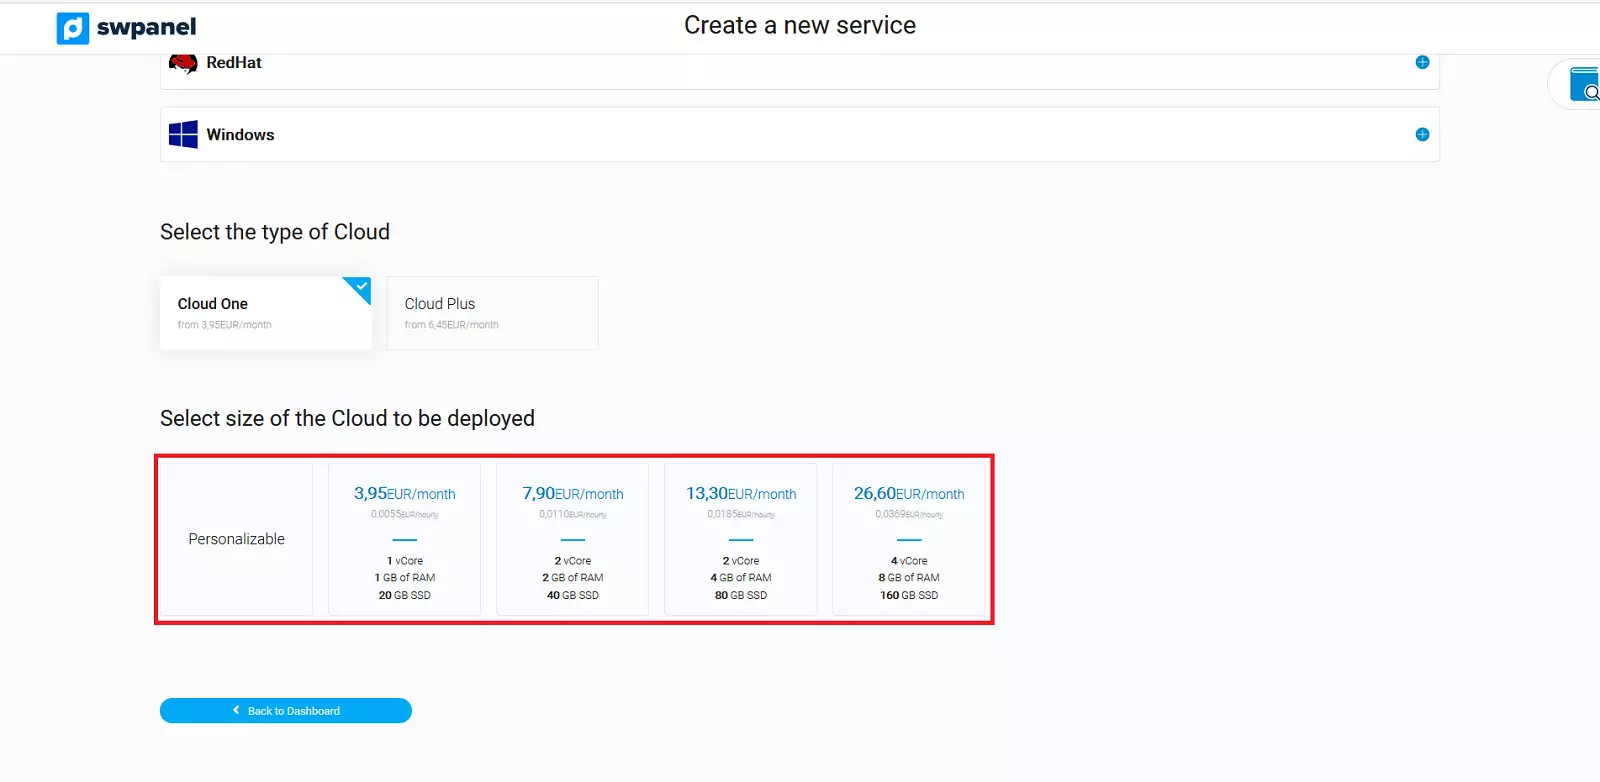
info_capture The screenshot is for guidance only. It was taken on version 2025.00.0017 with date 14/12/2024. It may differ from what the current version of SWPanel displays.
Finally, you must choose the Data Center where you want to locate your server, the number of clouds with the same selected characteristics that you need to create and accept to formalize the contract:
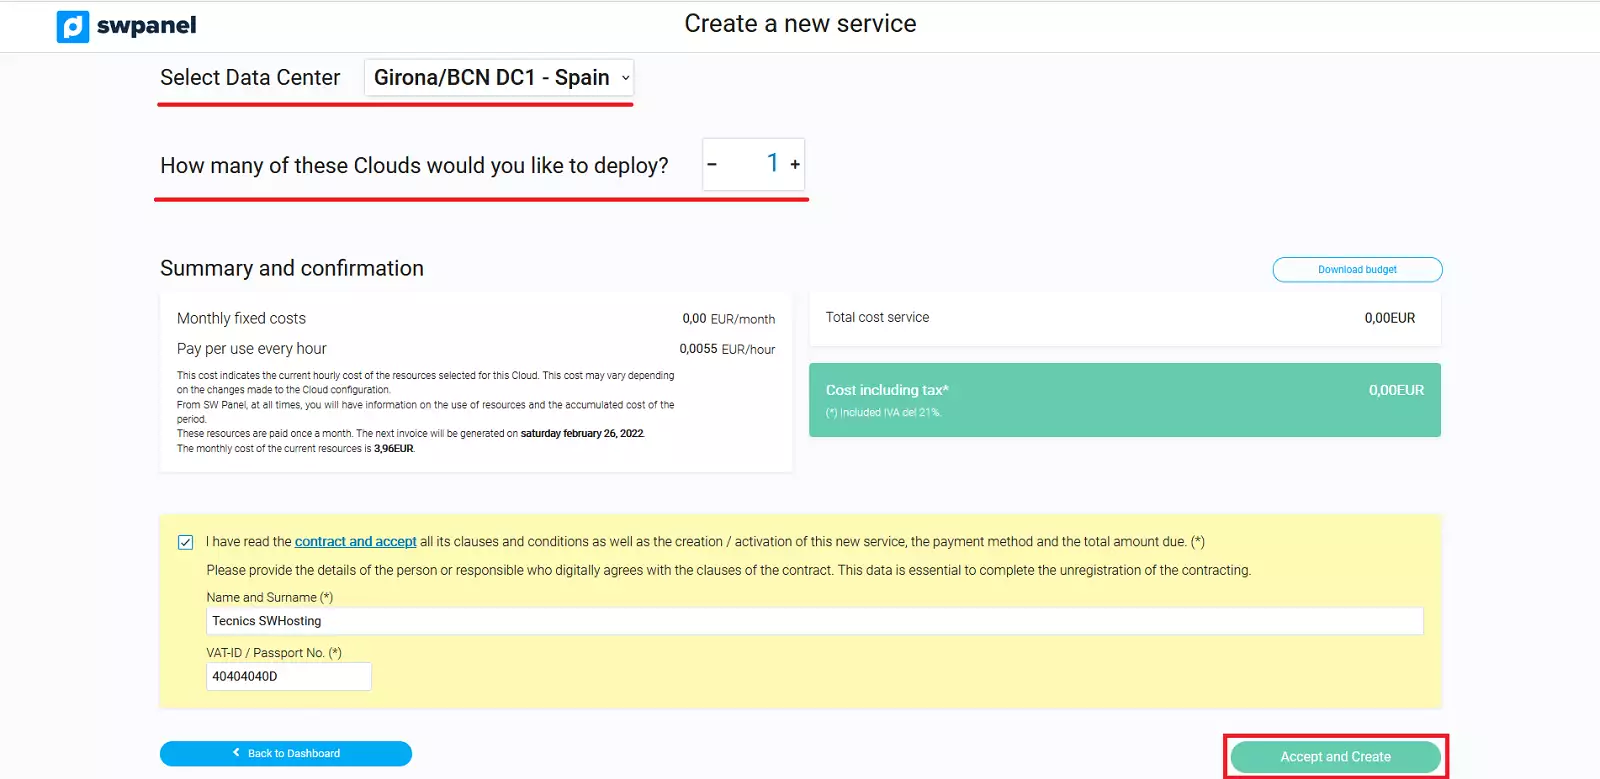
info_capture The screenshot is for guidance only. It was taken on version 2025.00.0017 with date 14/12/2024. It may differ from what the current version of SWPanel displays.
The system will take you directly to the "Active Services Tree " section and will show you the installation process of your new Cloud server:
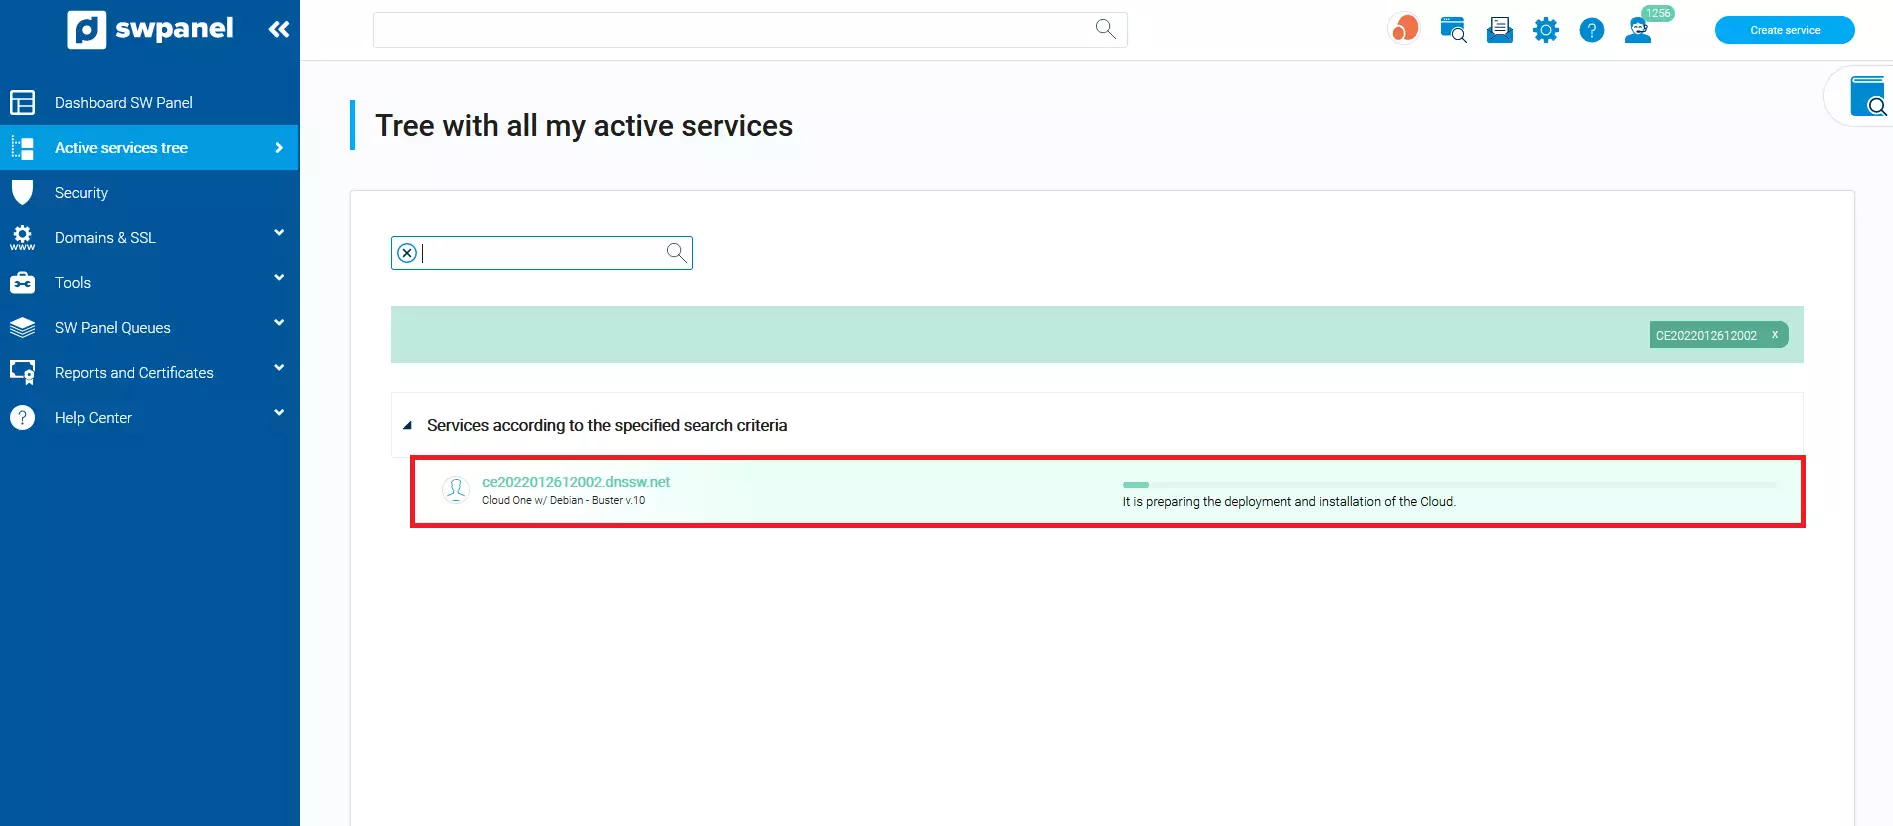
info_capture The screenshot is for guidance only. It was taken on version 2025.00.0017 with date 14/12/2024. It may differ from what the current version of SWPanel displays.
Once installed, you can start managing it by clicking on it.
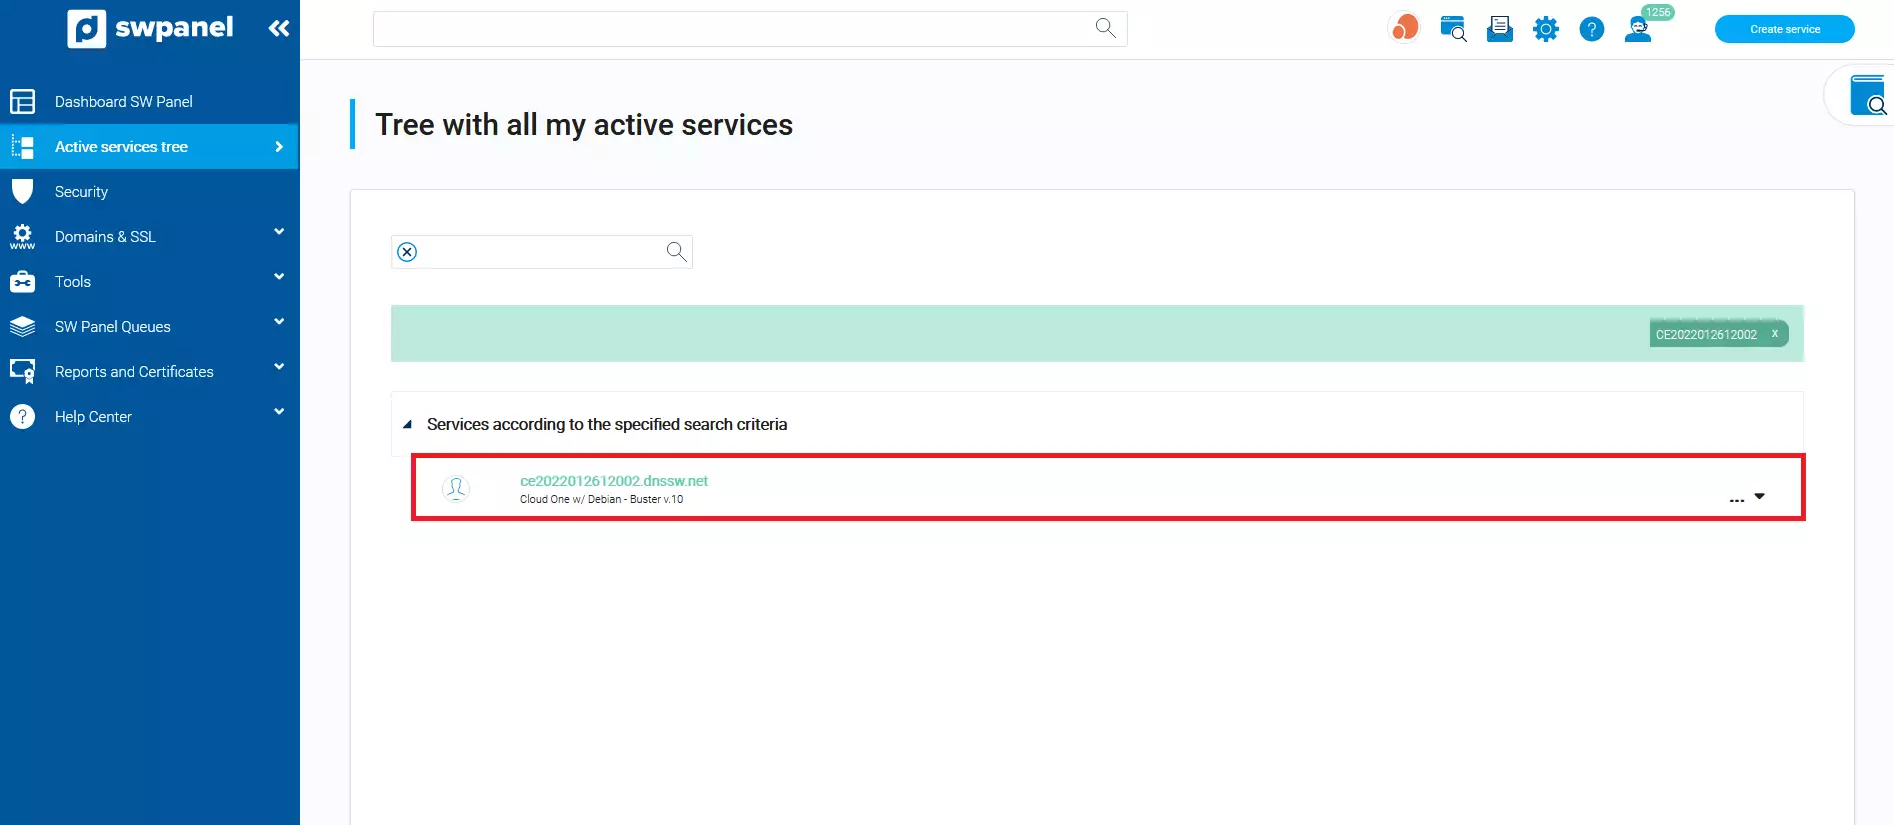
info_capture The screenshot is for guidance only. It was taken on version 2025.00.0017 with date 14/12/2024. It may differ from what the current version of SWPanel displays.