Content
Categories
- General SWPanel (38)
- Administration (14)
- Database (14)
- SSL Certificates (15)
- Cloud (59)
- Cloud Storage (2)
- Containers (1)
- Backup Copies (6)
- Mail (33)
- DevOps (55)
- Domains (33)
- FTP (6)
- Hosting (32)
- Migrate Services (6)
- DNS Registers (13)
- Security (12)
- Services (9)
- Support (5)
- Users and privileges (2)
- Web (15)
- WordPress (23)
How to create a Hosting within a MultiCloud.
Applicable to: Cloud with the SWPanel Administration Panel, Cloud with Engineering Support. The rest of the administration panels such as Vesta or cPanel, do not have this option.
MultiCloud allows you to register services in it in a few minutes, without having to access the server or have advanced computer skills, all from SWPanel.
In a MultiCloud you can deploy a Web Hosting service to create your website, email accounts, DNS records and databases in an easy and fast way. You can create a Web Hosting by following these steps.
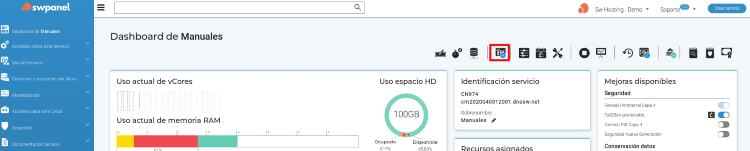
1. Within your SWPanel use the search engine to find your Cloud, in our case it is called manuals, yours will have a different name. Once you find it, select it.

2. Now click on the icon in the image, it is the one that says Create a new service in this accumulator.
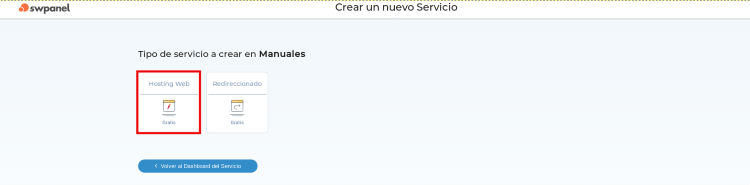
3. Select the type of service to create, in this case Web Hosting.
4. Multicloud distribution of the Web Hosting service.
-
In case of having several servers: you can establish a distributed infrastructure (distribute our services among several servers).
-
If you do not have several servers, or if you should host all the services on the same server, select the server itself for each service.
You can also choose to leave some of them blank, unchecking the checkbox, located on the right. In this way, the Hosting will not have a mail service, or database or DNS.
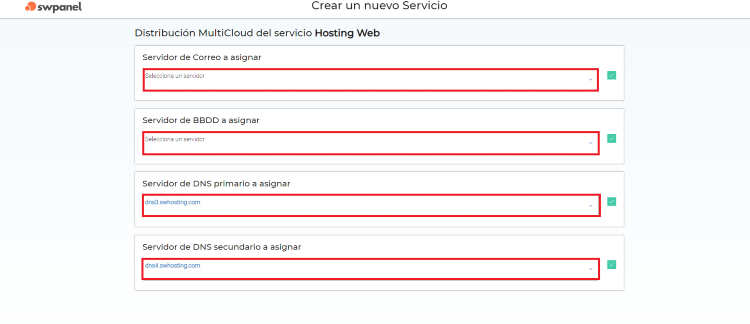
- Mail Server to assign: the Cloud where the mail will be hosted.
- Database server to assign: the Cloud where the Database will be hosted.
- Primary DNS server to assign: Primary DNS server.
- Secondary DNS server to assign: Secondary DNS server.
5. Enter the domain name or subdomain of the Web Hosting. In this case we will use the name manuals with the .com extension as an example.
For more information on domains and their registration process, consult our
8 .
By default, the default option of "Create 1 hosting service only" appears, although if you want, you can use the option "Create multiple Hosting services" to create different Hosting services at the same time.
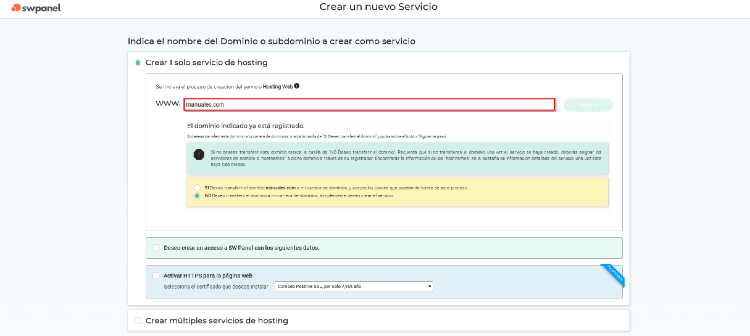
Next, press the Verify button and SWPanel will search if the domain is free and will offer you different options:
-
Register the domain if it is free.
-
Transfer the domain if it is already registered.
-
Register the service without registering the domain or transferring it.
Depending on the request, different options will be loaded. In this example we only create the Hosting service without registering or transferring the domain, as shown in the previous screenshot.
I want to create an access to SWPanel with the following data: It allows you to create a SWPanel user and assign him a profile (you must have created it previously) so that he can manage only the new Hosting created.
Activate HTTPS for the website: You can choose a type of certificate to show your website as secure:
- Comodo Positive SSL.
- Comodo Essential SSL.
- Certificate RapidSSL.
- Let's Encrypt SSL.
- Comodo Positive SSL Wildcard.
- Comodo Essential SSL, Wildcard.
Click on the link for more information and to know the different types of SSL certificates.
6. Now you can adjust your new service to your needs. The available options will vary depending on the characteristics of the Cloud on which the service is being created.
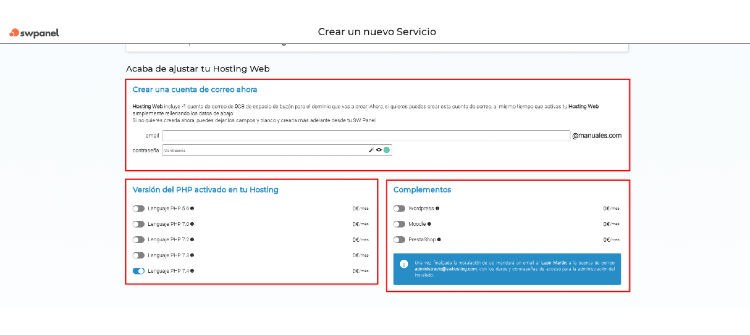
Create an email account now: Allows you to create your first email account. If you want you can leave it blank to create it later by following the following
Version of PHP activated in your Hosting: It allows you to select the version of PHP of the Hosting. The version can be changed later depending on your Cloud instance.
Add-ons: Allows you to install a CMS or content manager. At this time you can choose between Wordpress, Moodle or Prestashop.
7. Formalization and acceptance. Finally, check the data that appears, the cost of the action to be carried out (if any) and the data of the person making the request will be presented. Proceed by clicking on Accept and create:
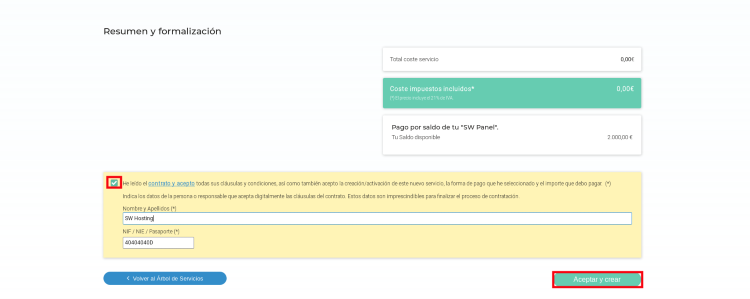
Ready! Your new service will be operational in a few seconds.