Content
Categories
- General SWPanel (38)
- Administration (14)
- Database (14)
- SSL Certificates (15)
- Cloud (59)
- Cloud Storage (2)
- Containers (1)
- Backup Copies (6)
- Mail (33)
- DevOps (55)
- Domains (33)
- FTP (6)
- Hosting (32)
- Migrate Services (6)
- DNS Registers (13)
- Security (12)
- Services (7)
- Support (5)
- Users and privileges (2)
- Web (15)
- WordPress (23)
How to create a service for a subdomain
When creating a hosting service, for various reasons, you may need to associate it to a subdomain of one of your domains.
In the following manual we will provide you with the information and the steps to follow on how you can create a hosting service associated to a subdomain.
⚠️ It is important to mention that you can only associate subdomains to paid hostings or hostings created within a private Cloud. The free hostings, such as "Smart Free ", it is not possible to associate a subdomain to them.
From SWPanel you can set up your hosting service associated with a subdomain in a matter of minutes, to do so:
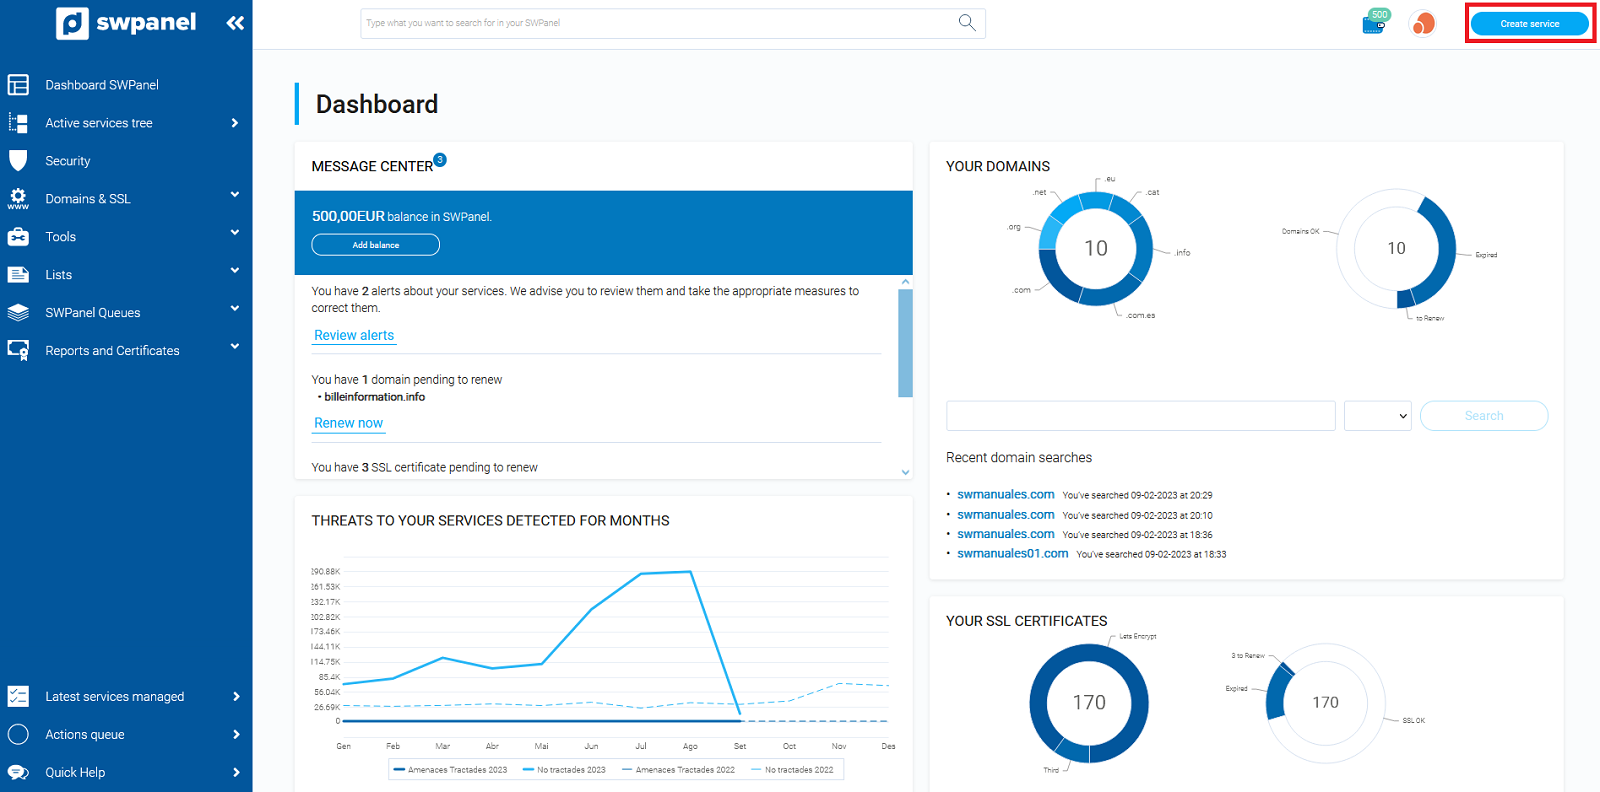
1.Click on Create Service (top right corner):
In case you need to create the hosting associated to a subdomain within a Cloud, you can follow the following manual, keeping the guidelines of this manual:
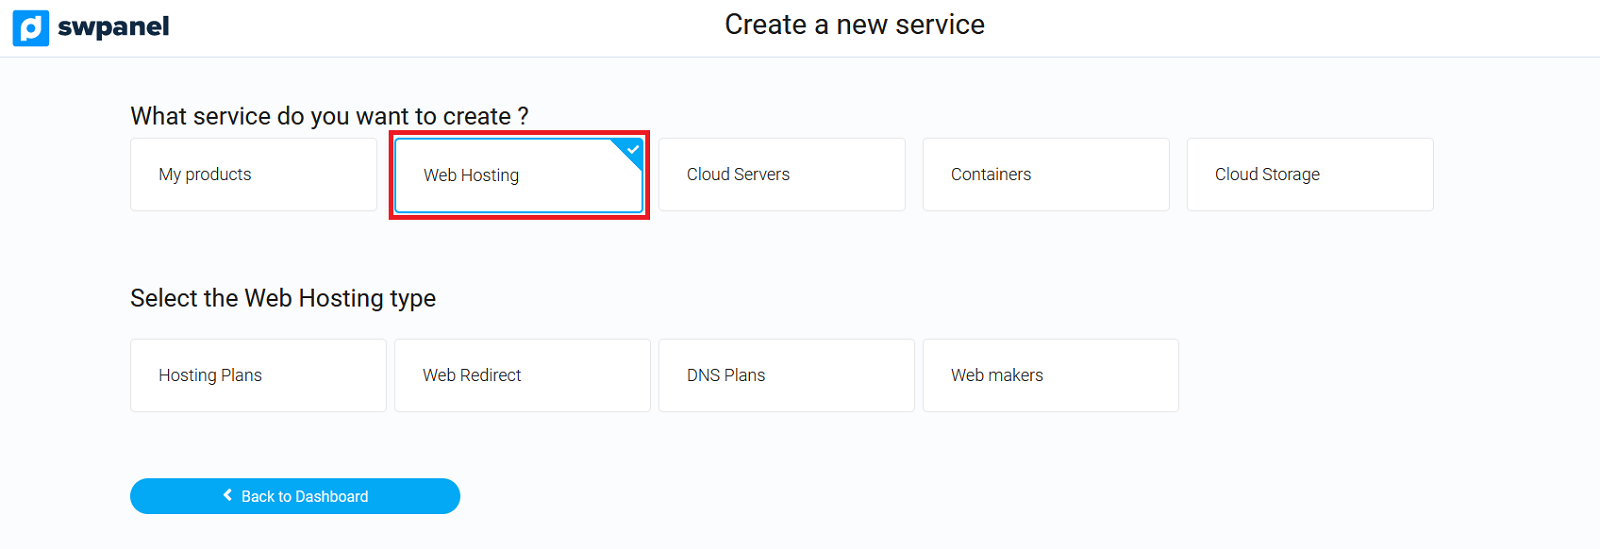
2.Then select Web Hosting:
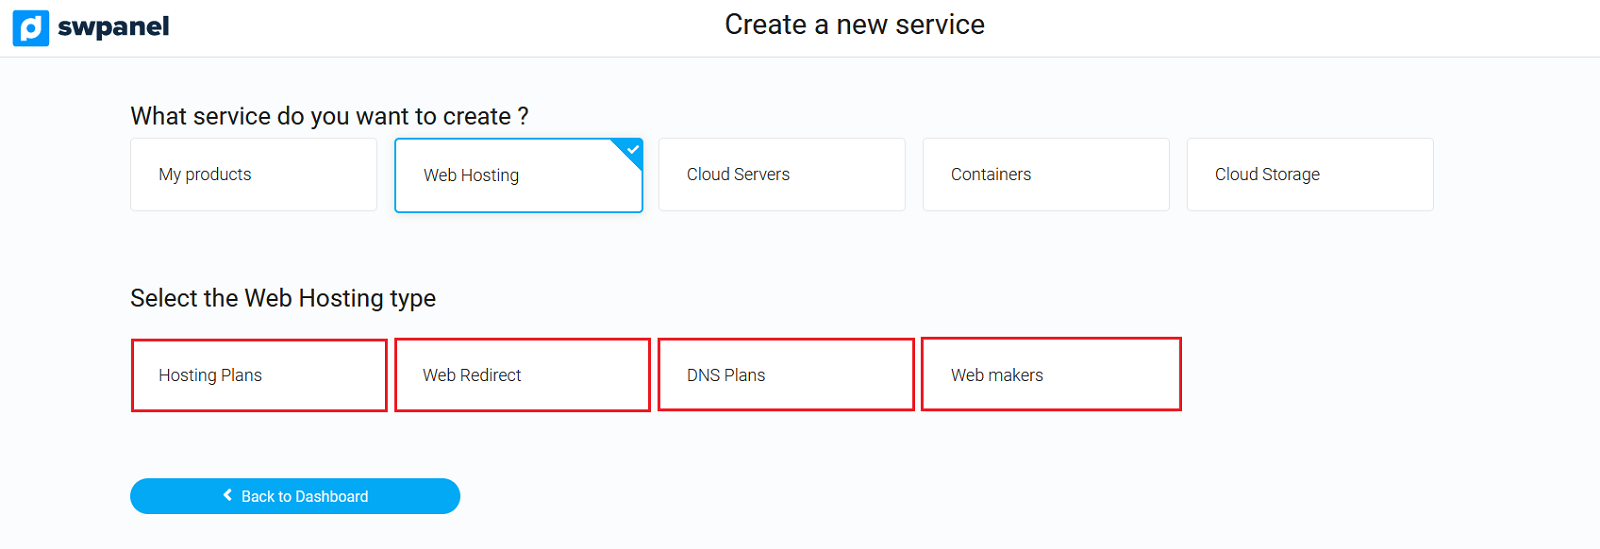
3.Then select the hosting plan you want:
-
Hosting Plans: Shared hosting to create a website, databases, email accounts, FTP accounts, DNS records, etc.
-
Redirectors: Redirection Hosting plans are ideal for those users who want to make a redirection easily and quickly.
-
DNS plans: They are a very good option if you only need to have DNS records associated with a domain, as it is not possible to create a website with this type of Hosting.
-
Web Packagers: Here you can create an EasyWeb SW, a website that can be created in 1 minute.
When you have decided which hosting plan best suits your needs, it is time to indicate the name of the subdomain in the "Domain name " field .
Example of a subdomain name: subdominio.swmanuales.com
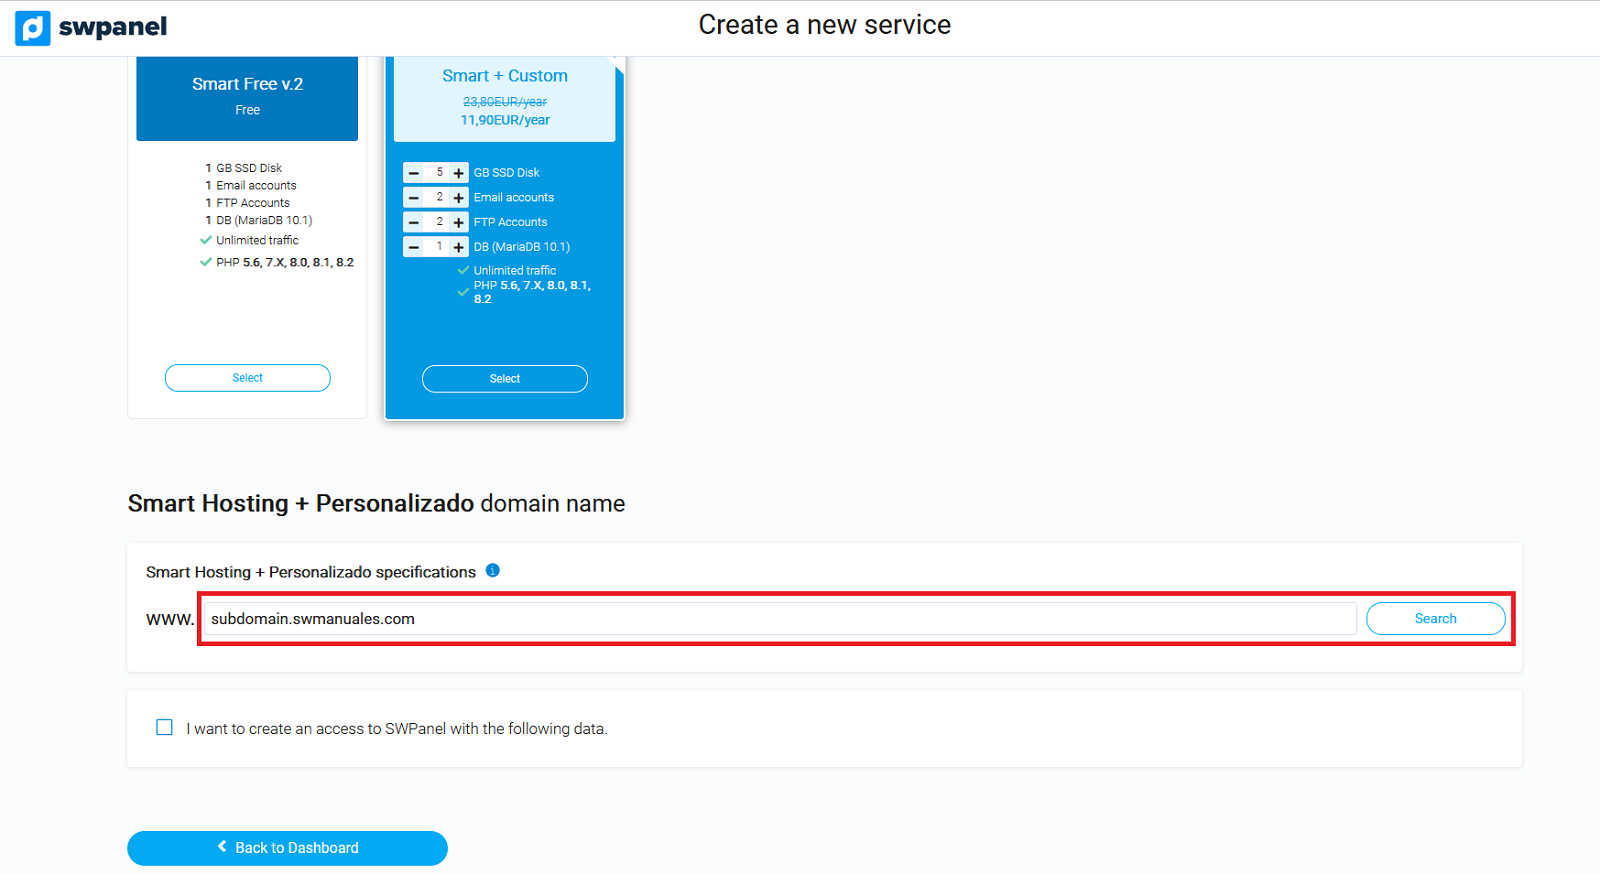
By clicking on the Search button, you will see the status of the domain of the subdomain you have entered.
You can choose to register the domain if it is free, transfer it if you are the owner, or simply register the service without registering the domain.
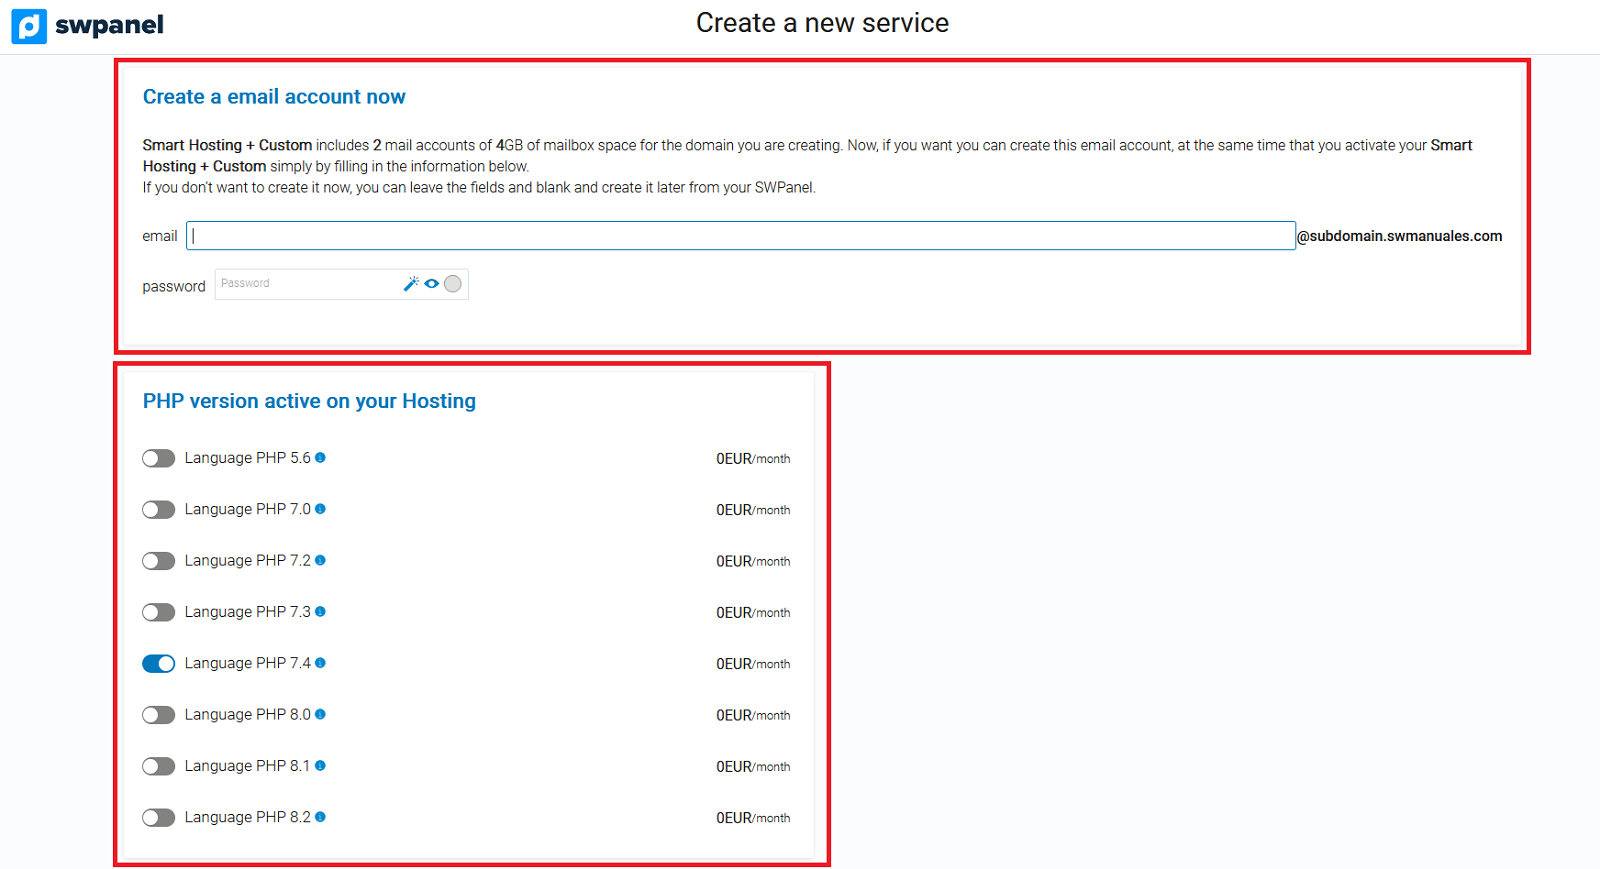
Now you can adjust your new Hosting to your needs: the PHP version and the creation of an email account for the indicated subdomain:
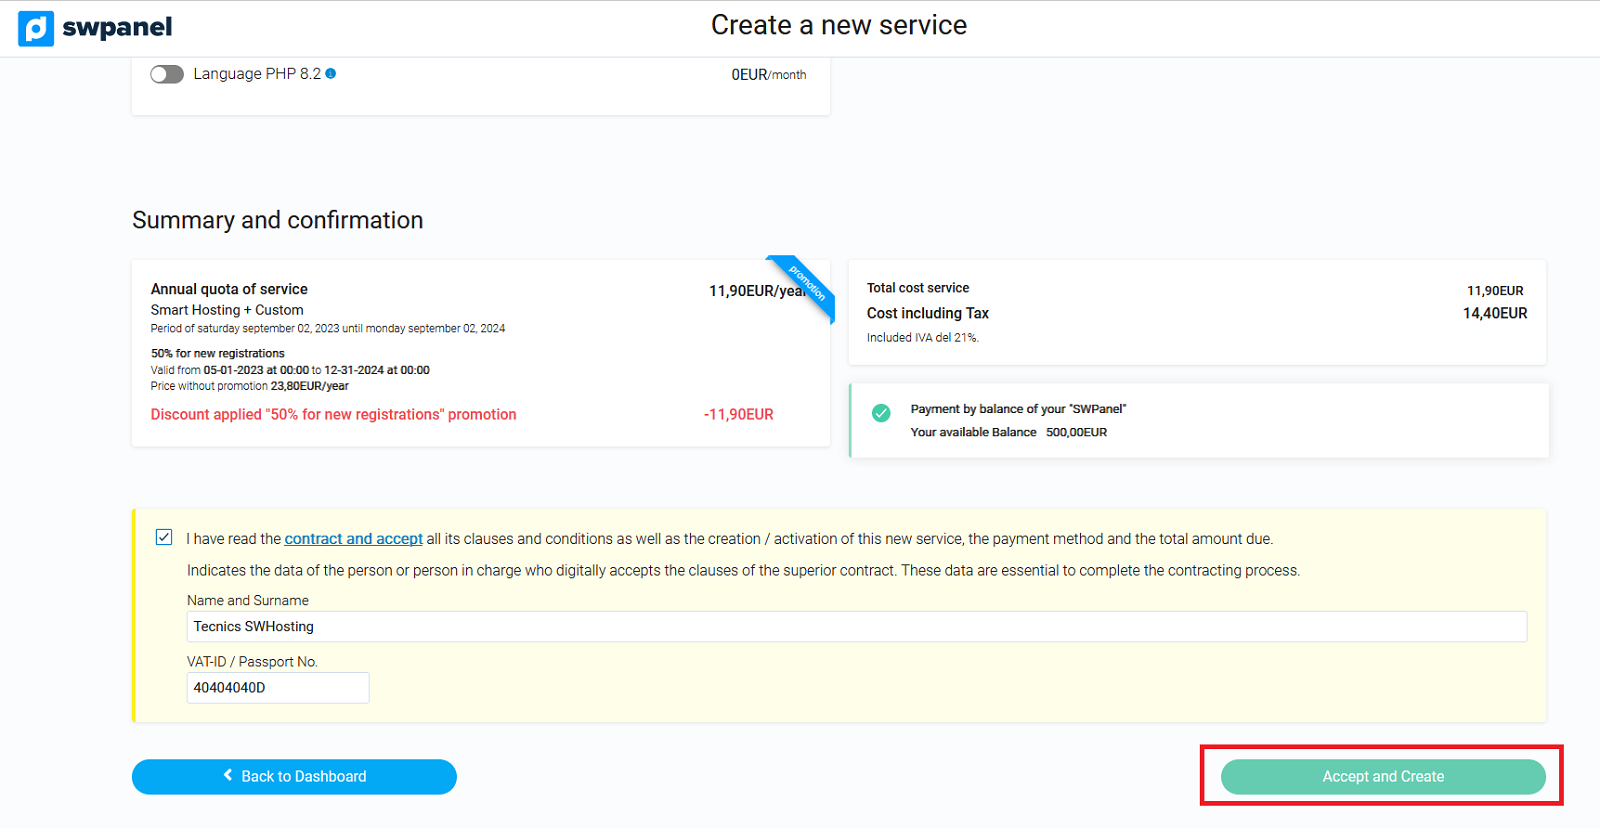
Once you have checked the data that appears on the screen, click on Accept and create to proceed with the contract:
Done! Your new Hosting service associated with a subdomain is now operational.