Content
Categories
- General SWPanel (38)
- Administration (14)
- Database (14)
- SSL Certificates (15)
- Cloud (59)
- Cloud Storage (2)
- Containers (1)
- Backup Copies (6)
- Mail (33)
- DevOps (55)
- Domains (33)
- FTP (6)
- Hosting (32)
- Migrate Services (6)
- DNS Registers (13)
- Security (12)
- Services (7)
- Support (5)
- Users and privileges (2)
- Web (15)
- WordPress (23)
How to create an FTP account
FTP is the abbreviation of File Transfer Protocol.
It is the means by which you can transfer your website or other files from your local computer to the Cloud space that you have with us (upload files), and vice versa.
Create FTP user account
Before proceeding to upload or download files from the FTP server, we must create a user account with access to it, management that SWPanel allows us to perform:
Step 1: Access the Dashboard of the service for which you have to create an FTP user account. To do this, press Active service tree (left menu) and click on the corresponding service (in this case, we select testsw.net):

info_capture The screenshot is for guidance only. It was taken on version 2024.07.0123 with date 24/10/2024. It may differ from what the current version of SWPanel displays.
Step 2: Access to FTP Management (left menu):

info_capture The screenshot is for guidance only. It was taken on version 2024.07.0123 with date 24/10/2024. It may differ from what the current version of SWPanel displays.
Step 3: Click on Create Account (located on the right):
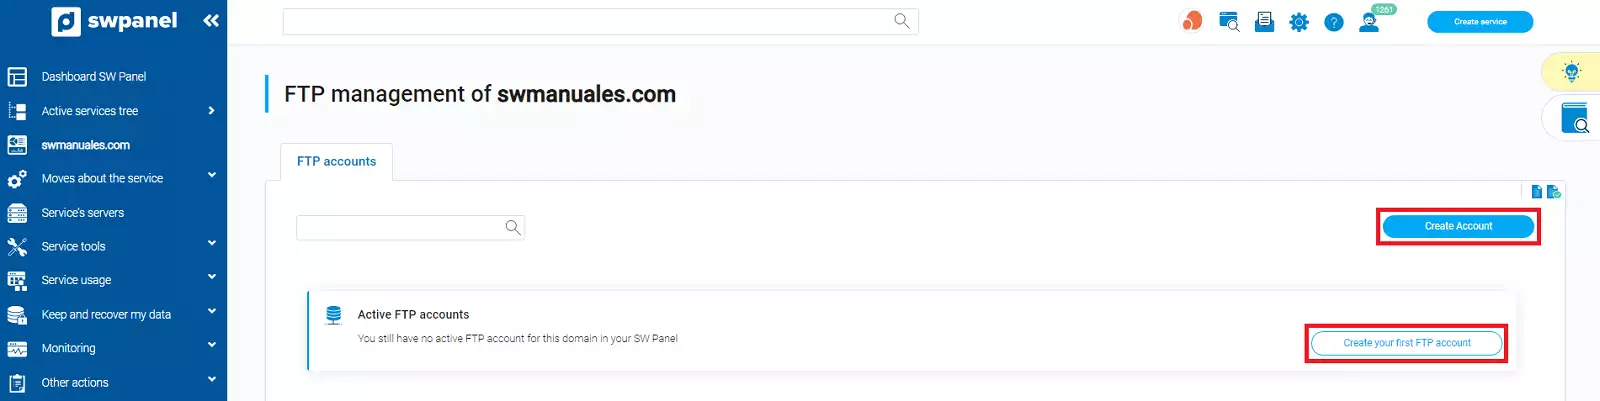
info_capture The screenshot is for guidance only. It was taken on version 2024.07.0123 with date 24/10/2024. It may differ from what the current version of SWPanel displays.
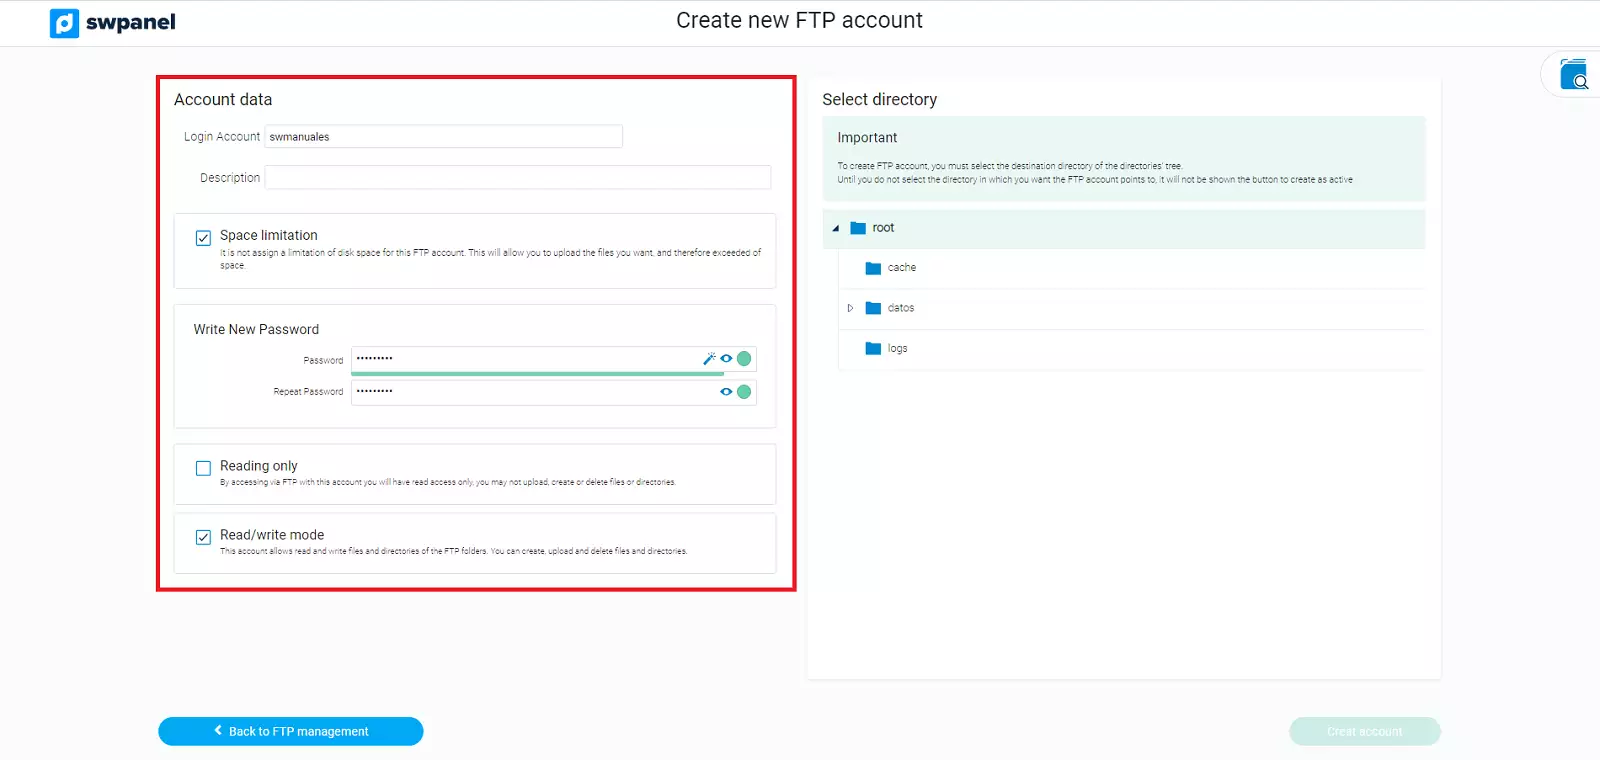
Step 4: Next, you must enter the required information:
info_capture The screenshot is for guidance only. It was taken on version 2024.07.0123 with date 24/10/2024. It may differ from what the current version of SWPanel displays.
In compliance with the ISO 27001 regulation on information security, the password will only be visible at the moment of creation. Later you can only modify it.
- Login Account: User name of the new account with which you will access the FTP server.
- Description: Optional. This field is used to detail or write a brief description of the FTP account for internal organization purposes.
- [x] No space limitation: Unlimited disk space for this account.
- Password: The password will be used together with the username (Login Account) to access the FTP server.
- [x] Read only: This account can only read files and directories, but not create, modify or delete.
- [x] Read/Write mode: This account can read, create, modify and delete files and directories.
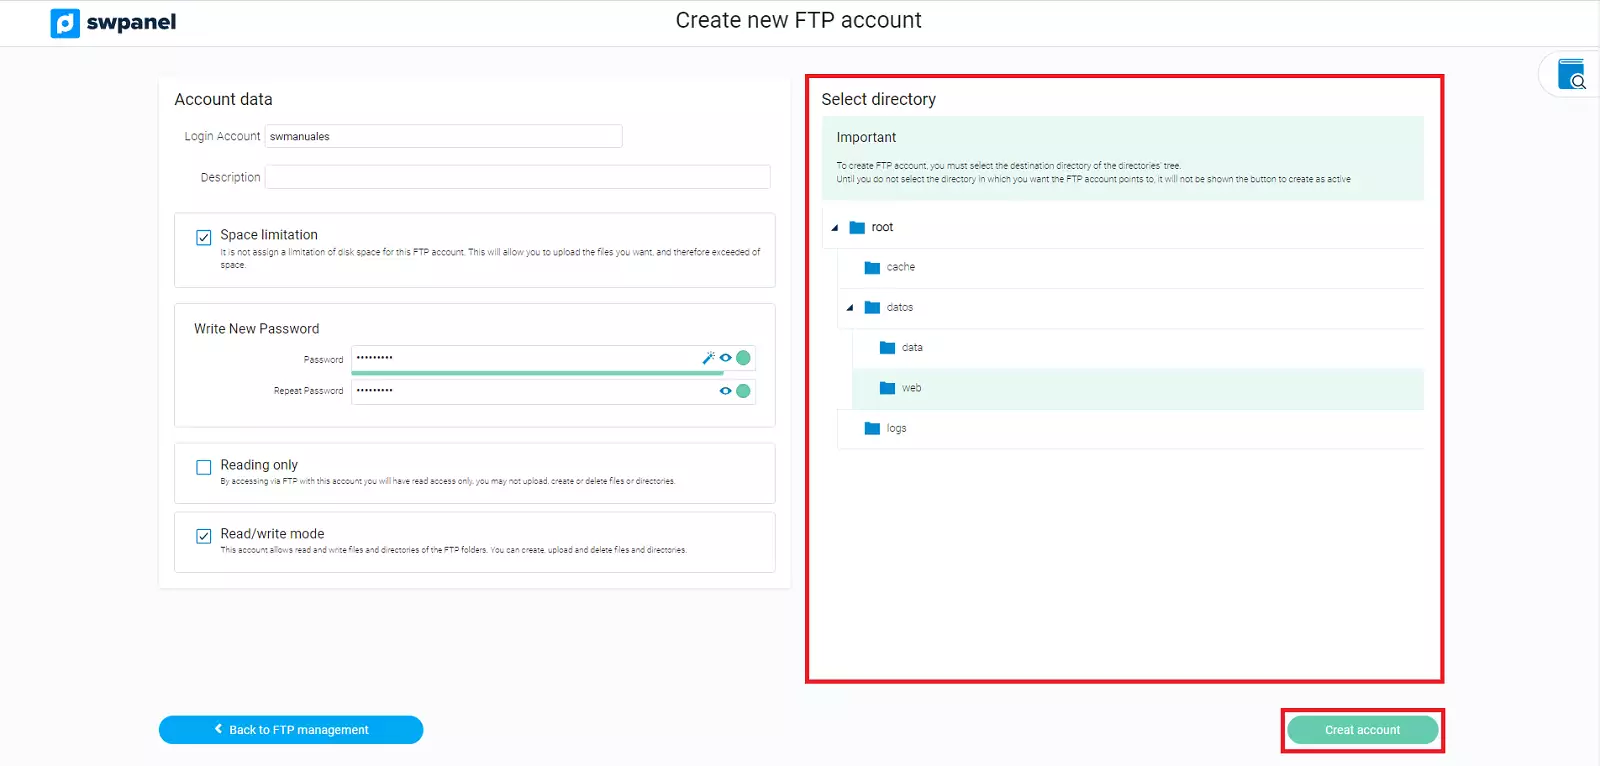
On the right side, you will find a directory tree:
info_capture The screenshot is for guidance only. It was taken on version 2024.07.0123 with date 24/10/2024. It may differ from what the current version of SWPanel displays.
You must select the root directory to which this account will have access.
In the previous example image, we have selected the "web" directory, so this account will have access to the "web" directory and its subdirectories. On the other hand, it will not have access to those outside the "web" directory: "data", "logs".
If you select "root", you will have access to all the service directories.
The "web" directory is where you must upload the files of your web page, your Wordpress blog or any other content manager.
Step 5: Click Create Account and your FTP user account will be ready.
Access the FTP server
To access and transfer your files you must download an FTP client, a program that is responsible for connecting to the remote FTP server and managing the sending/receiving of files.
The most popular FTP client is FileZilla. It is a free and easy-to-use FTP manager available for Windows, Linux and Mac OS X operating systems.
The access data to the FTP server are:
-
Server: Host name (example: swhosting.com) or IP (example: 81.25.112.60). You can consult this data from the Dashboard of your service, accessing the section Service's Server (left menu):
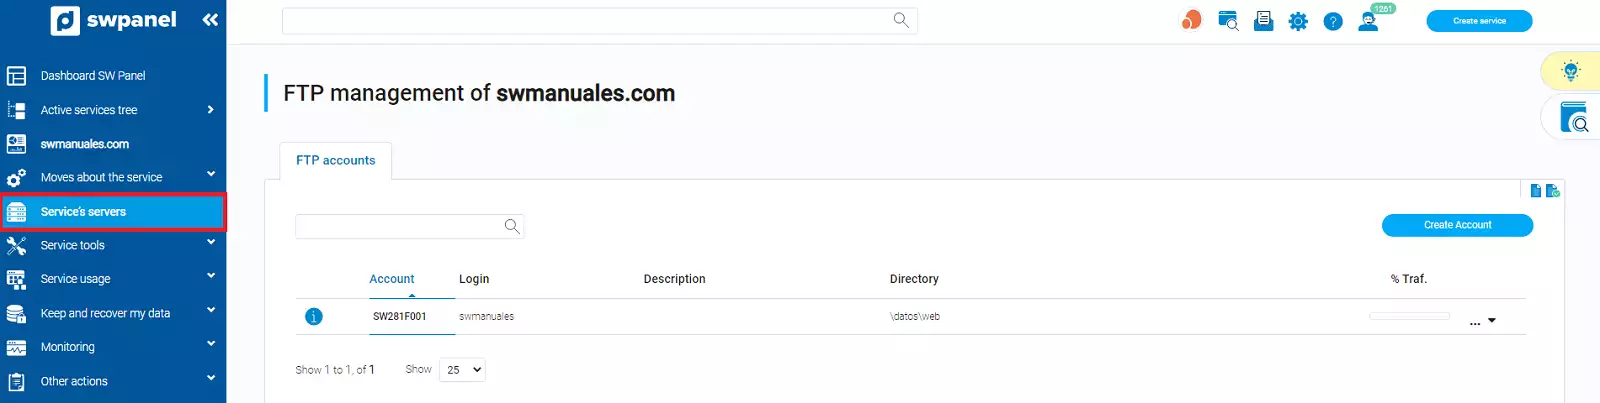
info_capture The screenshot is for guidance only. It was taken on version 2024.07.0123 with date 24/10/2024. It may differ from what the current version of SWPanel displays.
- Port: 21.
- Username and password: It will correspond to those you created in the previous section.