Content
Categories
- General SWPanel (38)
- Administration (14)
- Database (14)
- SSL Certificates (15)
- Cloud (59)
- Cloud Storage (2)
- Containers (1)
- Backup Copies (6)
- Mail (33)
- DevOps (55)
- Domains (33)
- FTP (6)
- Hosting (32)
- Migrate Services (6)
- DNS Registers (13)
- Security (12)
- Services (8)
- Support (5)
- Users and privileges (2)
- Web (15)
- WordPress (23)
How to manage my Cloud IPs
Add additional IPs to my Cloud
A Cloud, by default, is delivered with a public IP for its connection to the Internet. Once you have purchased a Cloud you can customize it with different options, one of which is the provision of up to a maximum of 7 additional IPs.
Here are the steps to customize your Cloud with different additional IPs:
Access the Cloud customization.
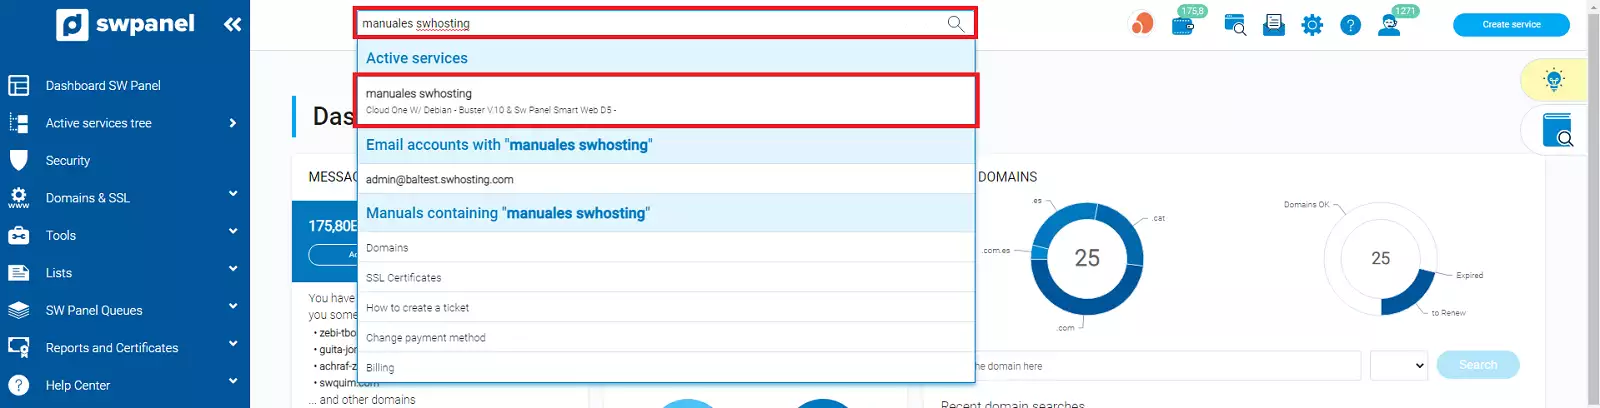
First, you must access your SWPanel and in the search window above, indicate the name of the Cloud service you wish to configure. Once you have located the service you can click on its name to access its Dashboard.

info_capture The screenshot is for guidance only. It was taken on version 2025.00.0017 with date 03/01/2025. It may differ from what the current version of SWPanel displays.
Once in the Cloud Dashboard, you must select the "Customize and adjust the resources and services of this Cloud" icon.
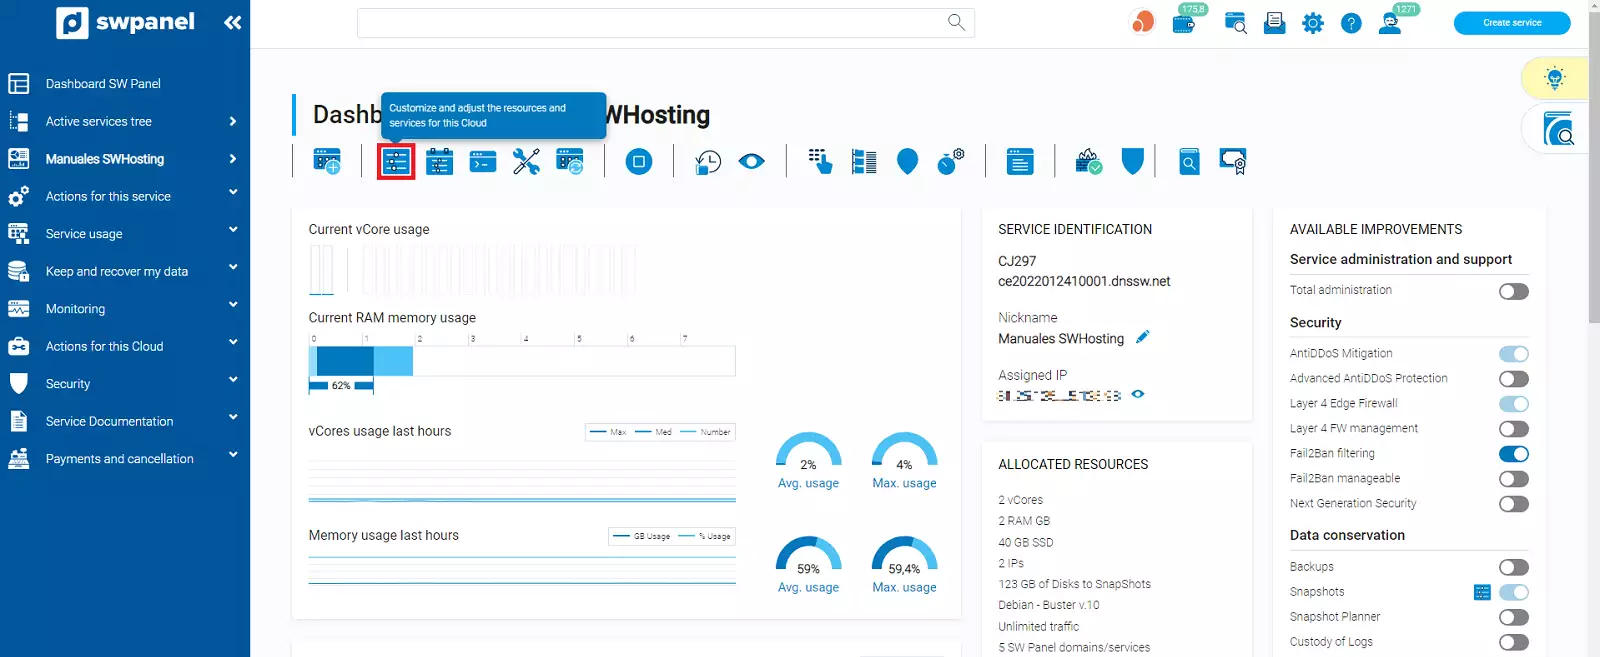
info_capture The screenshot is for guidance only. It was taken on version 2025.00.0017 with date 03/01/2025. It may differ from what the current version of SWPanel displays.
Once located in the customization of your Cloud, in the "Customize service resources" section, you can increase the "Public IPs" manually with the [ + ] and [ - ] buttons or by using the slider.
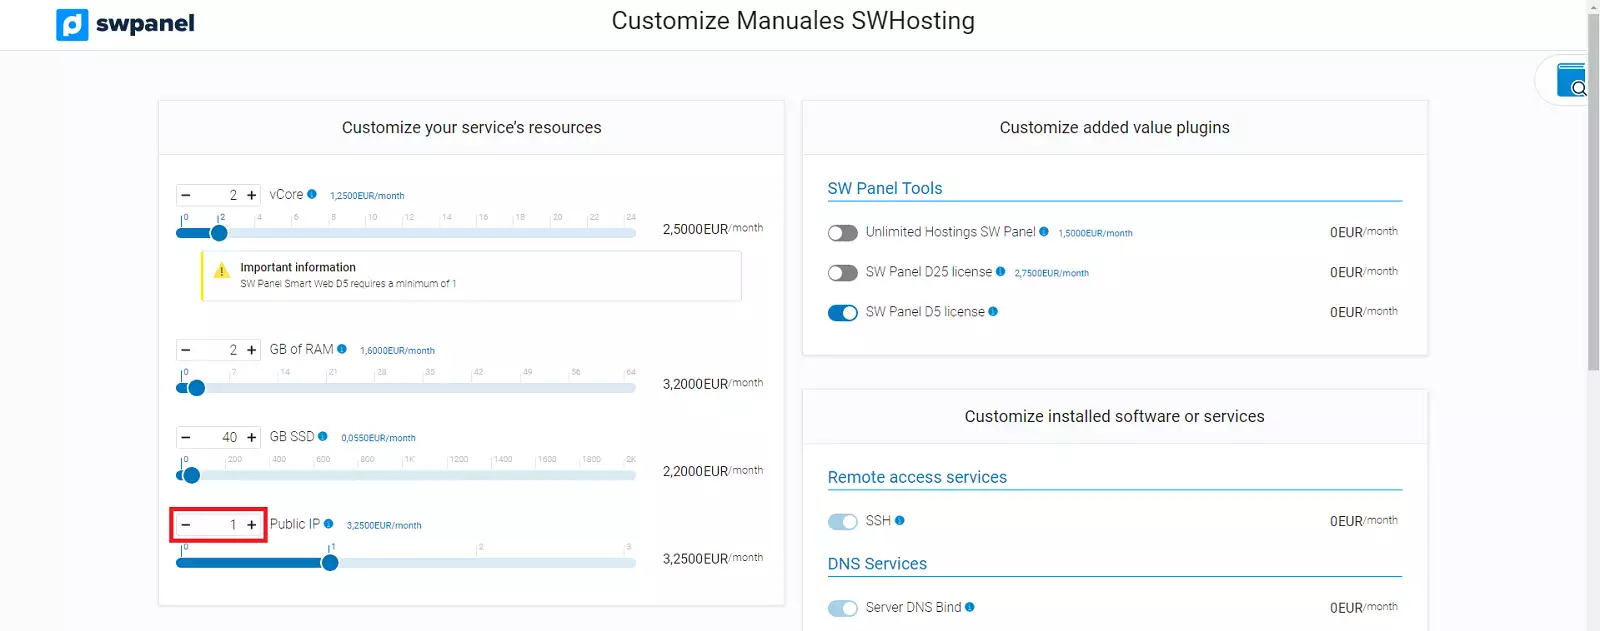
info_capture The screenshot is for guidance only. It was taken on version 2025.00.0017 with date 03/01/2025. It may differ from what the current version of SWPanel displays.
Once customized, you must scroll to the bottom of the page.
Finally, you must check the checkbox "I accept the update/customization of the service and the charge to my account of the costs that may arise from this action.(*)" and then "Accept and formalize changes".
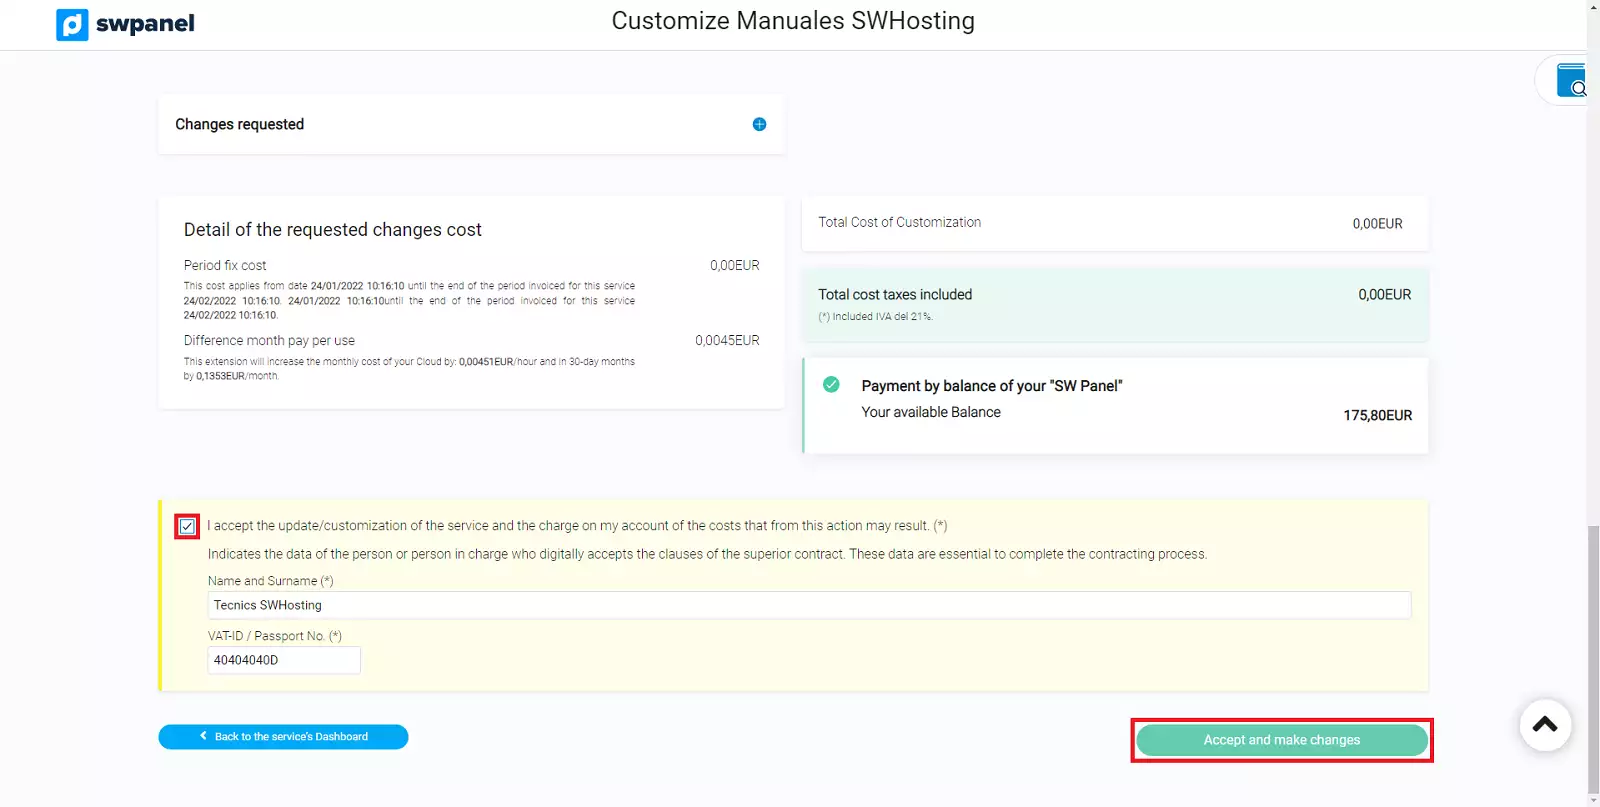
info_capture The screenshot is for guidance only. It was taken on version 2025.00.0017 with date 03/01/2025. It may differ from what the current version of SWPanel displays.
Manage additional IPs from my Cloud
First of all you must access your SWPanel and in the search window above, enter the name of the Cloud service you want to configure. Once you have located the service you can click on its name to access its Dashboard.
info_capture The screenshot is for guidance only. It was taken on version 2025.00.0017 with date 03/01/2025. It may differ from what the current version of SWPanel displays.
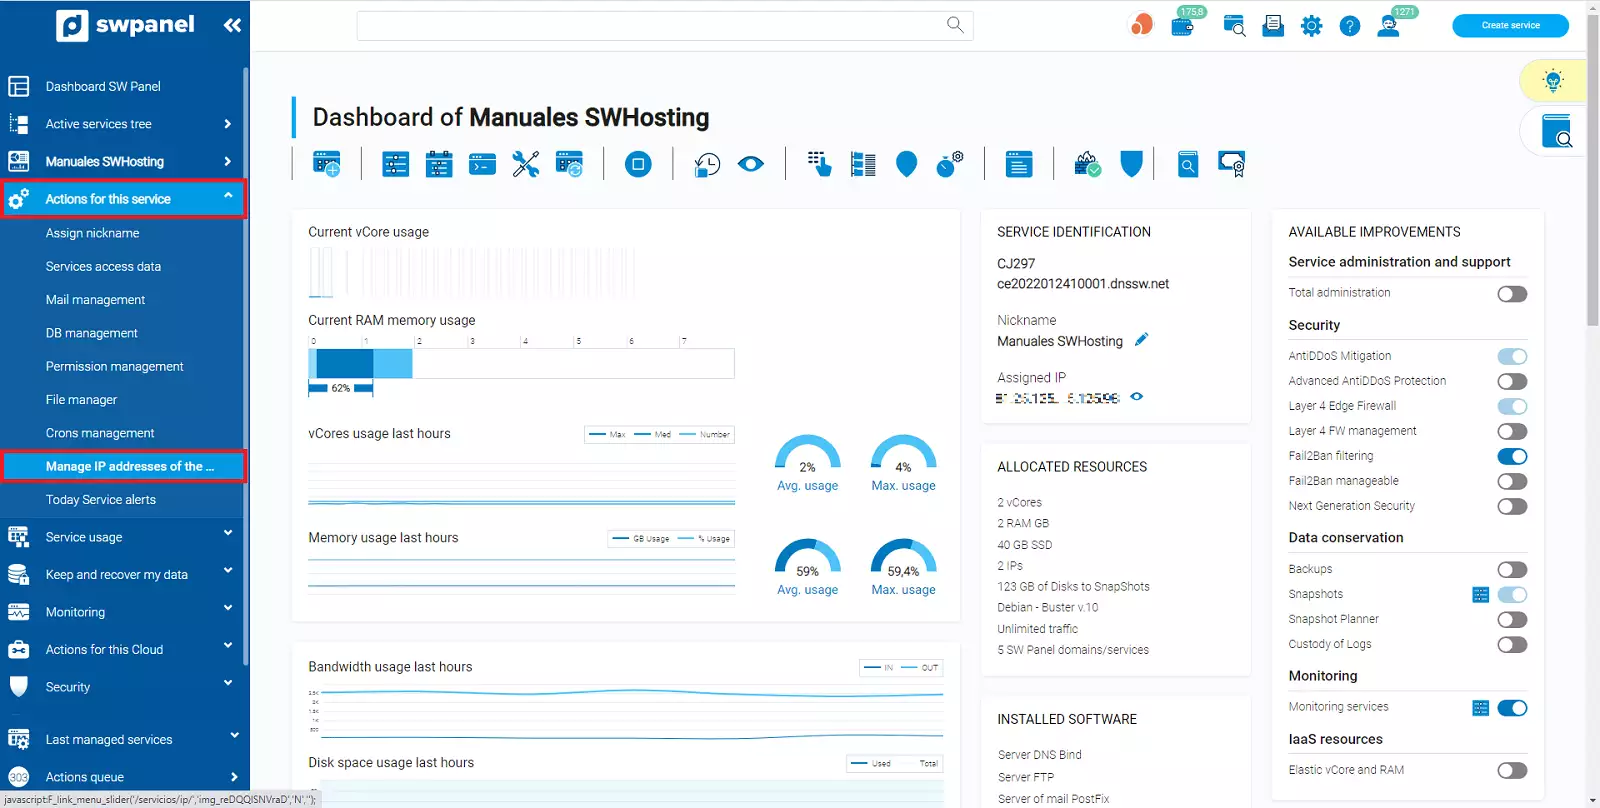
Once located in the Dashboard of your Cloud, you must go to the menu located on the left side in blue, go to "Actions on this service" and click on the submenu "Manage IPs of the service".

info_capture The screenshot is for guidance only. It was taken on version 2025.00.0017 with date 03/01/2025. It may differ from what the current version of SWPanel displays.
In this section, you will find the different "IPs currently assigned to your Cloud".

info_capture The screenshot is for guidance only. It was taken on version 2025.00.0017 with date 03/01/2025. It may differ from what the current version of SWPanel displays.
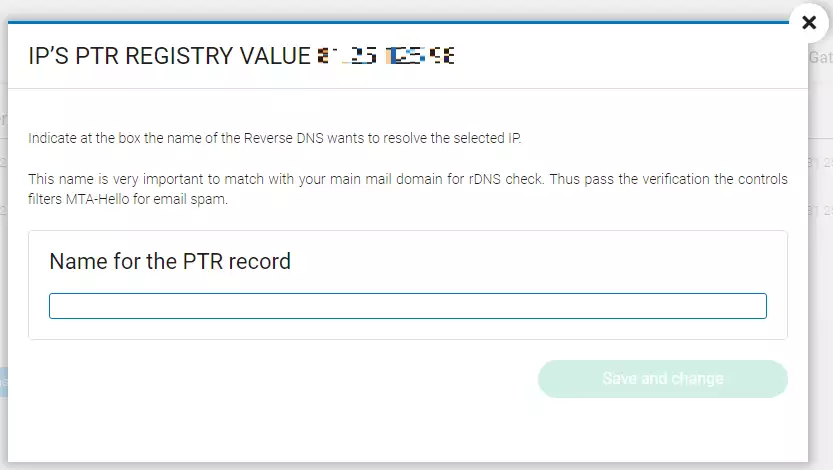
To modify the PTR record of an IP, you must go to the right side where you will find the icon [ --- ], when you pass the cursor over it a menu with different options will appear, you must select "Modify the PTR record of this IP" and when you click on it, a window will open where you will be able to define a name for the PTR record.
info_capture The screenshot is for guidance only. It was taken on version 2025.00.0017 with date 03/01/2025. It may differ from what the current version of SWPanel displays.
Remove additional IPs from my Cloud
First, you must access your SWPanel and in the search window above, enter the name of the Cloud service you wish to configure. Once you have located the service you can click on its name to access its Dashboard.

info_capture The screenshot is for guidance only. It was taken on version 2025.00.0017 with date 03/01/2025. It may differ from what the current version of SWPanel displays.
Once located in the Dashboard of your Cloud, you must go to the menu located on the left side in blue, go to "Actions on this service" and click on "Manage IPs of the service".
info_capture The screenshot is for guidance only. It was taken on version 2025.00.0017 with date 03/01/2025. It may differ from what the current version of SWPanel displays.
In this section, you will find the different "IPs currently assigned to your Cloud".
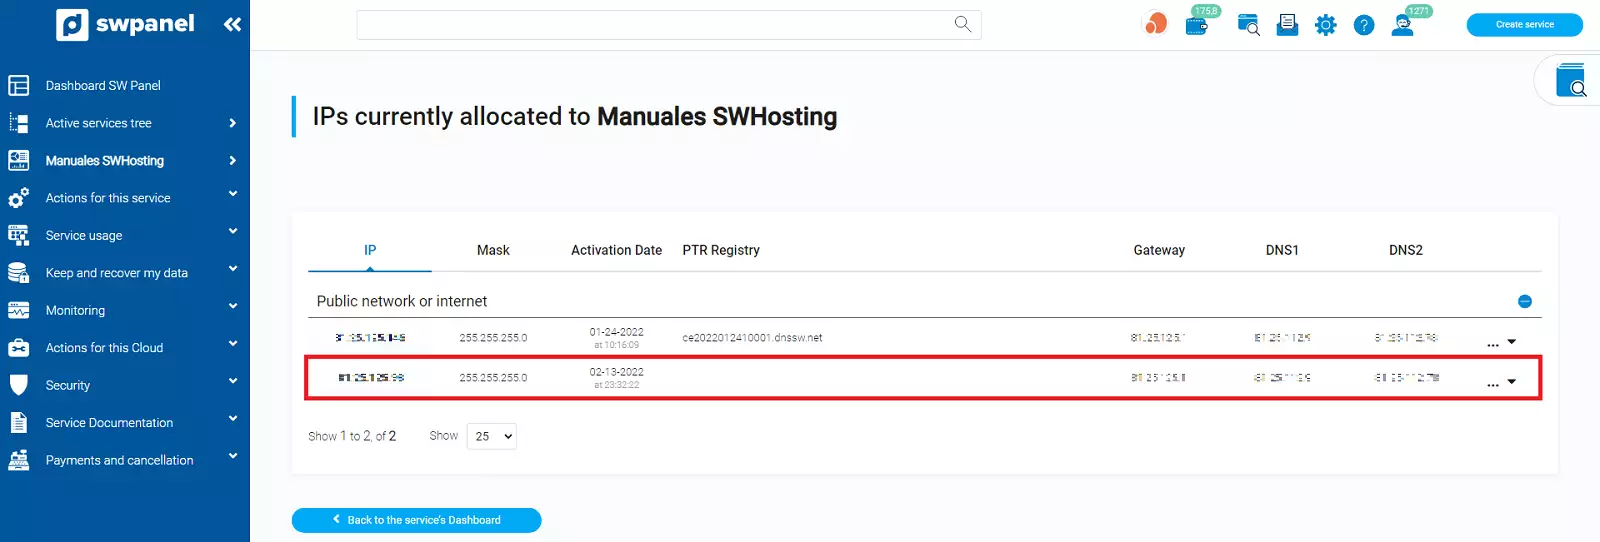
info_capture The screenshot is for guidance only. It was taken on version 2025.00.0017 with date 03/01/2025. It may differ from what the current version of SWPanel displays.
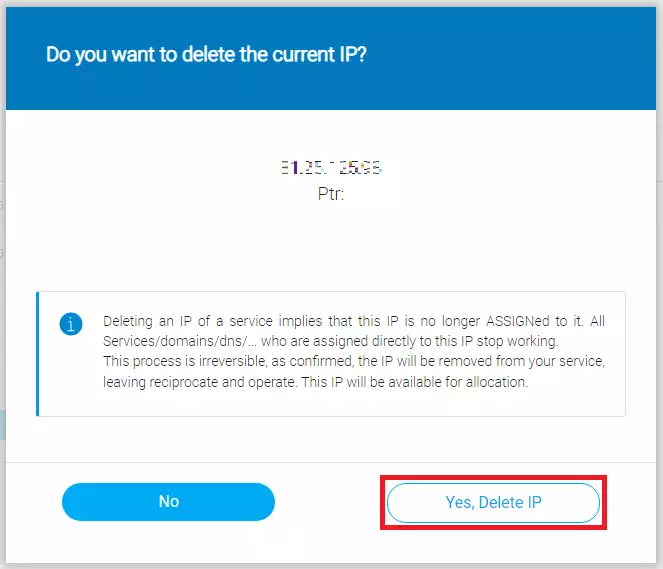
To delete an IP, you must go to the right side where you will find the icon [ --- ], when you pass the cursor over it, a menu with different options will appear. You must select "Delete fixed IPs assigned to the service" and when you click on it, a window will open where you will be able to confirm its deletion.
info_capture The screenshot is for guidance only. It was taken on version 2025.00.0017 with date 03/01/2025. It may differ from what the current version of SWPanel displays.