Content
Categories
- General SWPanel (38)
- Administration (14)
- Database (14)
- SSL Certificates (15)
- Cloud (59)
- Cloud Storage (2)
- Containers (1)
- Backup Copies (6)
- Mail (33)
- DevOps (55)
- Domains (33)
- FTP (6)
- Hosting (32)
- Migrate Services (6)
- DNS Registers (13)
- Security (12)
- Services (9)
- Support (5)
- Users and privileges (2)
- Web (15)
- WordPress (23)
How to import and export databases with phpMyAdmin
Importing the database with phpMyAdmin
To import your web database to your new hosting in SWPanel you will have to follow the following steps:
1. First of all, you must access your SWPanel and in the top search window indicate the name of the hosting service you want to configure. Once you have located the service, you can click on its name to access its Dashboard:
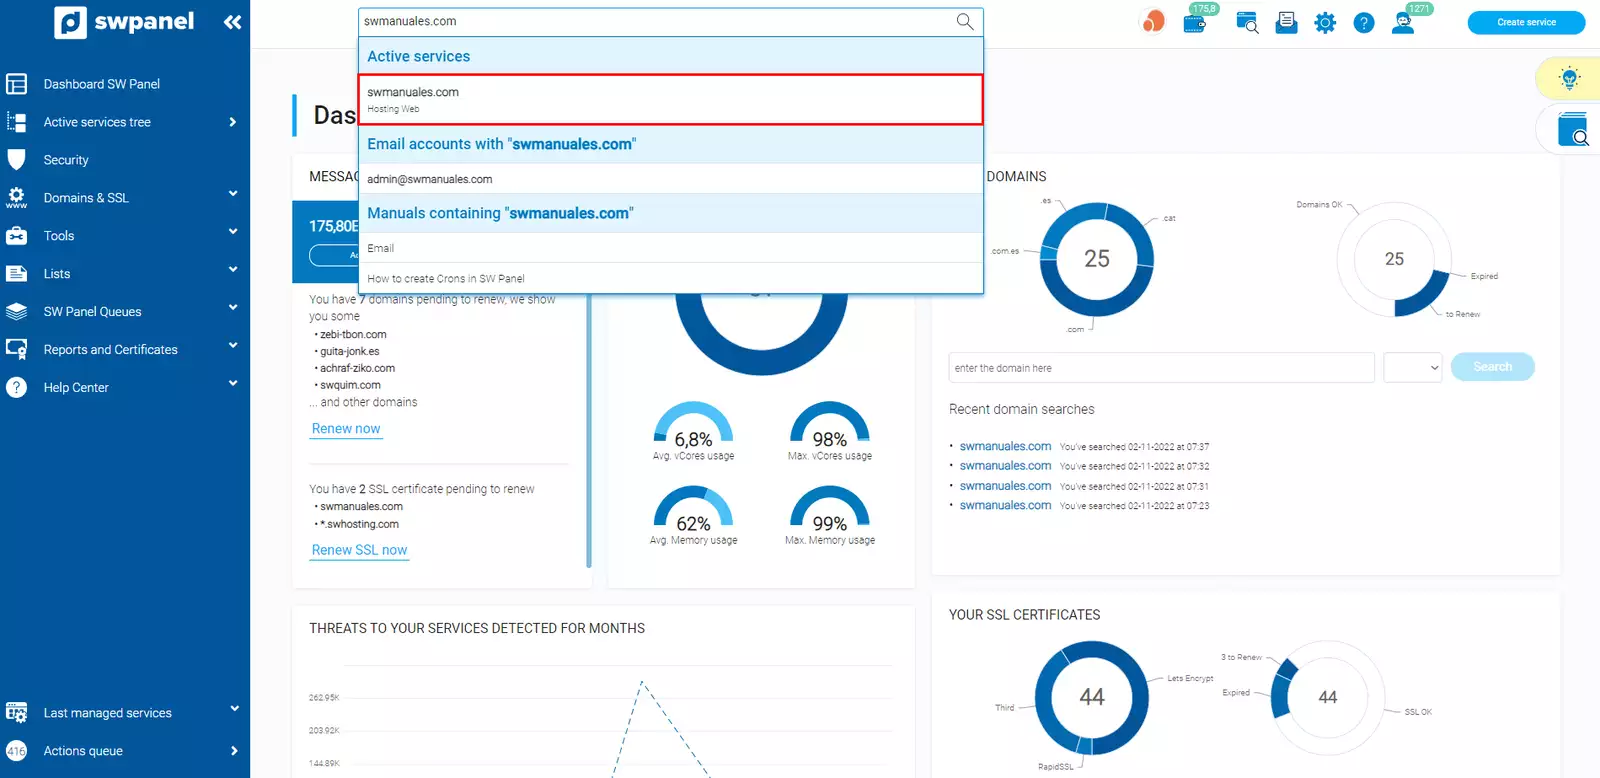
info_capture The screenshot is for guidance only. It was taken on version 2025.00.0017 with date 02/01/2025. It may differ from what the current version of SWPanel displays.
2. Next, click on Database Management.
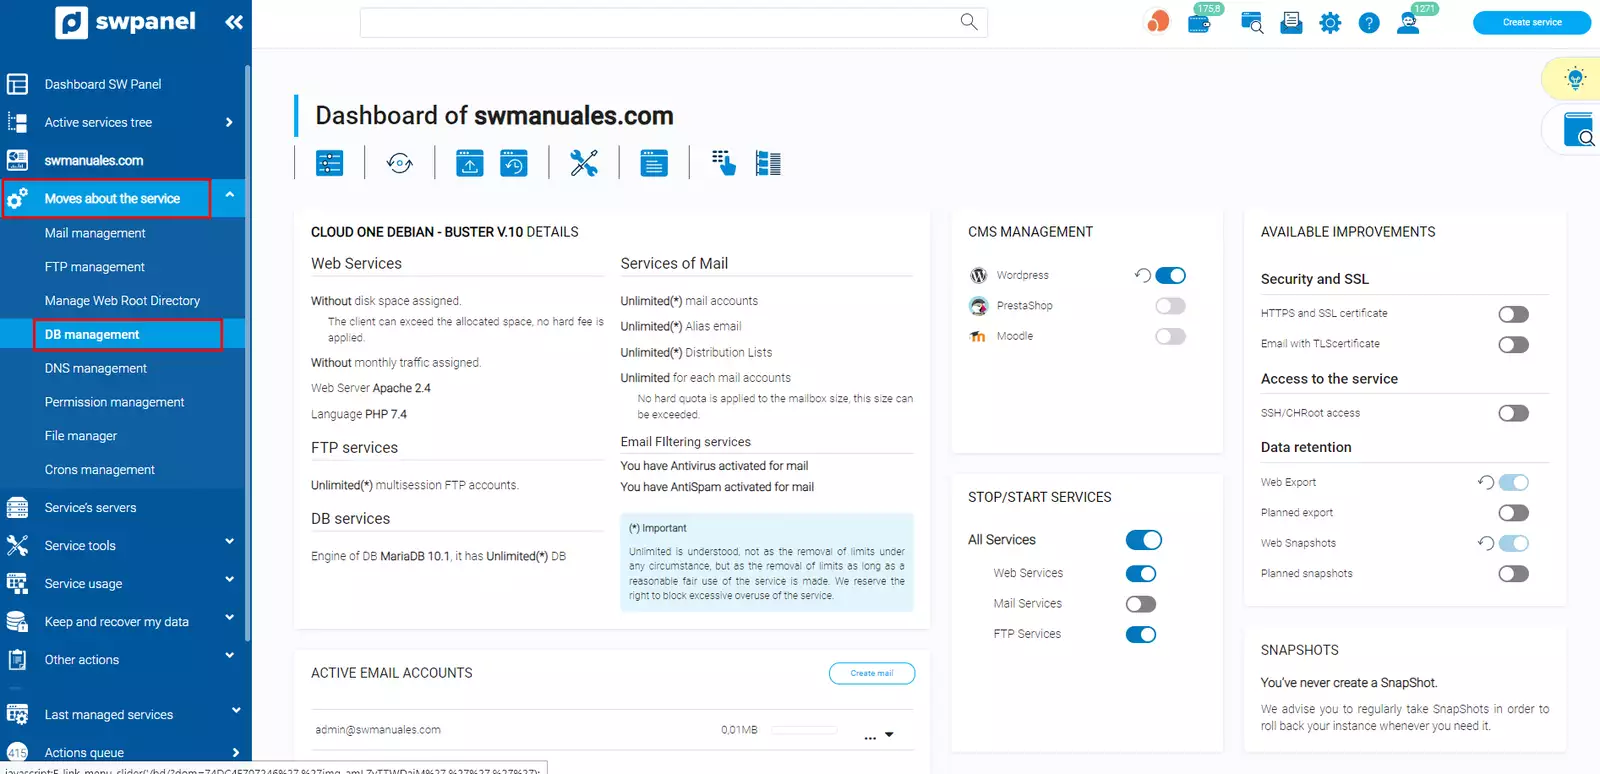
info_capture The screenshot is for guidance only. It was taken on version 2025.00.0017 with date 02/01/2025. It may differ from what the current version of SWPanel displays.
3. Here you can view the existing databases. In case you do not have any database created, you will have to create one in order to import the data. Once the database is created, go to the menu "[...]" and then select Open PhpMyAdmin. This action must be performed on the database where you want to import the data:
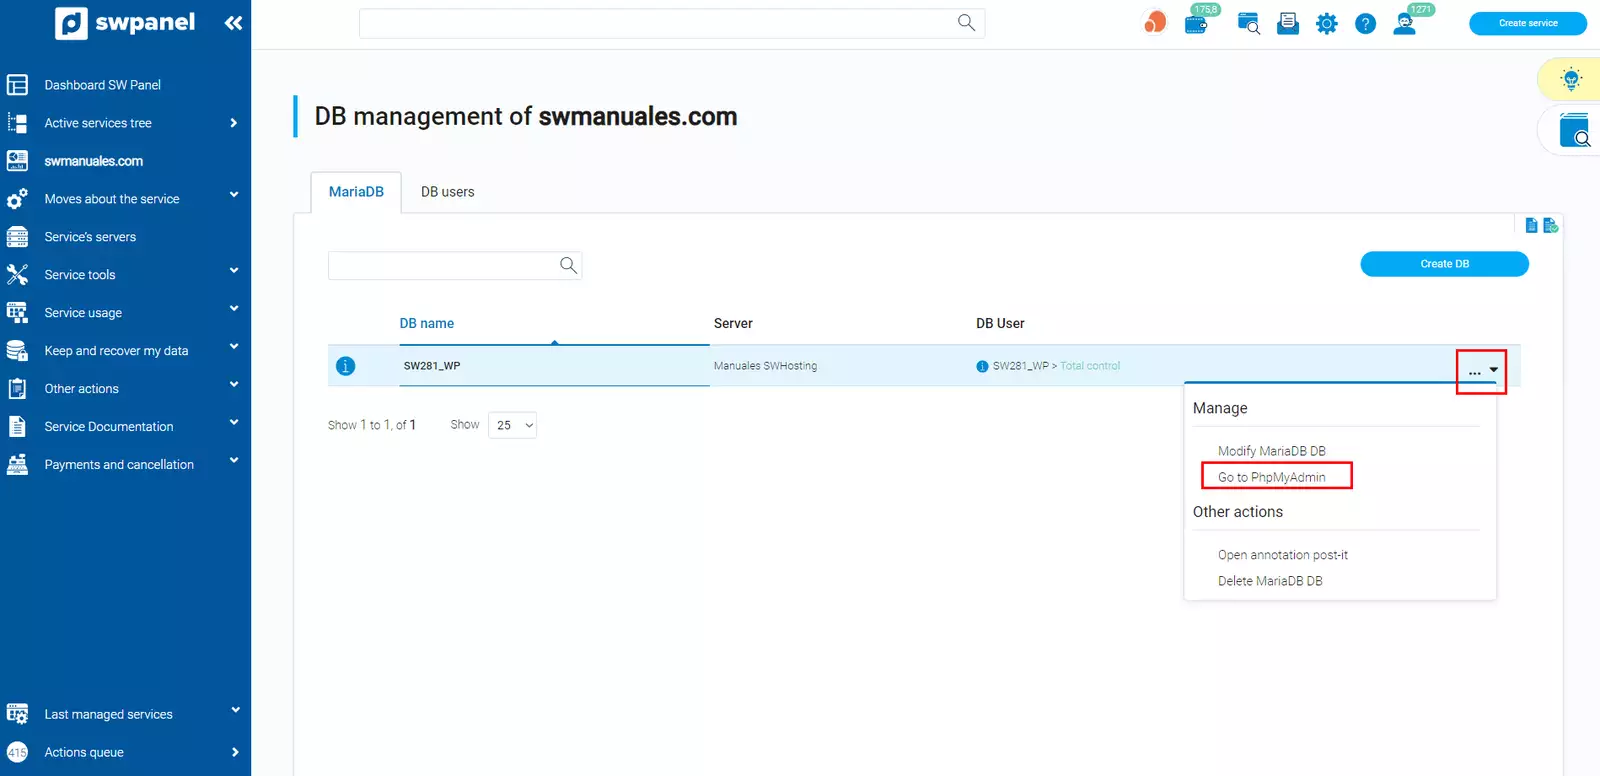
info_capture The screenshot is for guidance only. It was taken on version 2025.00.0017 with date 02/01/2025. It may differ from what the current version of SWPanel displays.
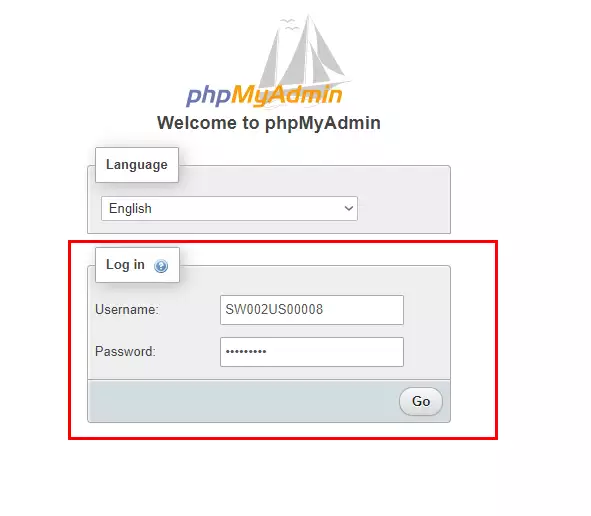
4. Once the phpMyadmin tool has opened in your browser, you must enter the User and Password of your website's database and click on the Continue button.
5. Next, select the database into which you want to import the data and go to the Import tab.
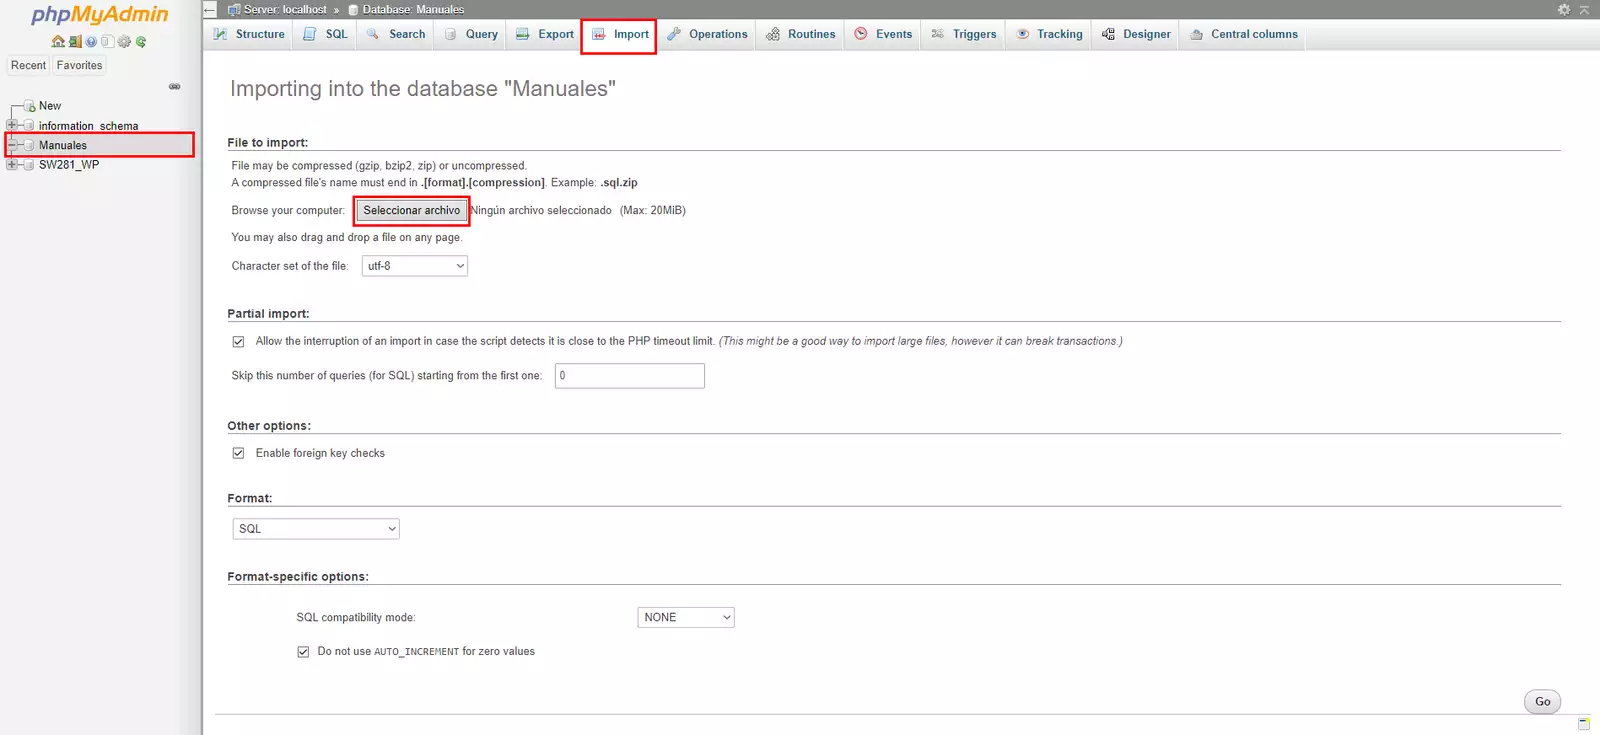
To import the DB you must follow the following steps:
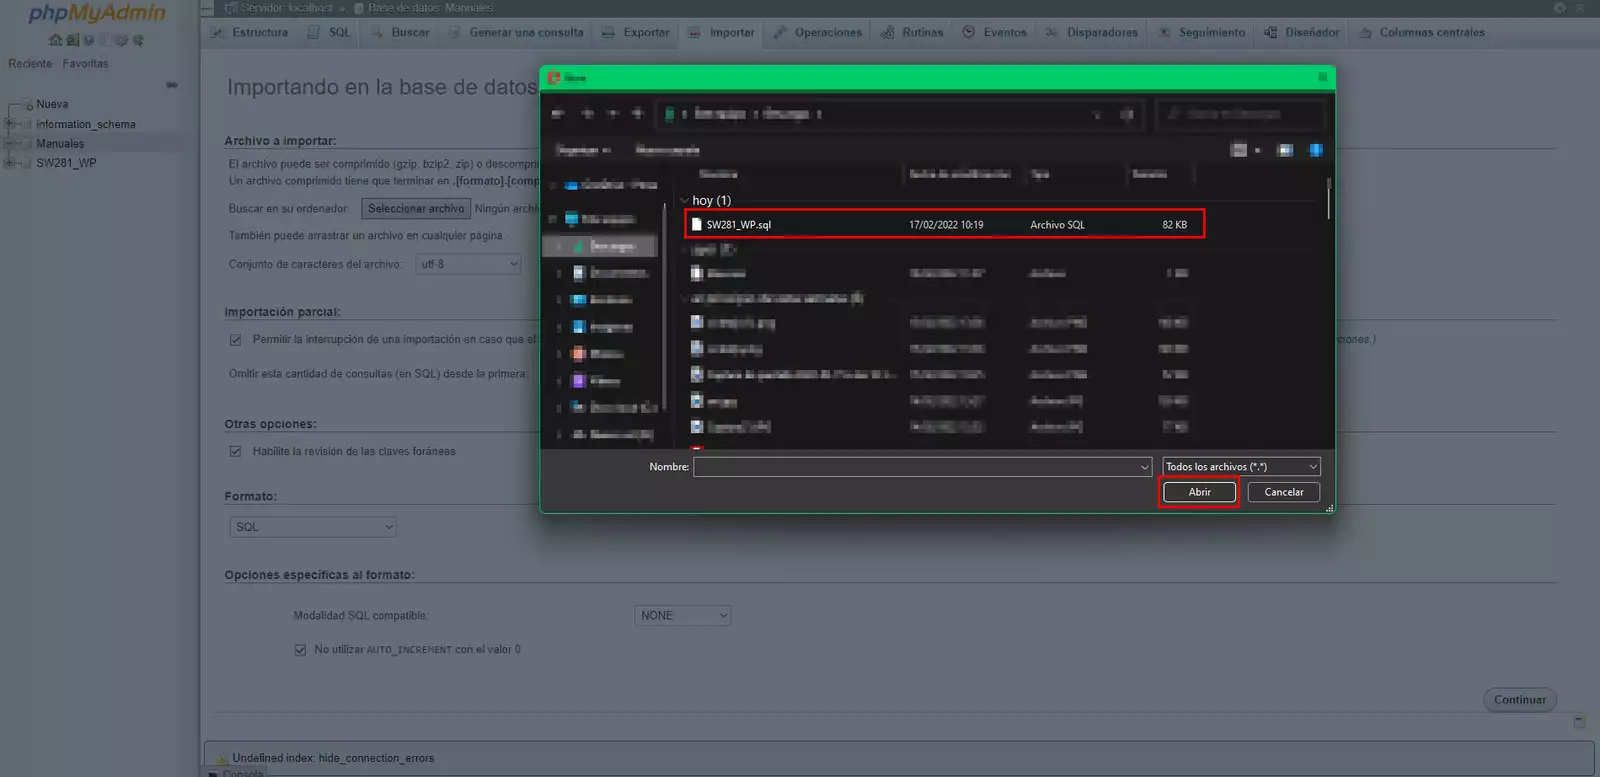
1) Use the Examine... button to open your file browser and select the DB with the .sql extension that we exported and saved previously with the phpMyAdmin.
2) Once you have selected the database to import, you must click on the Continue button.
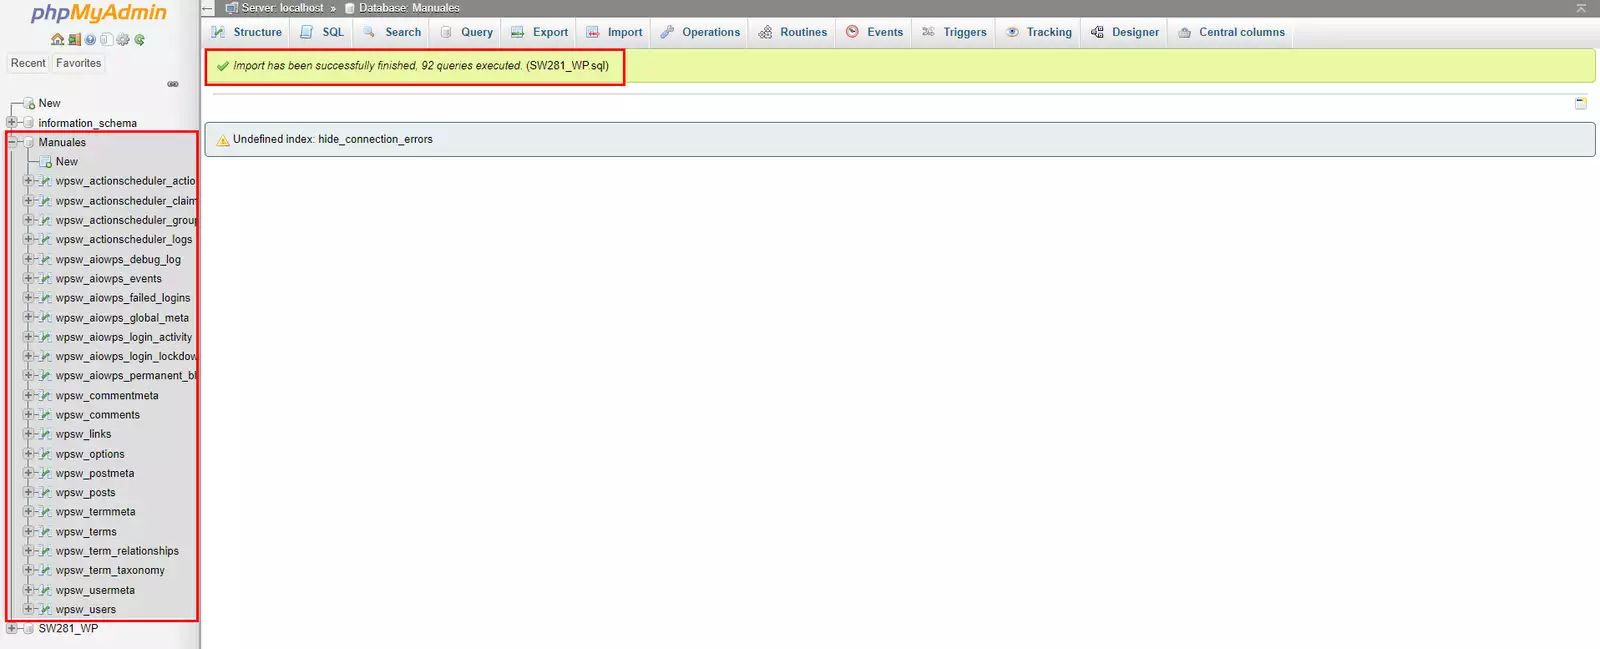
3) Once the DB import process has been successfully completed, the window will change and will show you the message Import successfully executed. In addition, you will be able to see that the corresponding tables and fields have been generated:
Database export with phpMyAdmin
To export a database, you must follow these steps:
1. First, you must access your SWPanel and in the top search window indicate the name of the hosting service you want to configure. Once you have located the service you can click on its name to access its Dashboard:
info_capture The screenshot is for guidance only. It was taken on version 2025.00.0017 with date 02/01/2025. It may differ from what the current version of SWPanel displays.
2. Next, click on Database Management.
info_capture The screenshot is for guidance only. It was taken on version 2025.00.0017 with date 02/01/2025. It may differ from what the current version of SWPanel displays.
3. Here you can view the existing databases. Go to the menu "[...]" and then select Open PhpMyAdmin. This action must be performed on the database where you want to export the data:
info_capture The screenshot is for guidance only. It was taken on version 2025.00.0017 with date 02/01/2025. It may differ from what the current version of SWPanel displays.
4. Once the phpMyadmin tool has opened in your browser, you must enter the User and Password of your website's database and click on the Continue button.
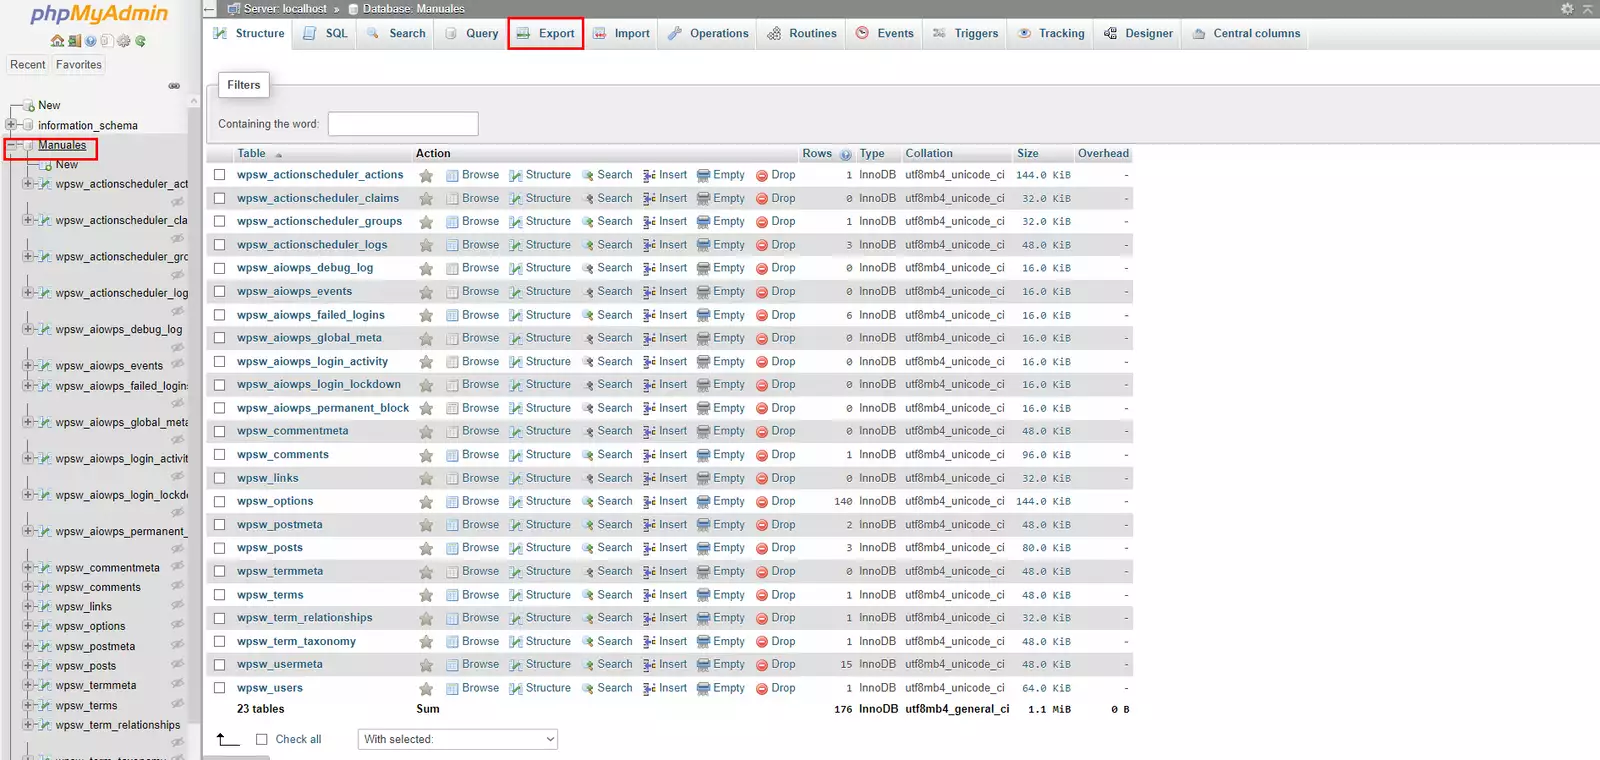
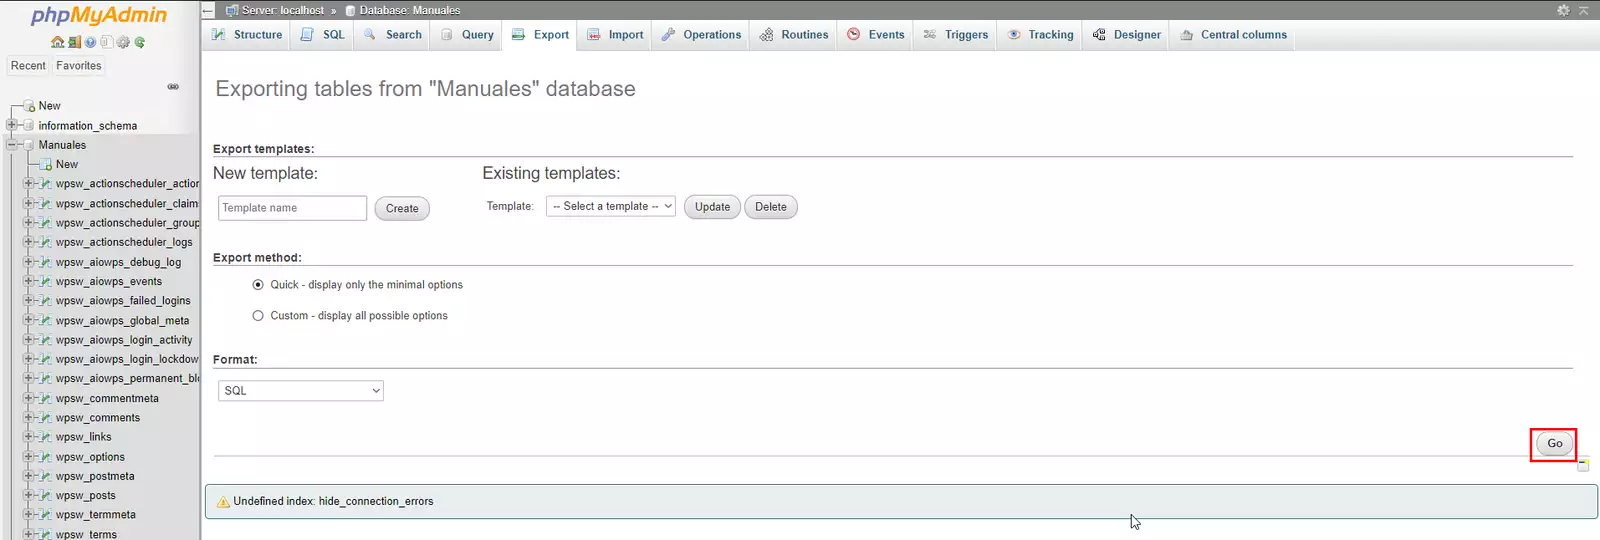
5. Once inside, you must select the DB corresponding to your website and then go to the Export tab.
6. In the next window you must leave the default options checked and then click on the Continue button.
7. Your browser will download your web database in database_name.sql format to your download folder.