Content
Categories
- General SWPanel (38)
- Administration (14)
- Database (14)
- SSL Certificates (15)
- Cloud (59)
- Cloud Storage (2)
- Containers (1)
- Backup Copies (6)
- Mail (33)
- DevOps (55)
- Domains (33)
- FTP (6)
- Hosting (32)
- Migrate Services (6)
- DNS Registers (13)
- Security (12)
- Services (7)
- Support (5)
- Users and privileges (2)
- Web (15)
- WordPress (23)
How to install ISPConfig 3 with Nginx on Ubuntu 22.04
Introduction
ISPConfig is a widely used open source hosting control panel for Linux, under BSD license, which allows you to manage websites, email addresses, MySQL and MariaDB databases, FTP accounts and DNS records. Its administration is done through a web-based interface, with 4 login levels: administrator, reseller, client and email user, each with a different set of permissions.
Before we start with the tutorial, don't you have a Linux Ubuntu 22.04 Cloud server on which you can install your ISPConfig 3 with Nginx? Don't worry! With just one click, you can easily deploy it with SW Hosting.
cta:cloud_so_ubuntu_22
Step 1: Update the system
Before installing any new software on Ubuntu, remember to always upgrade the system to have the latest versions of the software packages.
The system upgrade process and the installation of ISPconfig must be done with the root user. To do this you must run the commands:
sudo -s
apt update && apt upgrade -y
Step 2: Install ISPConfig 3 with Nginx
To install ISPConfig 3, you must download and run the installation script by executing this command:
wget -O - https://get.ispconfig.org | sh -s -- --use-nginx --use-ftp-ports=40110-40210 --unattended-upgrades)
You will receive the following result and you must enter "yes " to start the ISPConfig installation:
WARNING! This script will reconfigure your entire server!
It should be run on a freshly installed server and all current configuration that you have done will most likely be lost!
Type 'yes' if you really want to continue: yes
When the installer finishes, it will show you the passwords for the ISPConfig root admin user and MySQL:
...
[INFO] Installing ISPConfig3.
[INFO] Adding PHP version(s) to ISPConfig.
[INFO] Checking all services are running.
[INFO] mysql: OK
[INFO] clamav-daemon: OK
[INFO] postfix: OK
[INFO] bind9: OK
[INFO] pureftpd: OK
[INFO] nginx: OK
[INFO] rspamd: OK
[INFO] redis-server: OK
[INFO] dovecot: OK
[INFO] Installation ready.
[INFO] Your ISPConfig admin password is: ***
[INFO] Your MySQL root password is: ***
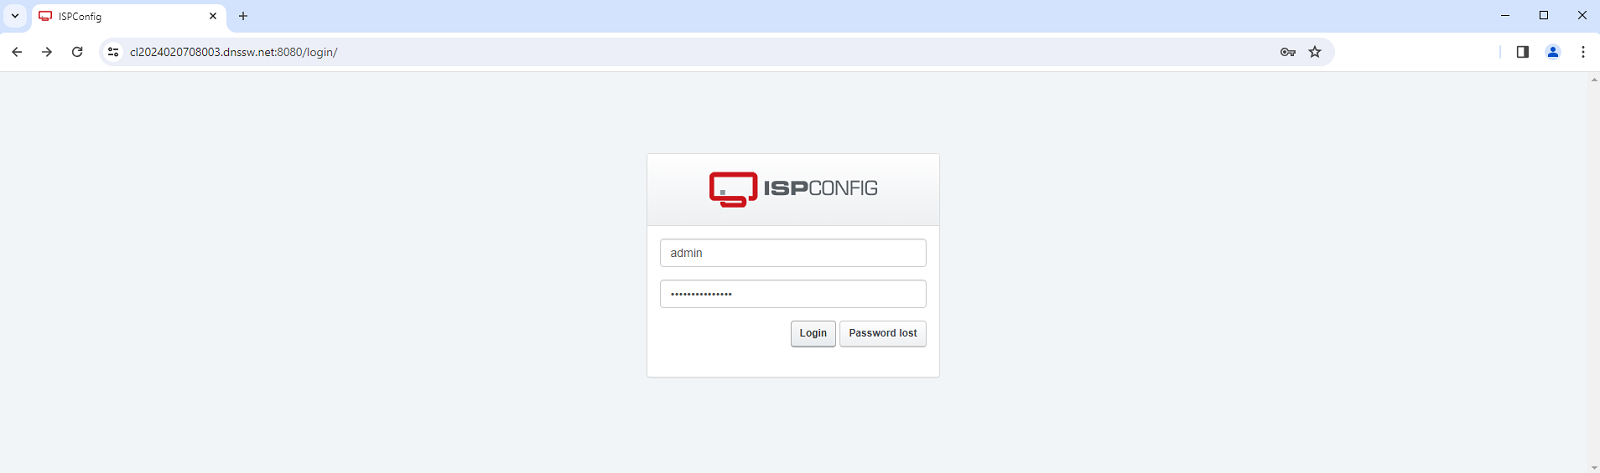
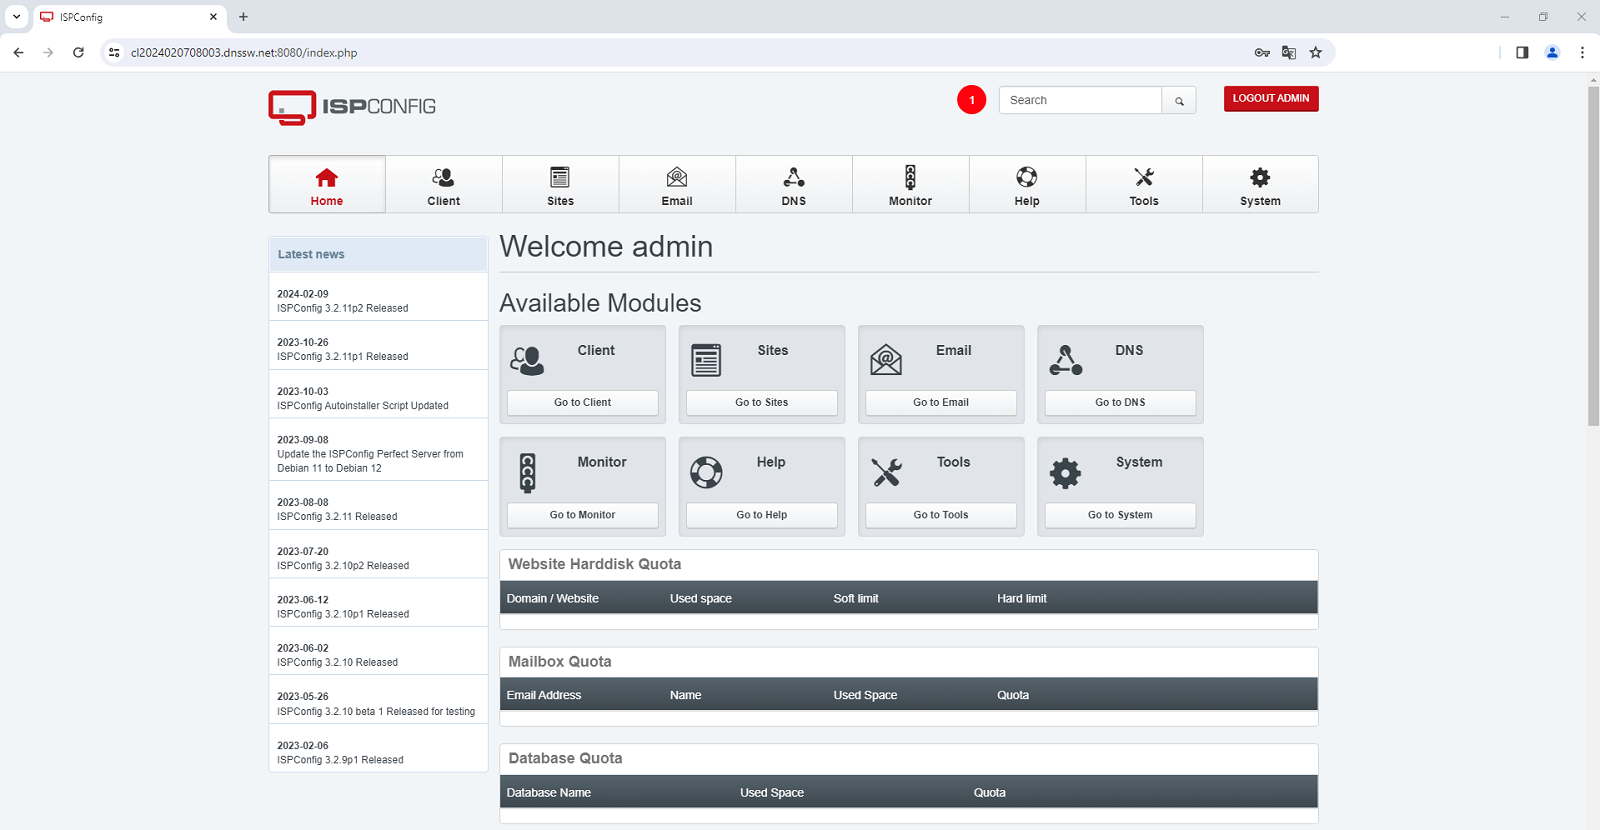
Step 3: Accessing the ISPConfig 3 control panel
You can now access the ISPConfig 3 installation at http://YourServerIpAdress:8090 o https://YourNameServer:8080
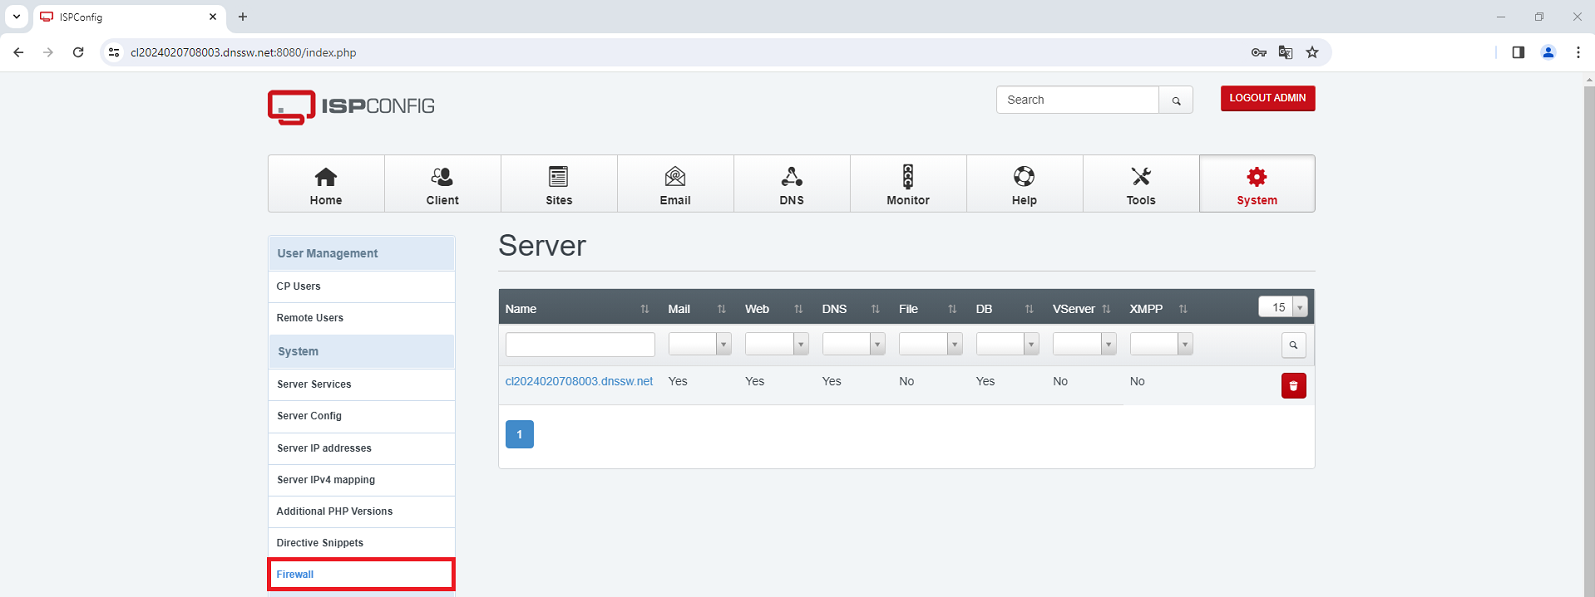
Step 4: Configure the firewall of the ISPConfig 3 panel
Go to "System";

-> "Firewall"
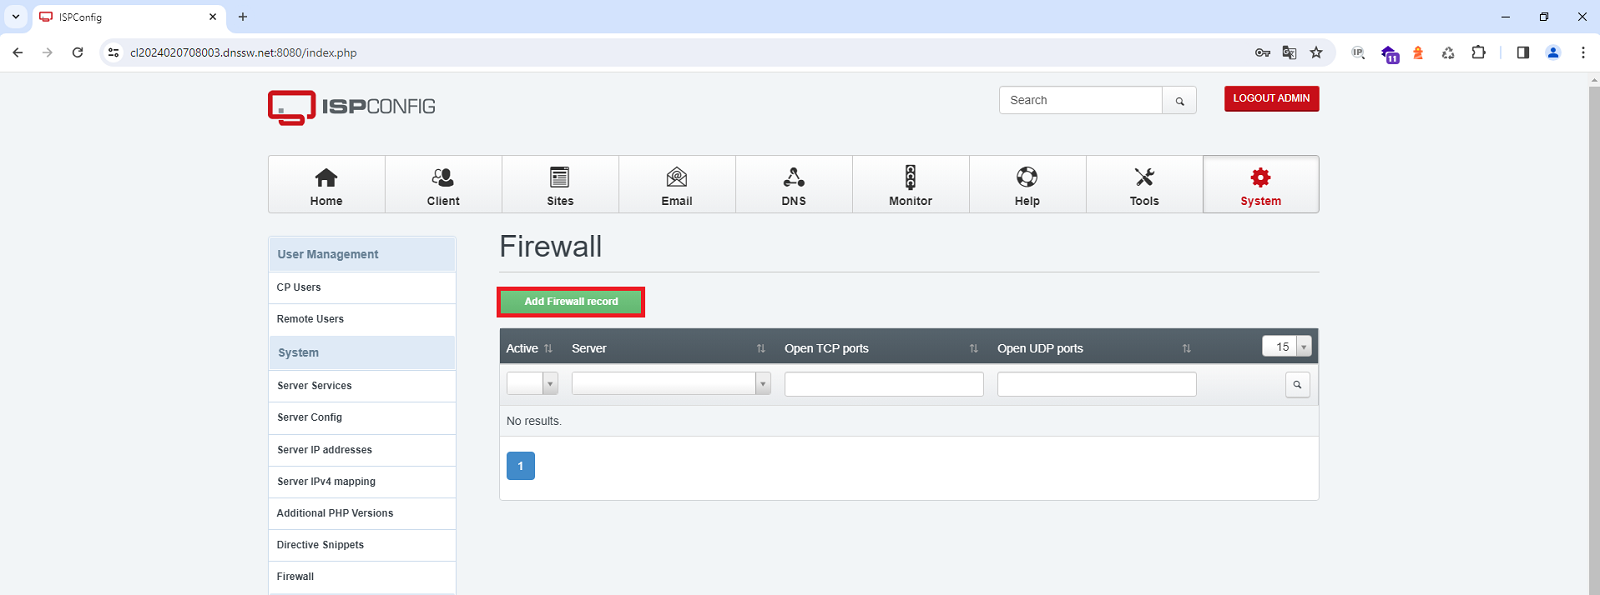
 Then click on "Add Firewall record".
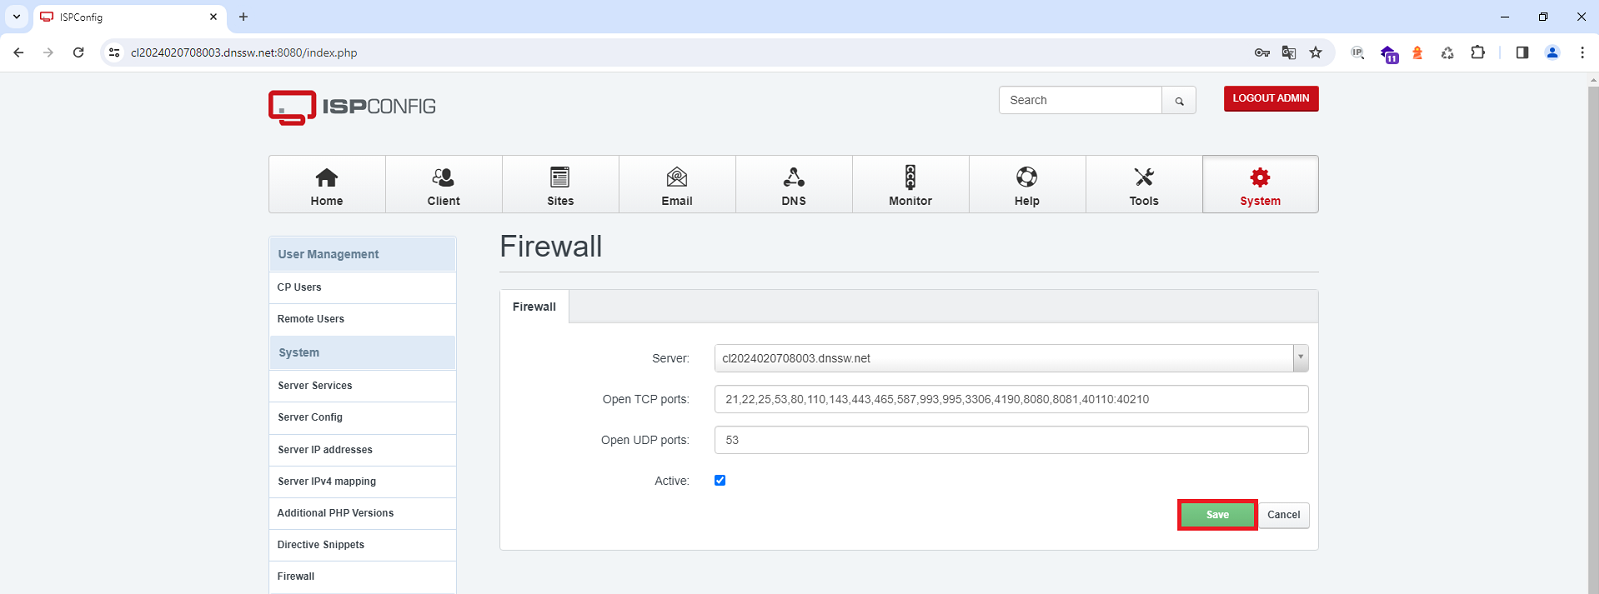
Save the changes by clicking the "Save" button.
success Congratulations! You have successfully installed and configured ISPConfig 3 with Nginx on Ubuntu 22.04.
Remember that if you don't have a Cloud server with Ubuntu 22.04 Linux operating system you can easily deploy it with SW Hosting.
cta:cloud_so_ubuntu_22