Content
Categories
- General SWPanel (38)
- Administration (14)
- Database (14)
- SSL Certificates (15)
- Cloud (59)
- Cloud Storage (2)
- Containers (1)
- Backup Copies (6)
- Mail (33)
- DevOps (55)
- Domains (33)
- FTP (6)
- Hosting (32)
- Migrate Services (6)
- DNS Registers (13)
- Security (12)
- Services (7)
- Support (5)
- Users and privileges (2)
- Web (15)
- WordPress (23)
How to install Virtualmin on Ubuntu 22.04
Introduction
Virtualmin is a popular web hosting control panel that allows you to manage multiple domains, email accounts and websites on a single server. It is designed to be easy to use, even for non-technical users, and provides a variety of features that make it a popular choice for web hosting providers and website owners. It is based on Webmin and is an alternative to other paid panels such as cPanel and Plesk.
Before we get started with the tutorial, don't you have a Linux Ubuntu 22.04 Cloud server on which you can install your Virtualmin? Don't worry! With just one click, you can easily deploy it with SW Hosting.
cta:cloud_so_ubuntu_22
Step 1: Update the system
Before installing any new software on Ubuntu, remember to always upgrade your system to have the latest versions of software packages.
The system upgrade process and the installation of Virtualmin must be done with the root user. To do this you must run the commands:
sudo -s
apt update && apt upgrade -y
Step 2: Install Virtualmin 7
To install Virtualmin, you need to download and run the installation script with the following commands:
wget http://software.virtualmin.com/gpl/scripts/install.sh
chmod a+x install.sh
./install.sh
You will receive the following result and you will have to enter "y " to start the installation of ISPConfig:
[INFO] Log will be written to: /root/virtualmin-install.log

  Welcome to the Virtualmin GPL installer, version 7.3.4

  This script must be run on a freshly installed supported OS. It does not
  perform updates or upgrades (use your system package manager) or license
  changes (use the "virtualmin change-license" command).

  The systems currently supported by the install script are:

    Red Hat Enterprise Linux and derivatives
      - RHEL 8 and 9 on x86_64
      - Alma and Rocky 8 and 9 on x86_64
      - CentOS 7 on x86_64

    Debian Linux and derivatives
      - Debian 10, 11 and 12 on i386 and amd64
      - Ubuntu 20.04 LTS and 22.04 LTS on i386 and amd64

  If your OS/version/arch is not listed, installation will fail. More
  details about the systems supported by the script can be found here:

    https://www.virtualmin.com/os-support

  The selected package bundle is LAMP and the size of install is
  full. It will require up to 2 GB of disk space.

  Exit and re-run this script with --help flag to see available options.

 Continue? (y/n) y
When the installer finishes, it will show you the URLs to access the Virtualmin web interface:
...
[SUCCESS] Installation Complete!
[SUCCESS] If there were no errors above, Virtualmin should be ready
[SUCCESS] to configure at https://cl2024020708003.dnssw.net:10000 (or https://81.25.126.188:10000).
[SUCCESS] You may receive a security warning in your browser on your first visit.
Step 3: Access the control panel and configure Virtualmin 7
You can now access the Virtualmin 7 installation at http://YourServerIpAdress:10000 or https://YourNameServer:10000
Ignore the SSL certificate validation error in your browser (the SSL certificate is self-signed after the initial installation, but can be replaced with a valid certificate once the initial configuration is complete).
To access the Virtualmin web interface you must enter the root user and password to access the server.
 Follow the steps in the post-installation wizard to configure Virtualmin according to your environment and needs. Virtualmin will verify your system configuration and validate some server settings to make sure your system is ready for service.
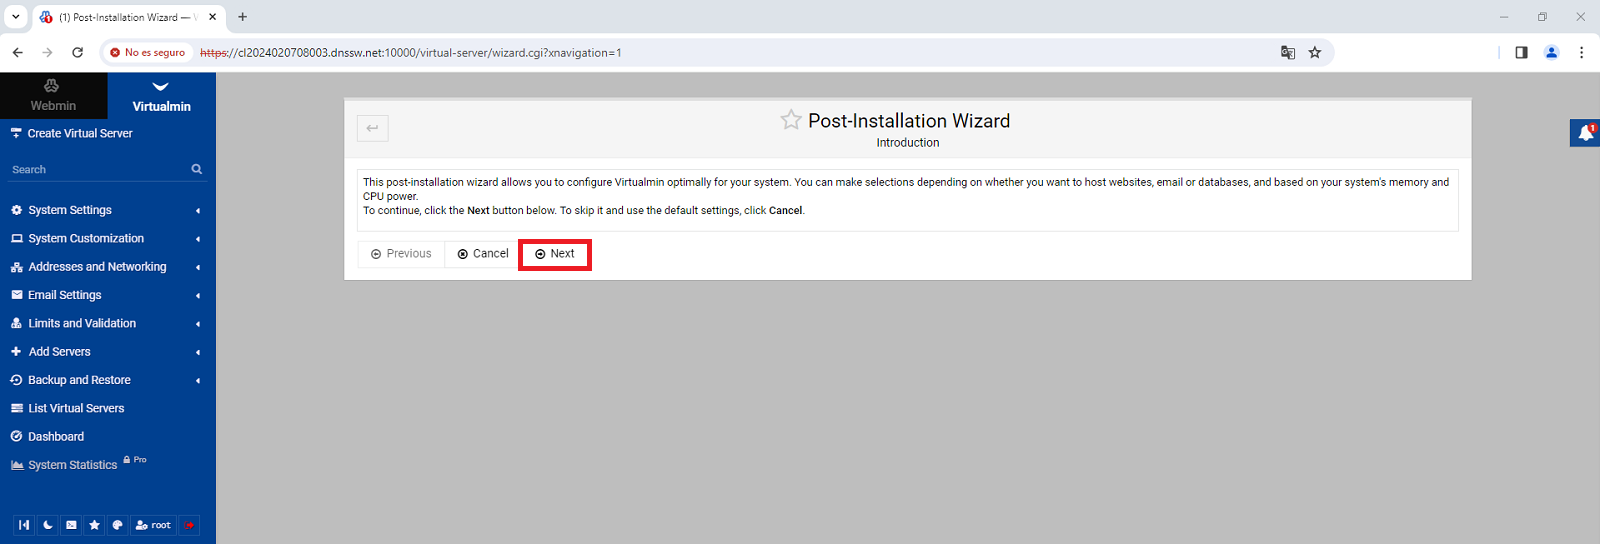
Click the "Next" button.
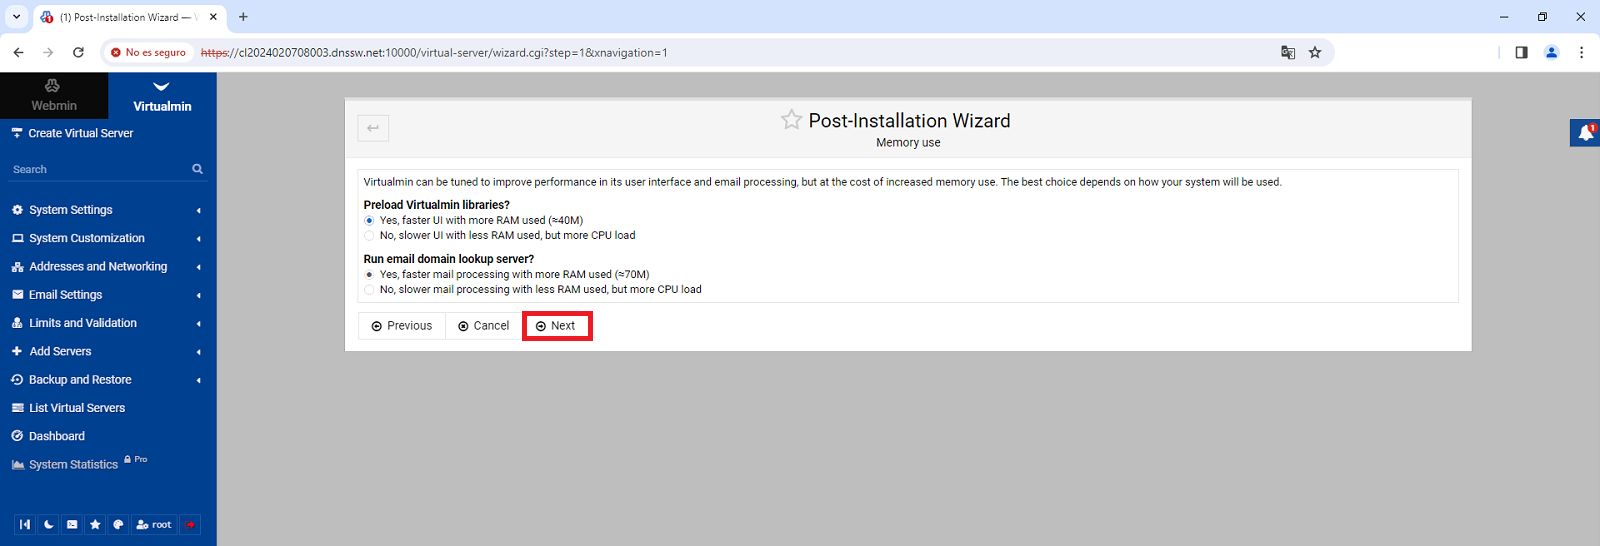
Select the appropriate RAM usage settings for your system and click the "Next" button
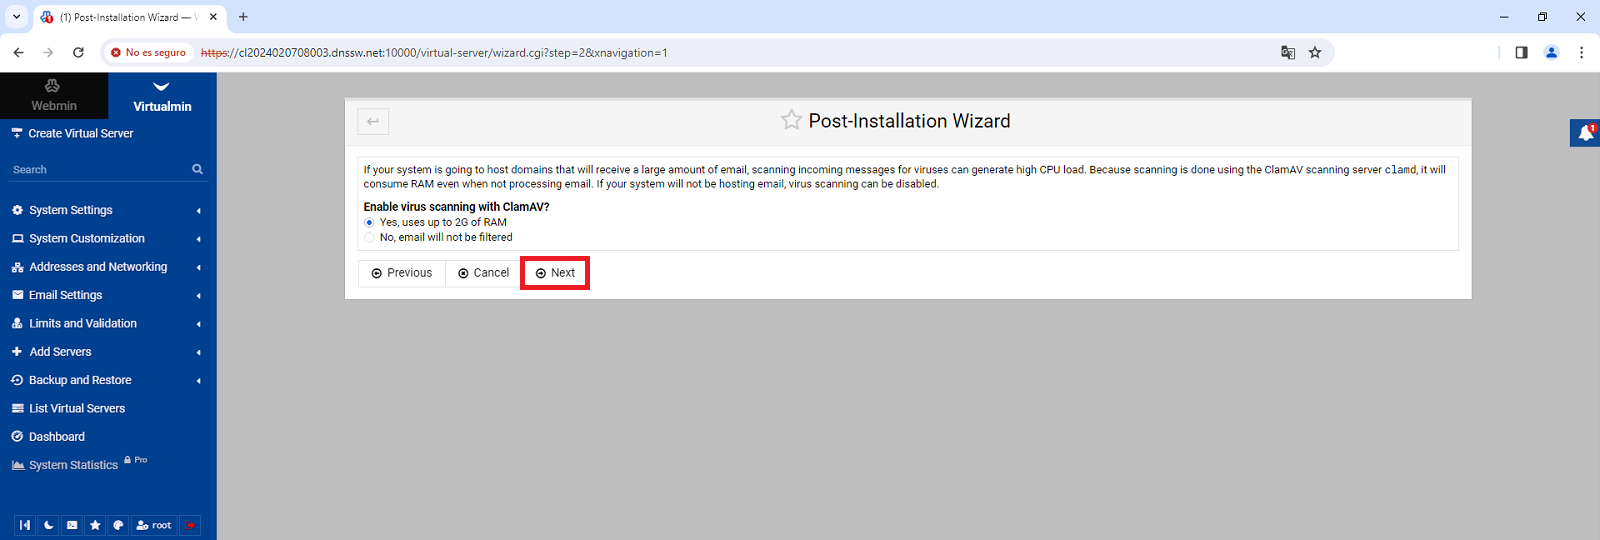
Select whether you want to run clamd antivirus in the background.
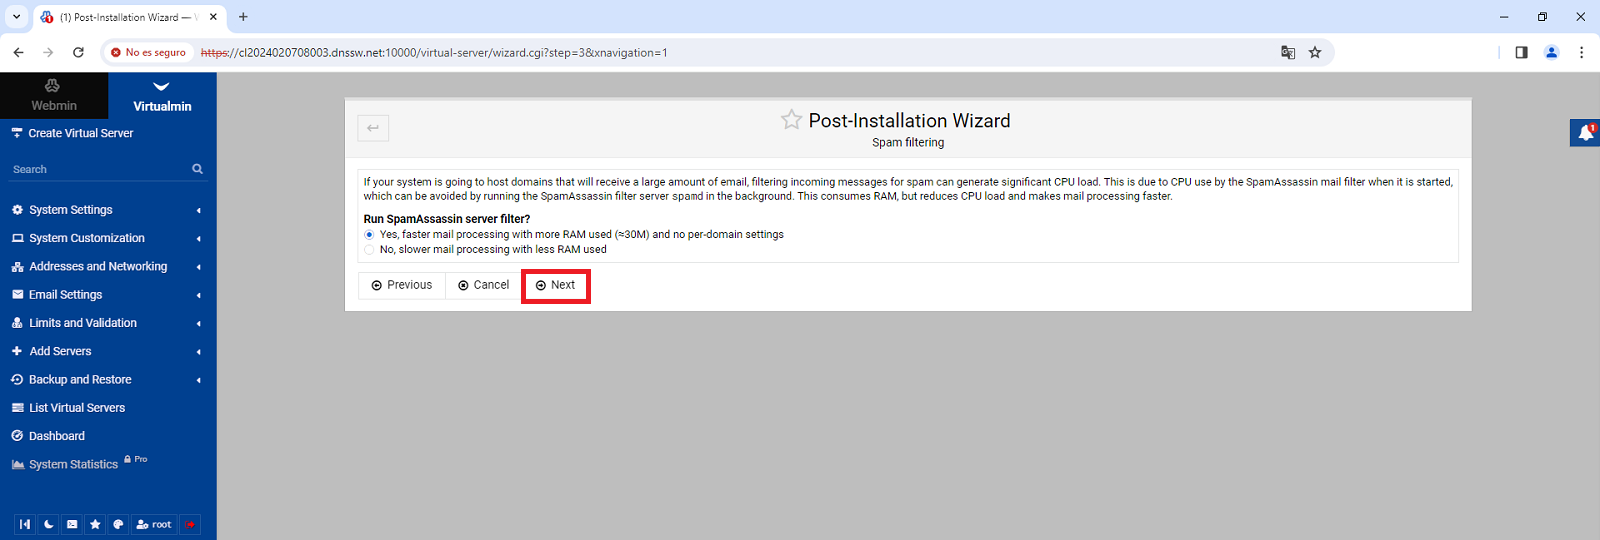
Select if you want to run the antispam spamd in the background.
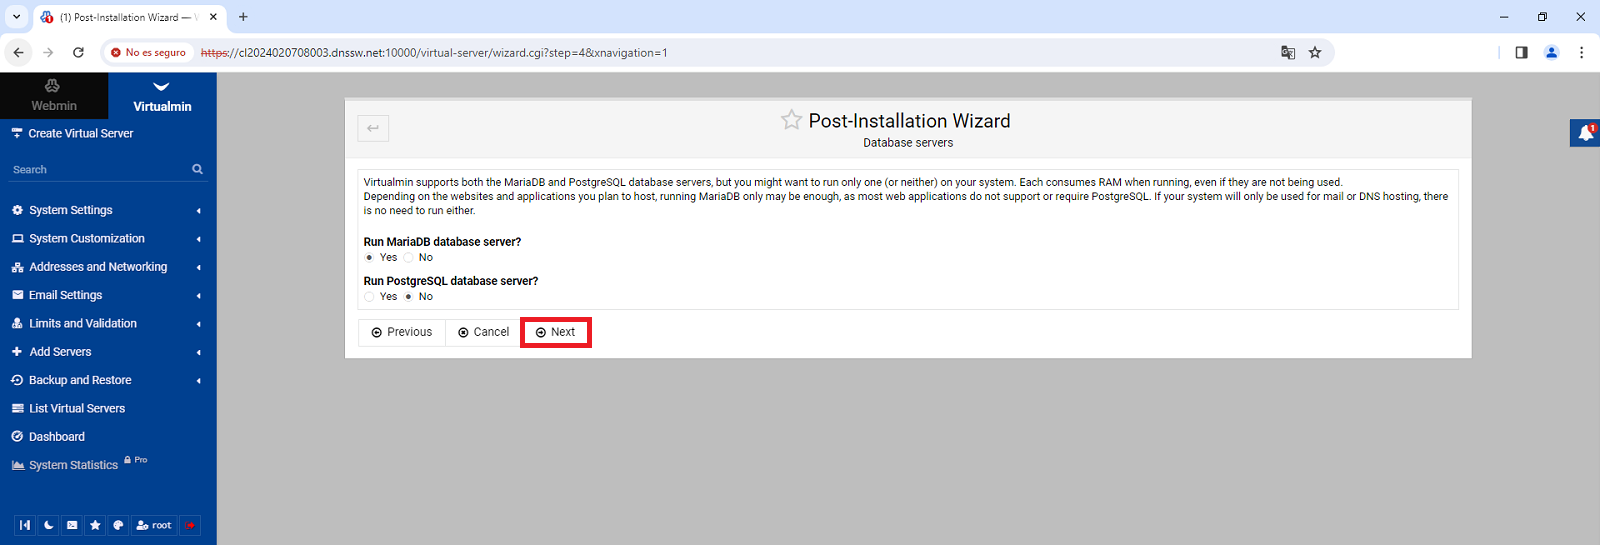
Select whether to run a MySQL server, a PostgreSQL server or both and click the "Next" button
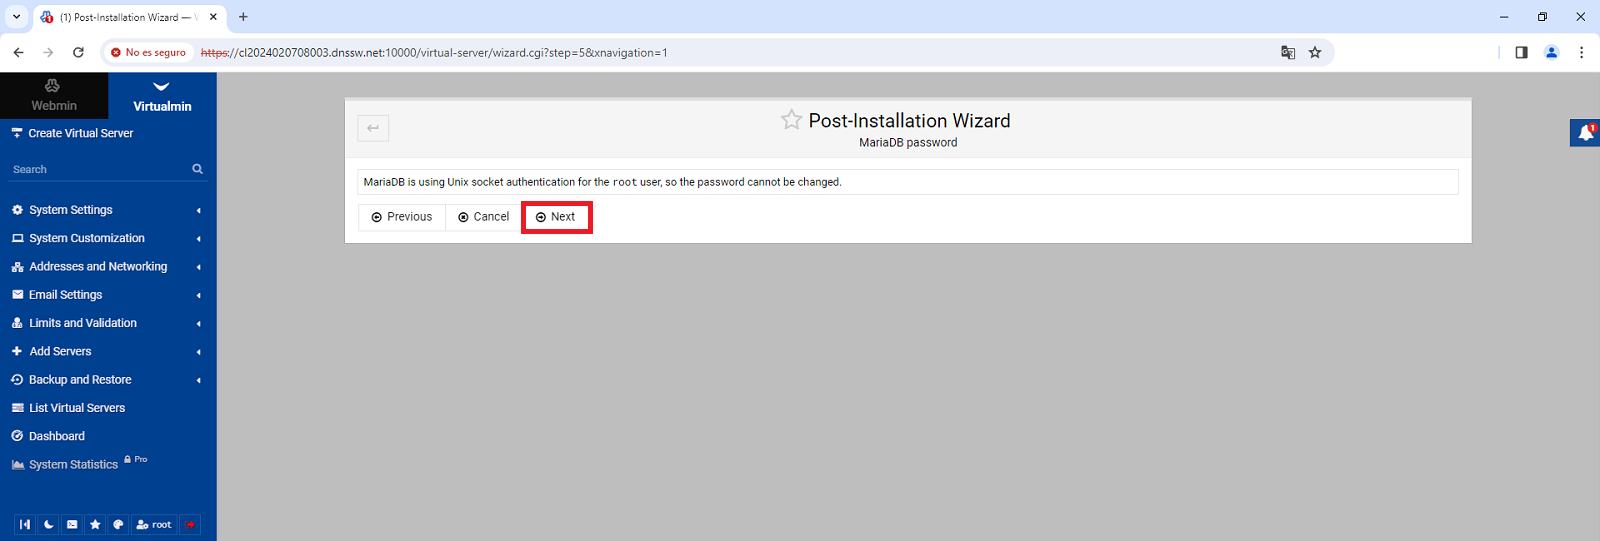
Set a root password for the database server (MySQL/PostgreSQL).
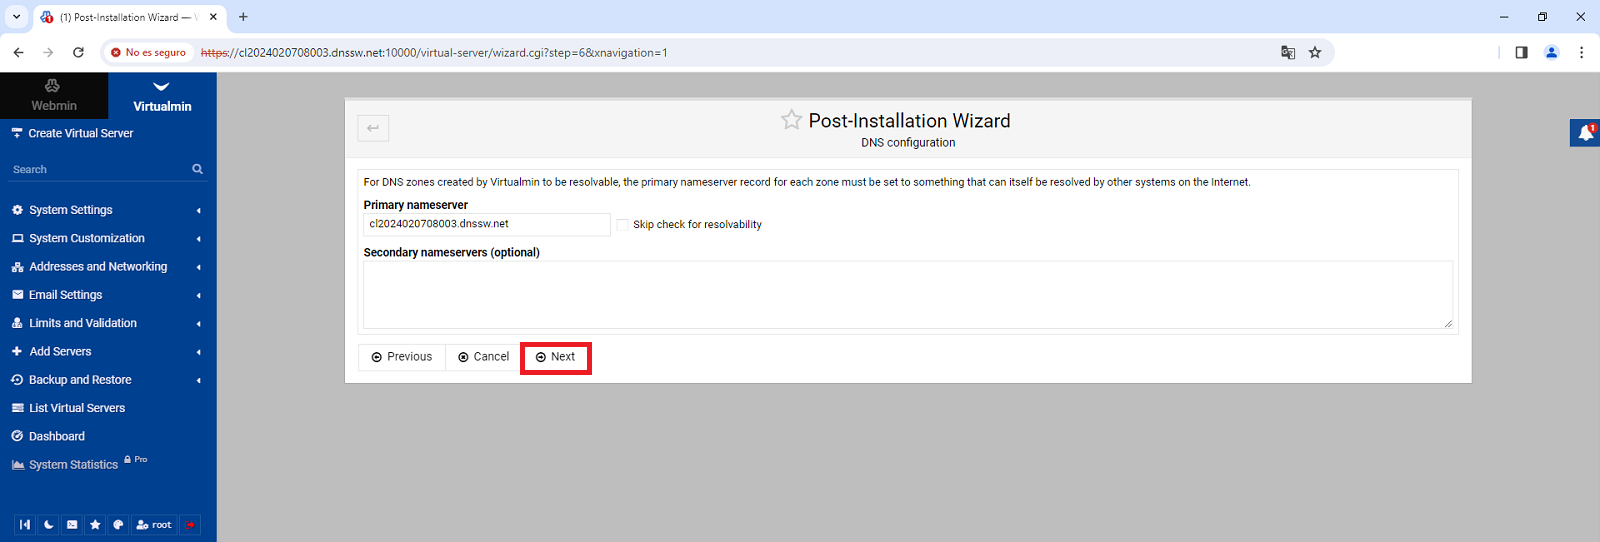
Configures the primary nameserver (Nameserver)
Continue with the custom configuration of Virtualmin with some additional parameters by clicking the "Next" button.
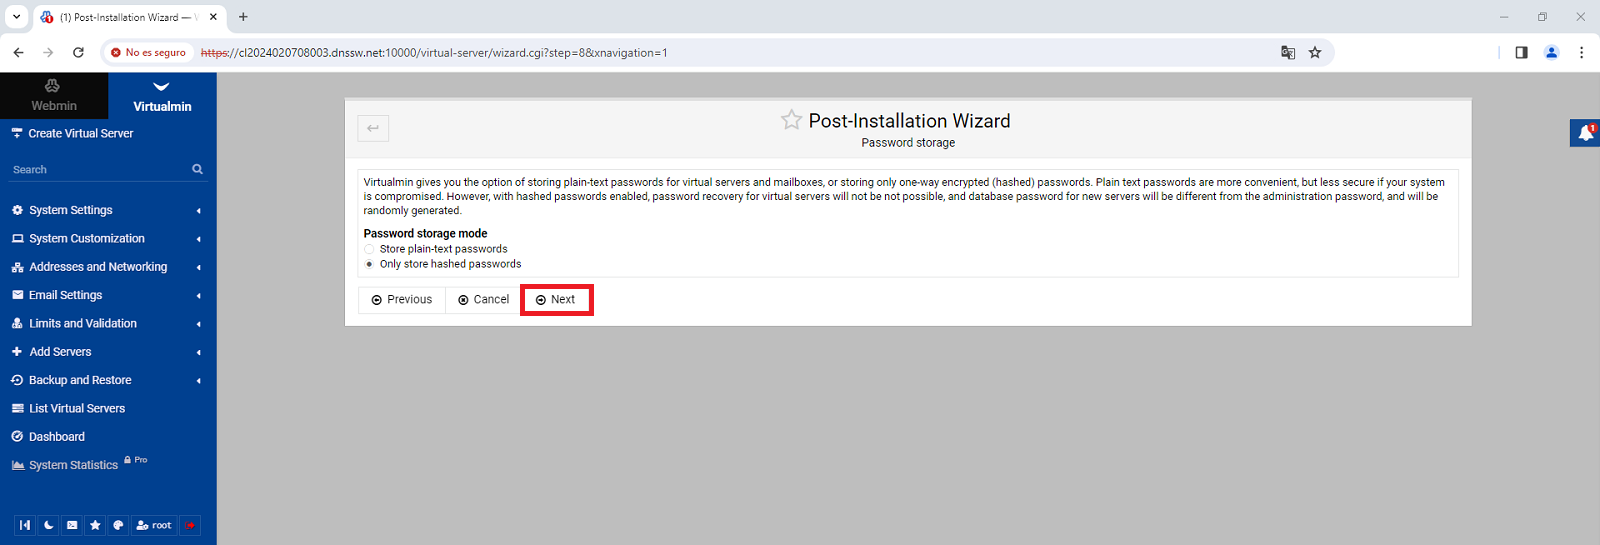
Select whether you prefer to store passwords in plain text or hash.
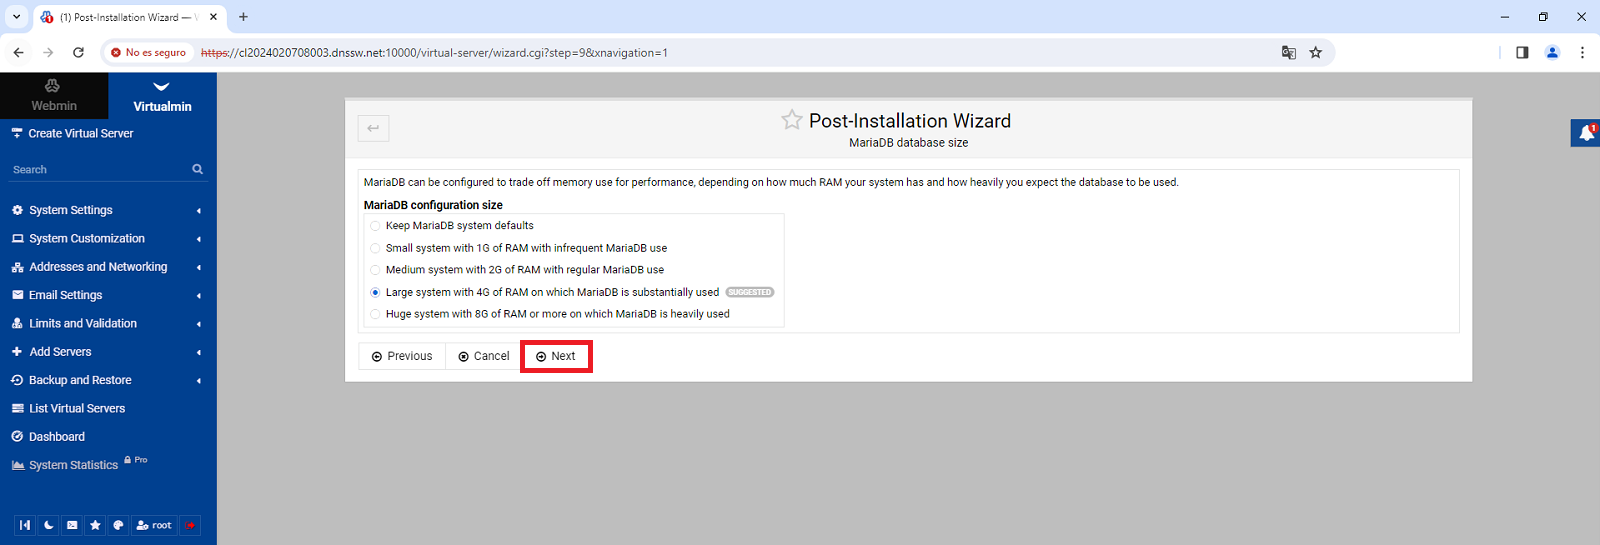
Select the RAM memory usage and performance parameters for MySQL/MariaDB
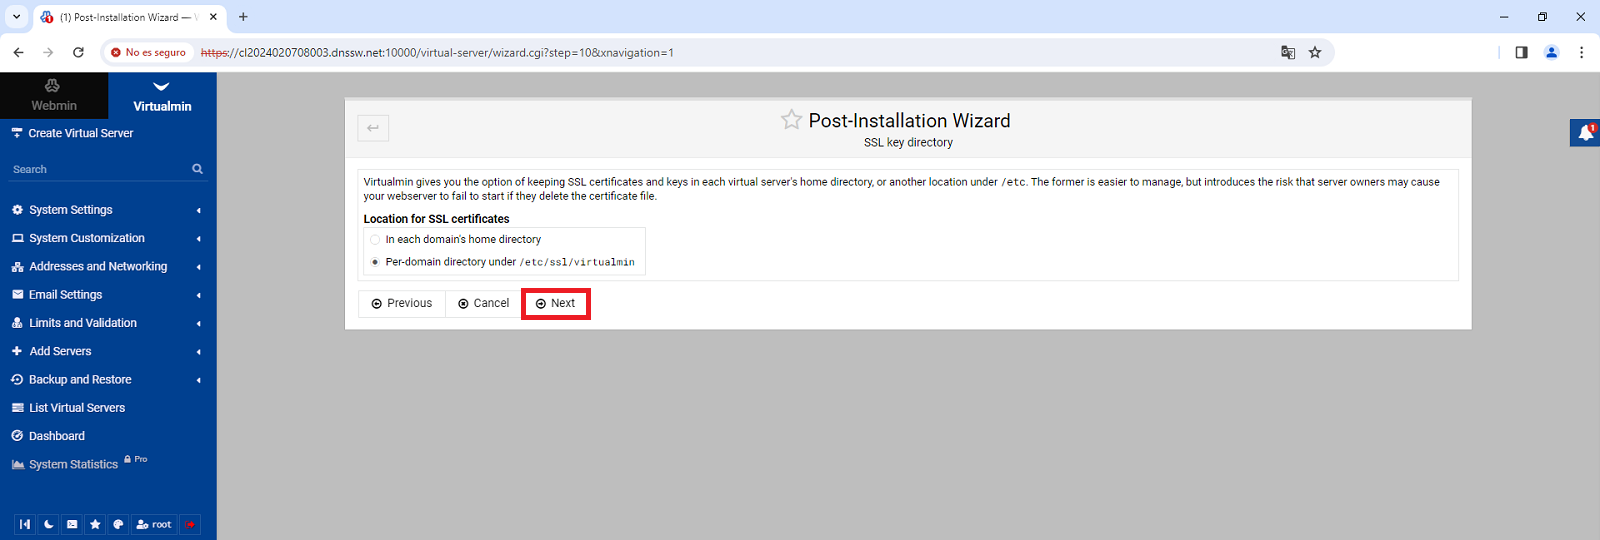
Selects the location of SSL certificates
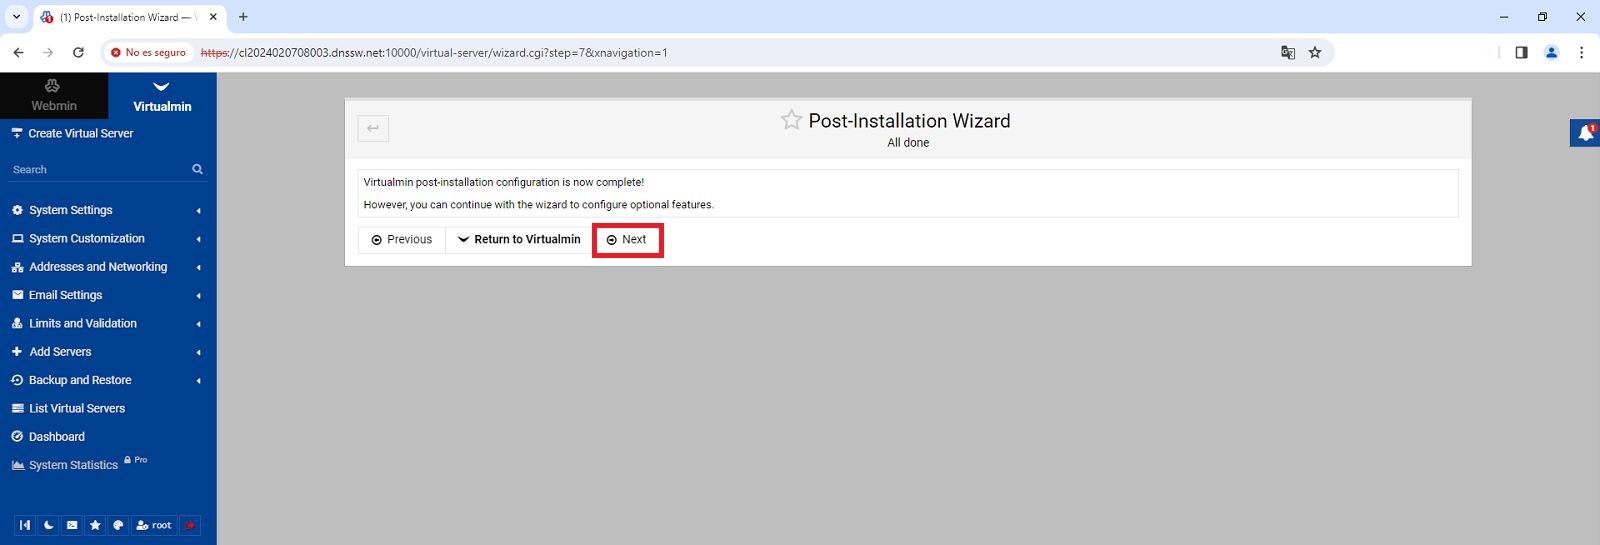
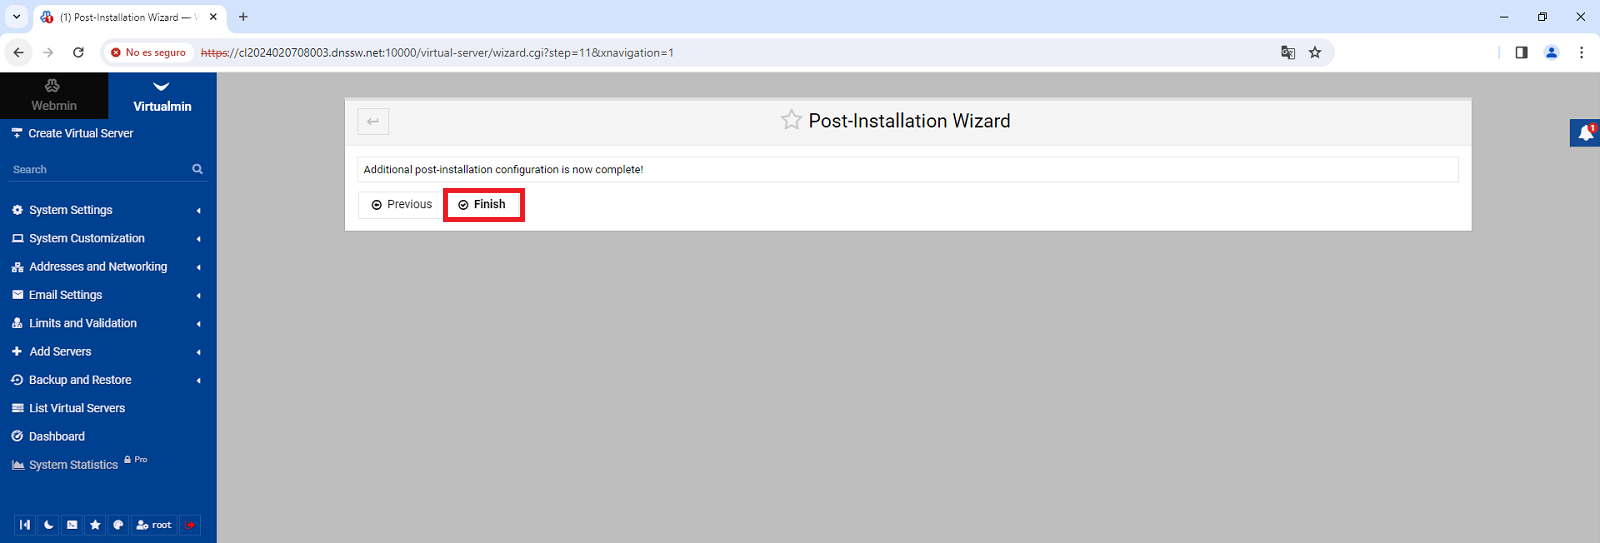
Complete the Virtualmin configuration wizard by clicking the "Finish " button
success Congratulations! You have successfully installed and configured Virtualmin on Ubuntu 22.04.
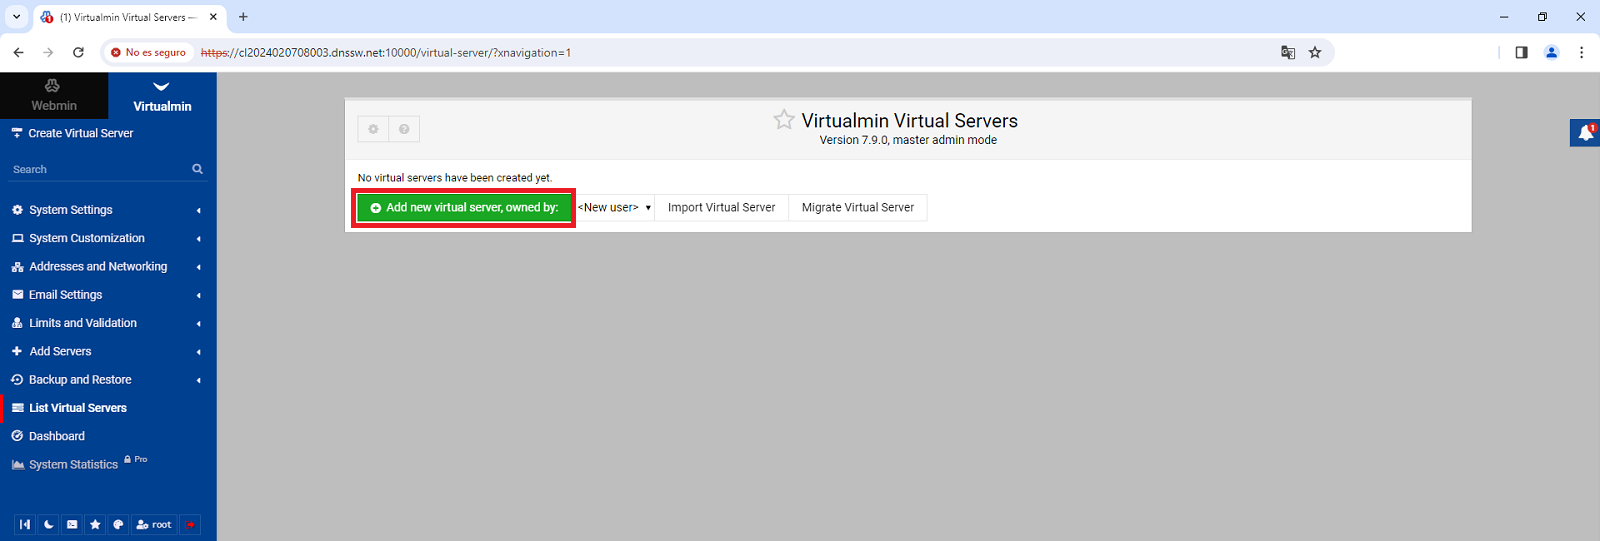
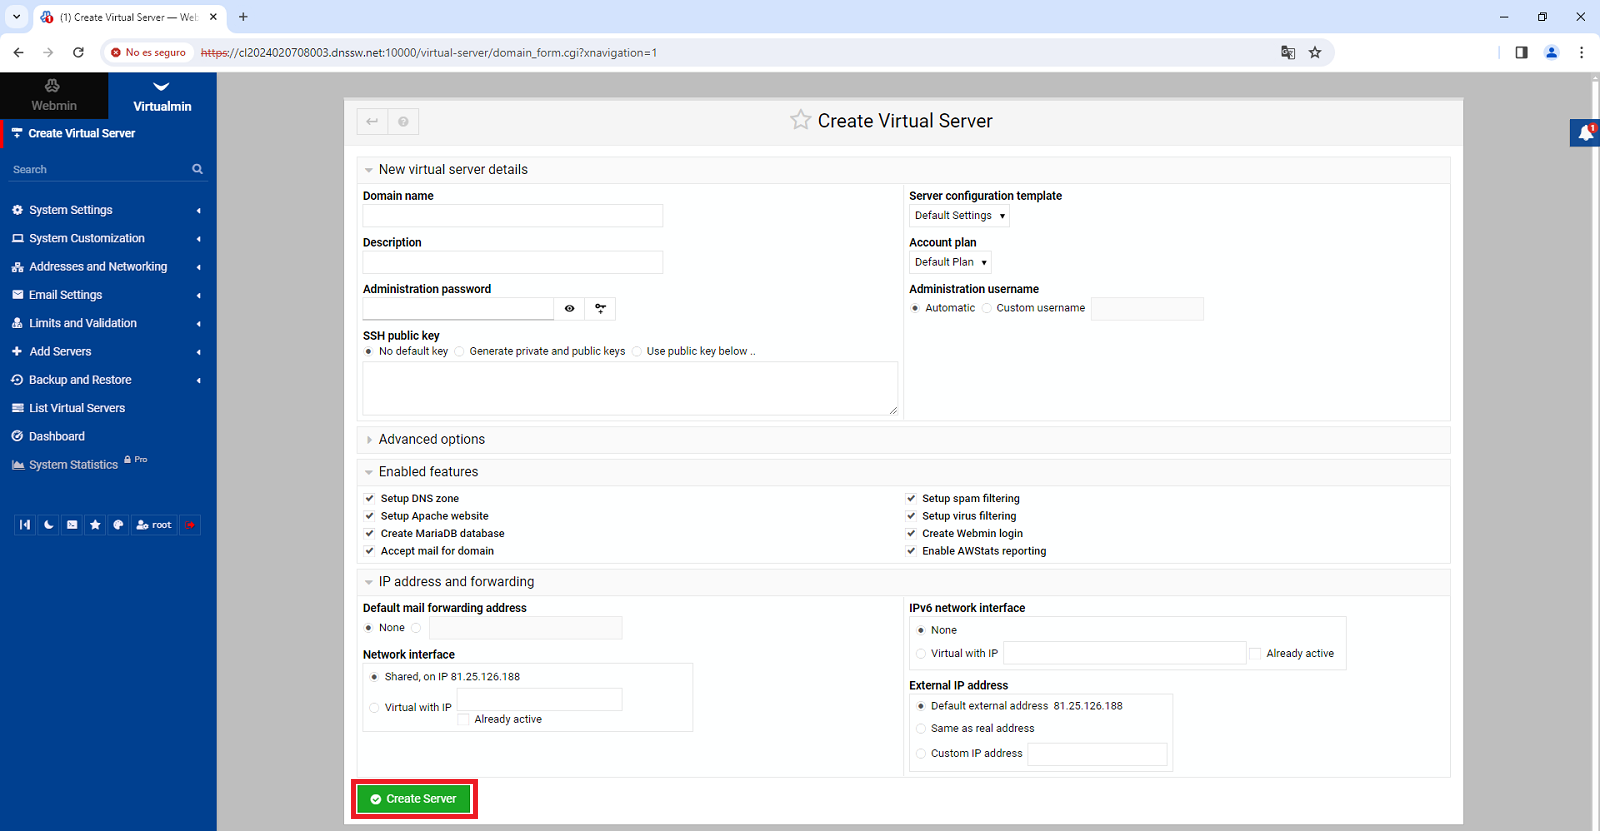
You can now click on "Add new virtual server... " to start creating your first Virtualmin website!
Remember that if you don't have a Cloud server with Ubuntu 22.04 Linux operating system you can easily deploy it with SW Hosting.
cta:cloud_so_ubuntu_22