Content
Categories
- General SWPanel (38)
- Administration (14)
- Database (14)
- SSL Certificates (15)
- Cloud (59)
- Cloud Storage (2)
- Containers (1)
- Backup Copies (6)
- Mail (33)
- DevOps (55)
- Domains (33)
- FTP (6)
- Hosting (32)
- Migrate Services (6)
- DNS Registers (13)
- Security (12)
- Services (7)
- Support (5)
- Users and privileges (2)
- Web (15)
- WordPress (23)
How to migrate a Wordpress manually
Migrating a Wordpress may seem a complex task, and in a way it is. Either because you come from another provider and want to bring your website to SWHosting, because you have hired a more powerful Cloud, or for any other reason... We will help you to perform the migration in a simple way.
In this manual we cover the migration process of a Wordpress manually, this means exporting/importing the web content and database, from the source server to your hosting and make the necessary configurations for the proper functioning of the web.
1. Environment preparation
In order to perform the migration correctly you will need to export the web content and database from the source server, for this you will need to have:
1. FTP access data of the origin server.
2. Access to the database (phpMyAdmin) of the source server.
danger If you already have a copy of the web content and database (".sql" file), it is not necessary to have the above data and you can also skip the steps:
- "2. Export the web content from the source server".
- "3. Export database from the source server".
On the other hand, when importing the web content and database to your hosting you will need to have:
3. FTP access data for your hosting.
info You can follow the following manual to create an FTP account on your hosting: How to create an FTP account
4. Access data to the phpMyAdmin of your hosting.
info You will get this data later in this manual, in the step:
- "6. Import the database".
2. Exporting web content from the source server
The following steps describe in a very simplified way how you can copy the web content from the source server to your local computer:
info You will need an FTP client, a program that is responsible for connecting to the remote FTP server and managing the sending/receiving of files. The most popular FTP client is FileZilla. It is a free and easy-to-use FTP manager available for free
-
Access via FTP to the source server.
-
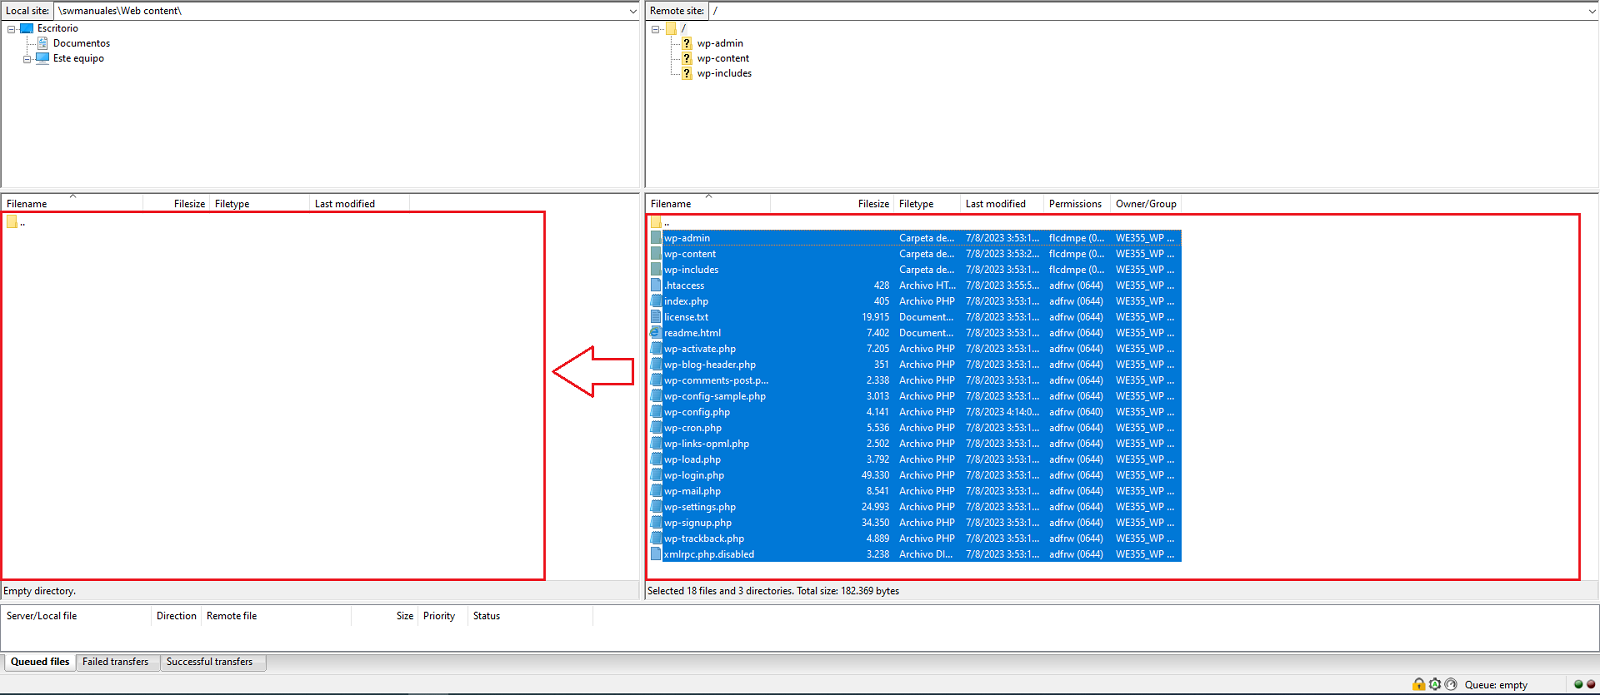
Select all the files in the root folder of the web.
danger Make sure that the hidden files such as ".htaccess" and similar are there. If you do not see them, there should be an option to view them from the FTP manager.
- Copy and save them to your local computer.
info The web content should look similar to the following image:
3. Export database from the source server
The following steps describe in a very simplified way how you can export the database from the source server and save it on your local machine, in ".sql" file format.
1.Log into phpMyAdmin on the source server.
2.Select the database.
3.Go to export, select "SQL" format and click the "Export" button.
4. Create a database on your hosting
It is recommended to create a database from SWPanel, this must have the same name as the WordPress database to migrate.
You can follow the following manual to create a database from SWPanel:
This way, the database will be manageable from SWPanel.
5. Edit the wp-config.php file
It is necessary to edit the wp-config.php file, before uploading the web, so that it makes the connection to the new database, created in step "4. Create a database on your hosting", for this:
-
Open the folder on your computer where you saved the website files you want to copy.
-
Find a file called wp-config.php and create a copy.
-
Use an editor such as Sublime Text, Atom or your computer's notepad.
-
Edit the original file (wp-config.php) and make the following changes:
Rename the database
Locate the following line:
define( 'DB_NAME', "NOMBRE" );
Here you should add the name of the new database you created in the previous step. In the example, you would have to change where it says «NOMBRE» to the name of the new database created, keeping the quotation marks.
Changes the database user name
To do this, look for the line:
define( 'DB_USER', "USUARIO" );
As in the previous step, change «USUARIO» to the user name created above, keeping the quotation marks.
Change of the database password
Finally, look for the line:
define( 'DB_PASSWORD', "CONTRASEÑA" );
Following the example, you would have to replace where it says «CONTRASEÑA» with the password of the user of the previously created database.
6. Importing the database
We now move on to the import of the web site on your hosting. The first thing to do is to import the copy of the database (file ".sql") saved on your local computer, to the database created earlier.
You can follow the following manual to import the database of your website to your hosting in SWPanel:
7. Upload WordPress files:
Once imported all the information in the new database of the hosting and you have modified the wp-config.php file according to the new data, it is time to finish and now, upload the WordPress site files that we had previously downloaded from our previous server.
info Using an FTP client, such as filezilla
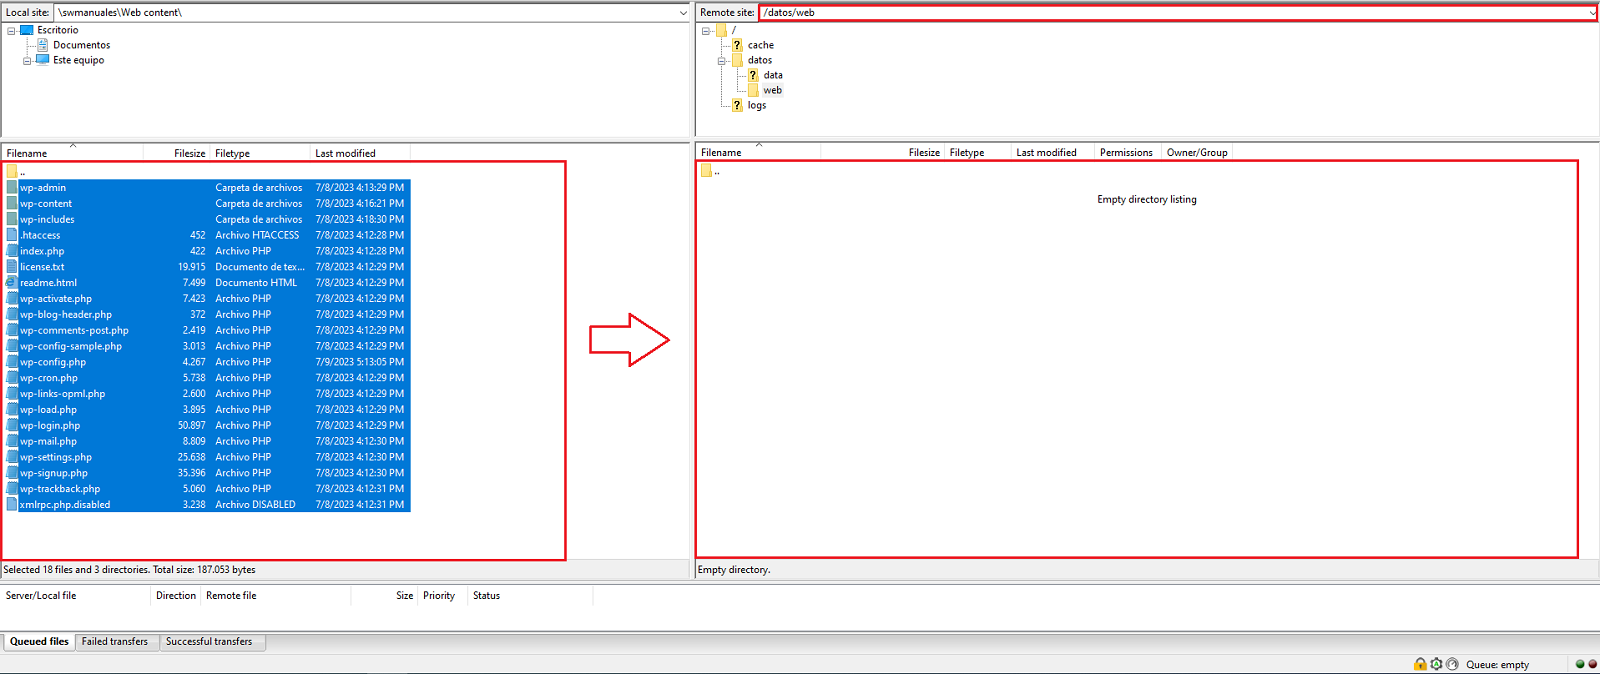
1.Access the FTP of your hosting with the data collected in step "1. Preparation of the environment".
2.Browse for the web content saved on your local machine and copy it to "/datos/web".
info The web content you will upload should look similar to the following image:
Don't worry if it takes a while, this whole process may take some time.
info We recommend that you do not delete these files from your computer even when the upload is complete, at least until you have checked for several days that nothing is missing and the site is working perfectly.
8. Check the website
It is possible that after the whole process of migrating your Wordpress, you may want to check if the website is seen correctly, to do this simply place the URL in the browser.
If you can not access it by placing the URL in your browser. Either because the domain still does not point to your hosting or any other reason.
In these cases you can make your personal computer access the content of your hosting temporarily.
To do this you must modify the 'hosts' file on your computer, we attach the following manual that explains in detail the process:
Modify 'hosts' file on Windows, Mac and Linux
Once you check your website, we recommend you to remove the line added to the "hosts" file, as long as your computer uses the propagated DNS records.
success Done! Now you have all the information required to migrate a Wordpress manually.