Content
Categories
- General SWPanel (38)
- Administration (14)
- Database (14)
- SSL Certificates (15)
- Cloud (59)
- Cloud Storage (2)
- Containers (1)
- Backup Copies (6)
- Mail (33)
- DevOps (55)
- Domains (33)
- FTP (6)
- Hosting (32)
- Migrate Services (6)
- DNS Registers (13)
- Security (12)
- Services (8)
- Support (5)
- Users and privileges (2)
- Web (15)
- WordPress (23)
Setting up a Debian/Ubuntu/Windows server cloned from the template
By creating a Cloud using a deployment template, you will have to provision the server with a series of previous modifications in order to be able to operate with it.
⚠️ Important: When deploying a service using a deployment template, the same IP will be configured as in the server used to create it. So there may be connectivity problems until this is changed.
In the case of a Linux server, you will have to configure the IP of the server with the IP that you will find in your SWPanel or you will have received by mail.
In the case of a Windows service, also, you should use the sysprep tool to avoid problems of duplicate names / IDs within the same network.
To create a Deployment Template you can follow this manual: How to create Cloud deployment templates
To create a Cloud using a Template you can follow this manual: How to create a Cloud using a Template
Linux Server Configuration
Preparing the environment
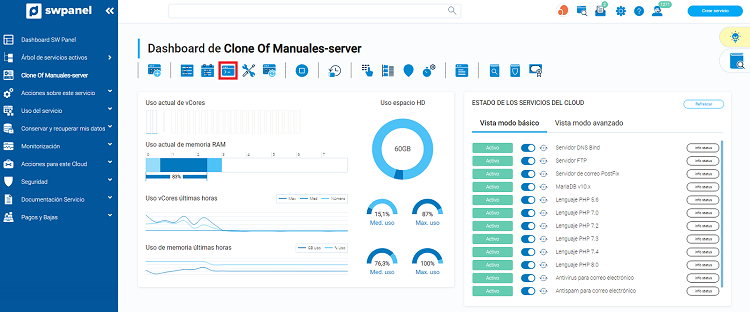
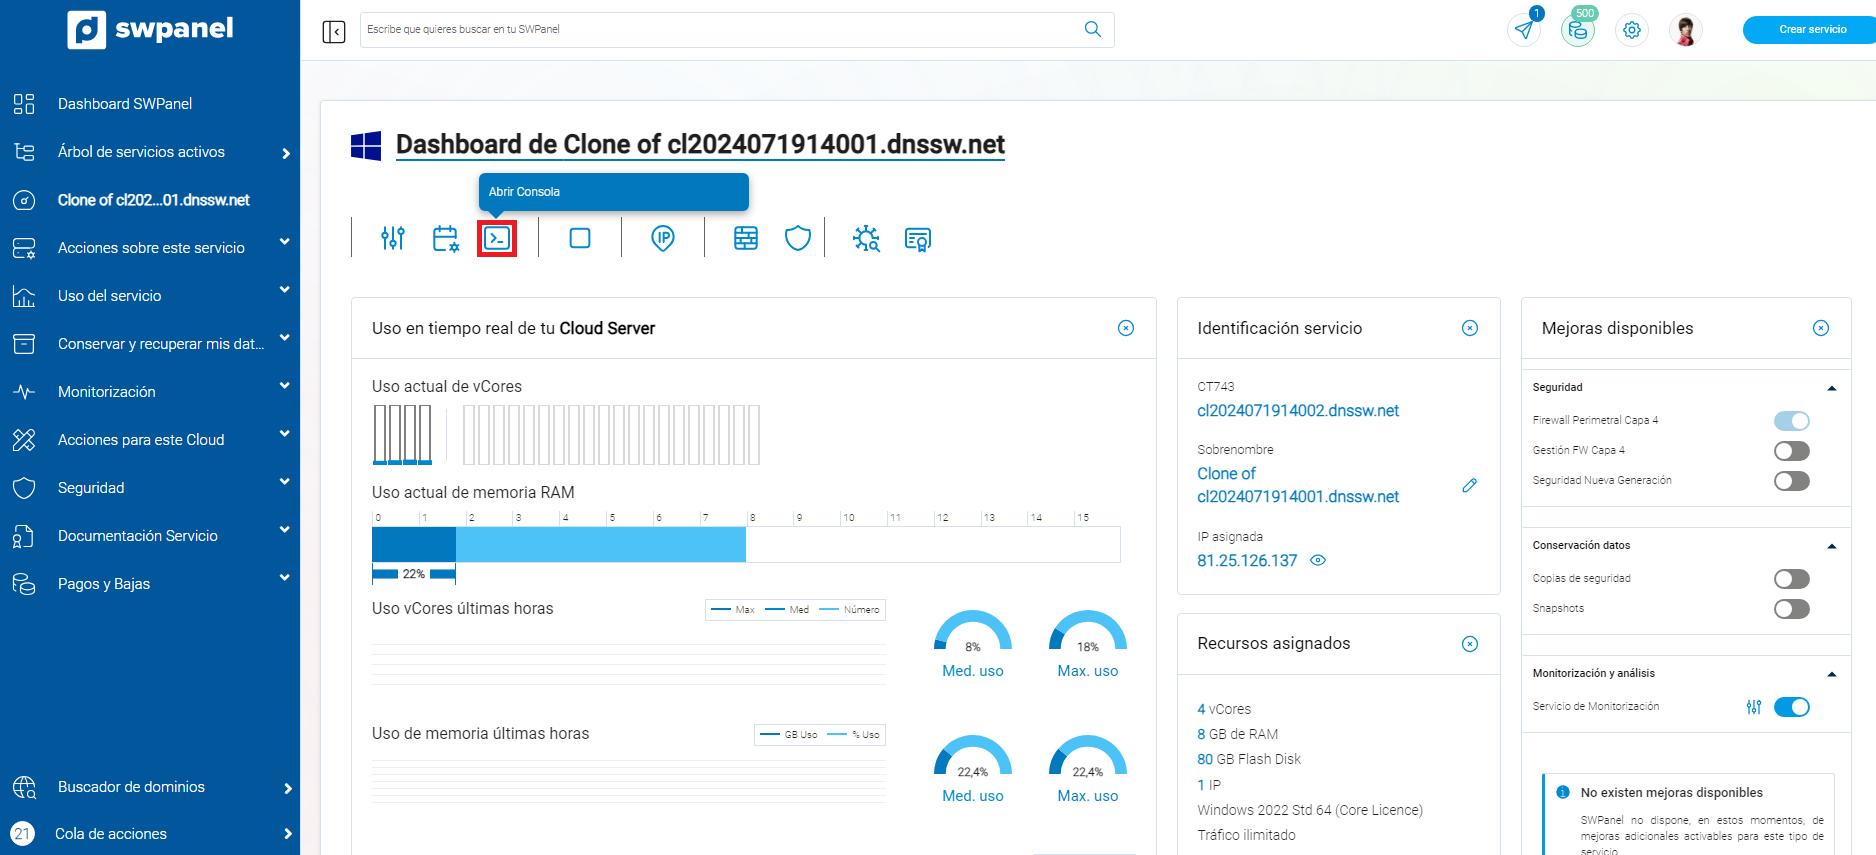
Access the dashboard of the Cloud server deployed from a template and click the corresponding icon in the SSH console.
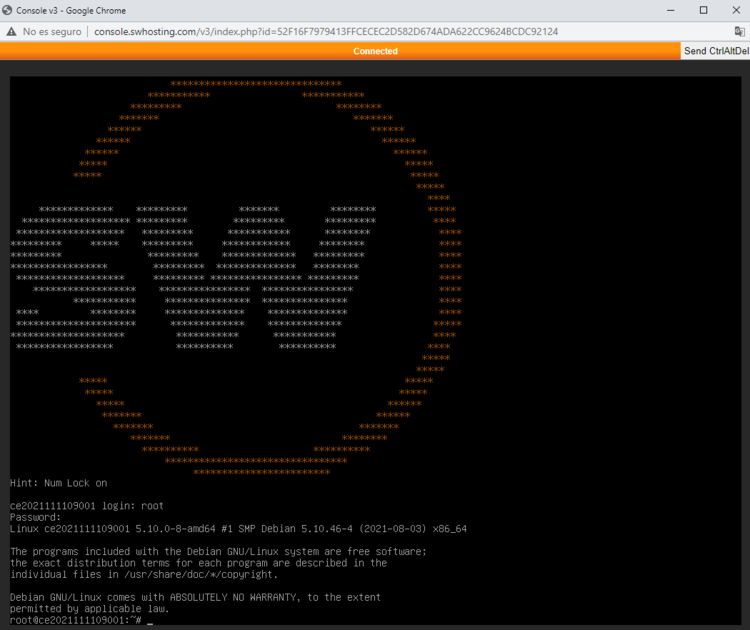
Login to the cloned machine with the root user and the password of the original machine (note the special characters in the ASCII code).
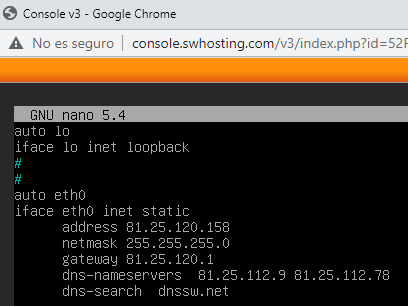
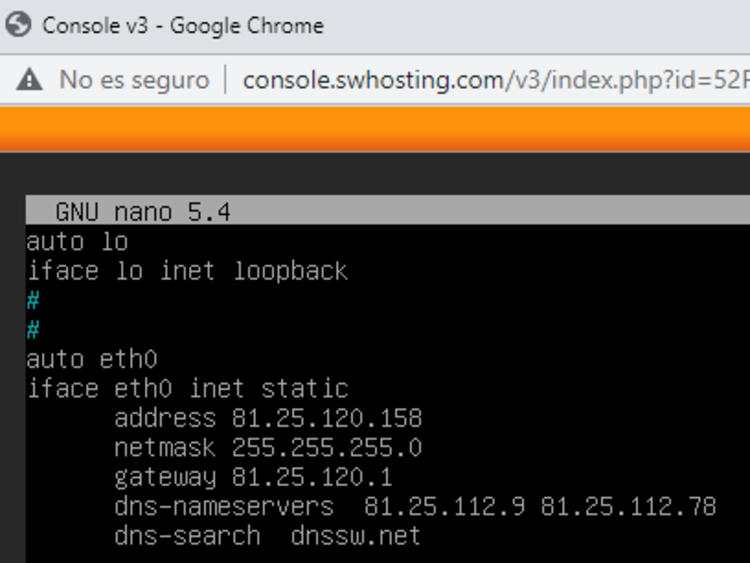
Once you have logged into the cloned server, you must modify the /etc/network/interfaces file, for example with the nano editor, and modify the existing public IP in the file by the new public IP of the cloned machine, which you will have received by mail.

nano interfaces
Interfaces file with the initial configuration.
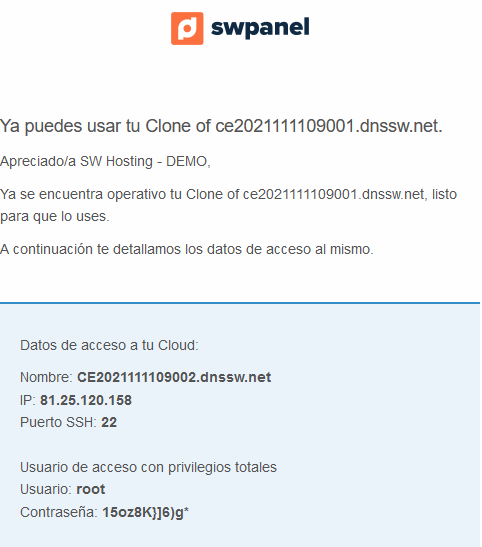
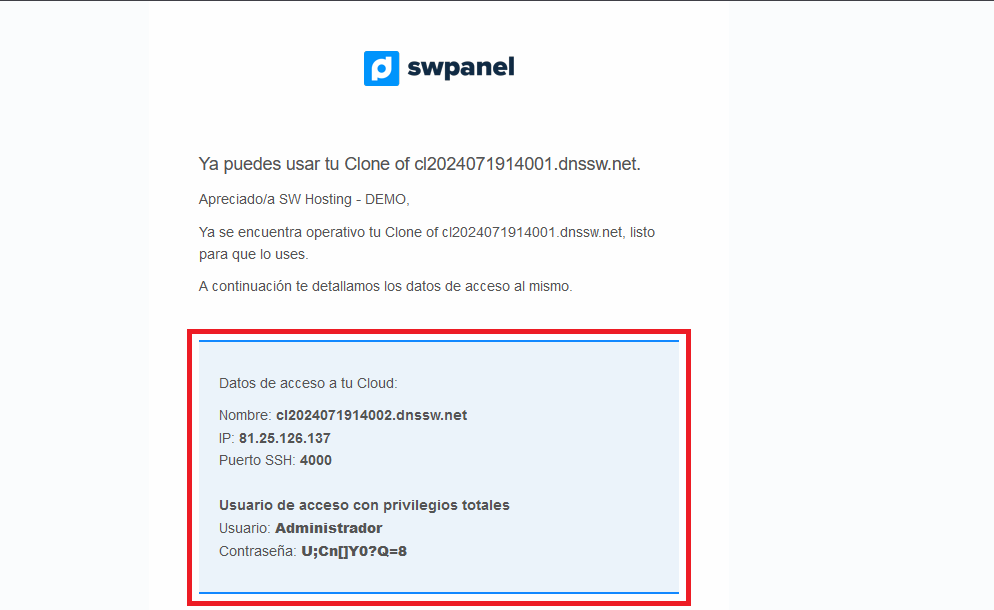
Mail with access credentials.
Updated interfaces file.
Then run the command /etc/init.d/networking restart.

You can check the modification of the newly configured IP by executing the ifconfig -a command.
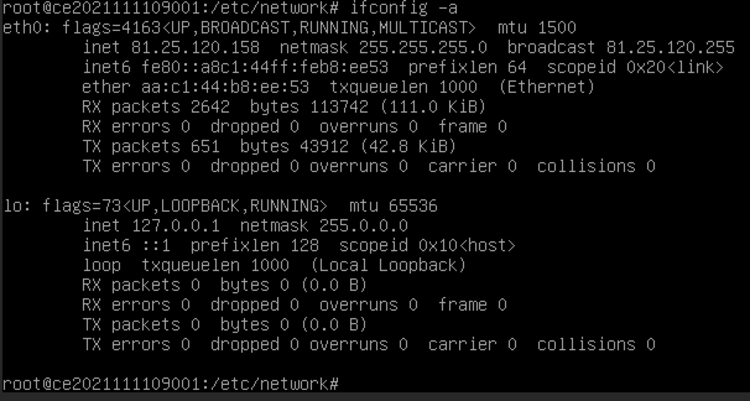
At this point, your cloned machine will have its own IP and will be able to make use of any SSH connection instead of the console provided by SWPanel.
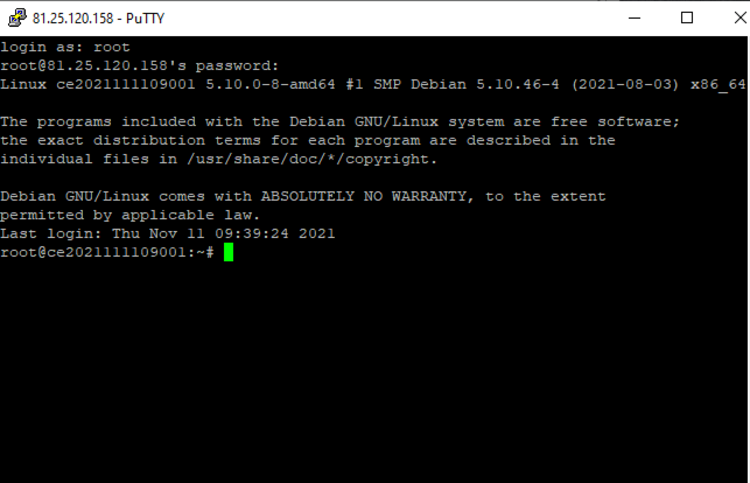
Modifying the hosts and hostname files
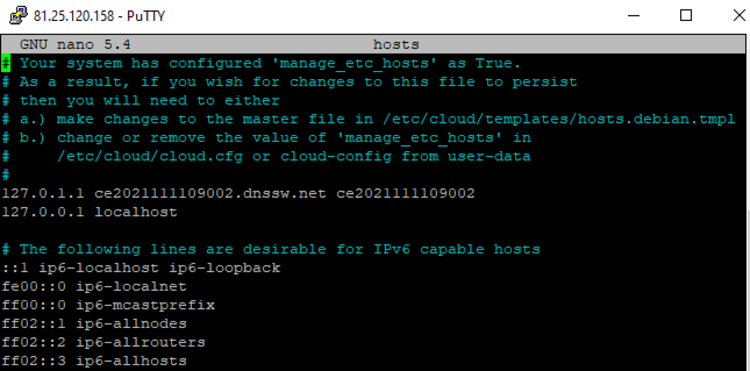
Connect via SSH to the new server and modify the /etc/hosts and /etc/hostname files by changing the name of the original server to the name of the server you received by email.
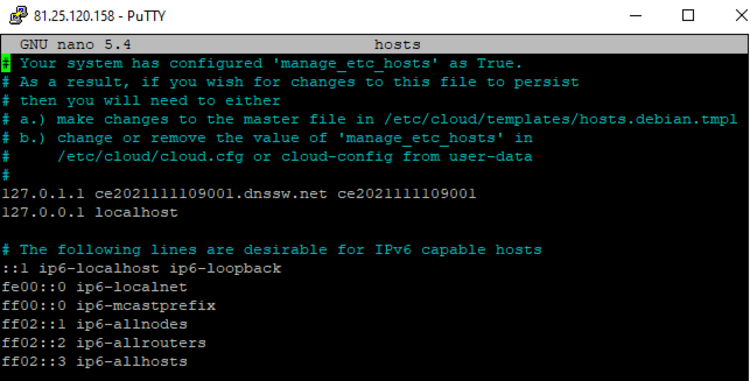
nano /etc/hosts
Hosts file with the initial configuration.
Hosts file with the final configuration.
nano /etc/hostname
Hostname file with the initial configuration.
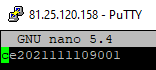
Hostname file with the final configuration.

Change root user password
Execute the command passwd root so that you can change the root user password to the one you received by e-mail.
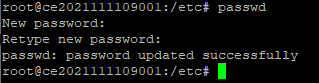
In this way, the new cloned machine will have the same IP, with its corresponding root name and password, finalizing the cloning process and starting up the cloned server.
IMPORTANT: to save the changes with the nano editor, remember to press the
control + xkeys on your keyboard.
Windows Server configuration
Preparing the environment
Access the dashboard of the Cloud server deployed from a template and click on the icon corresponding to the console.
Login to the cloned machine with the Administrator user and the password of the original machine (note the special characters in the ASCII code).
You may be prompted to press “Ctrl+Alt+Del” to continue with the login. If this is the case, you can select the button at the top right of the console that allows you to simulate the action of this combination:
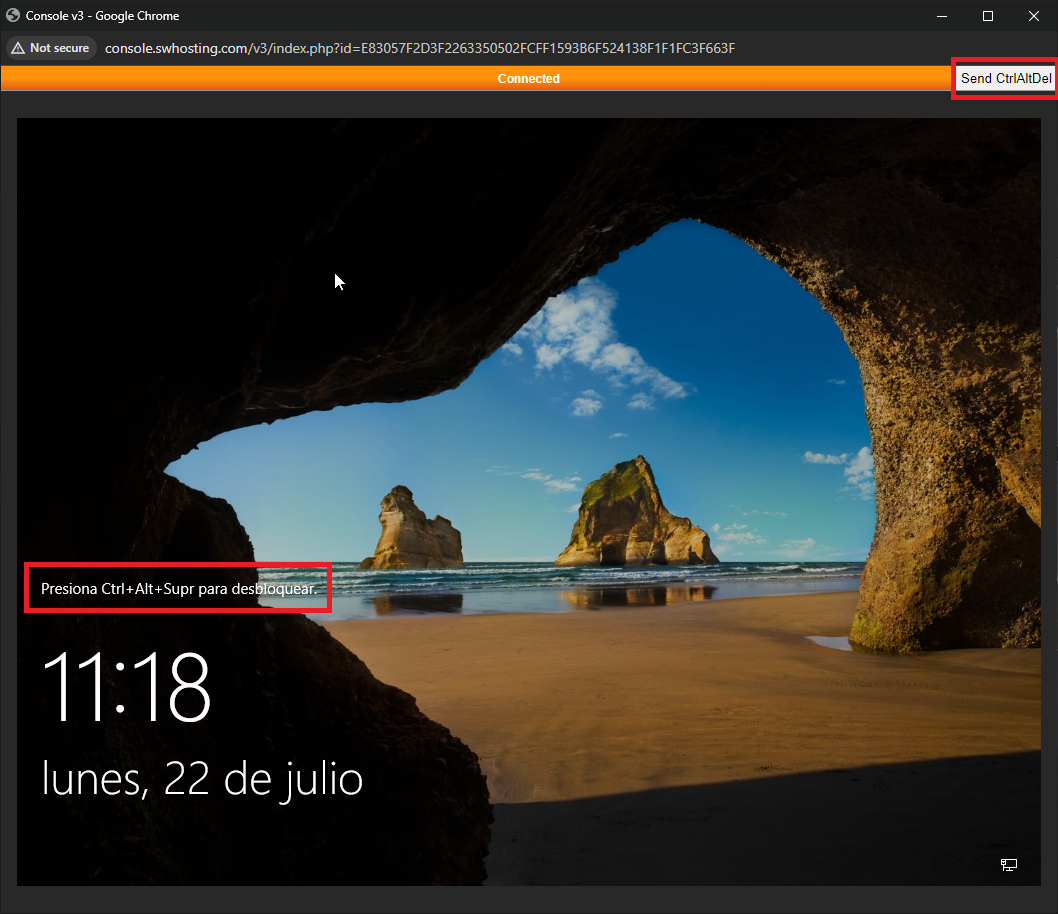
Then specify the password of the source machine.
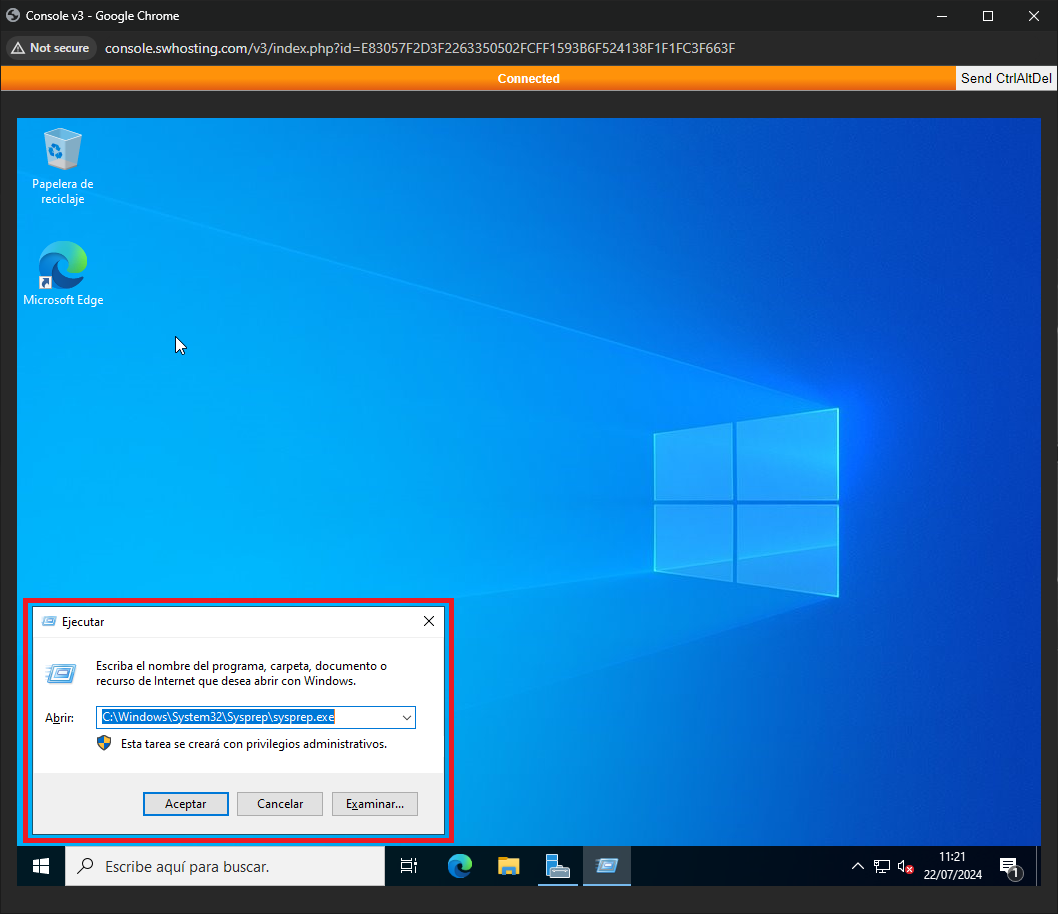
Once you are logged in, go to the Windows icon and search for “run”. Here you must specify:
C:\Windows\System32\Sysprep\sysprep.exe
As specified in the attached screenshot:
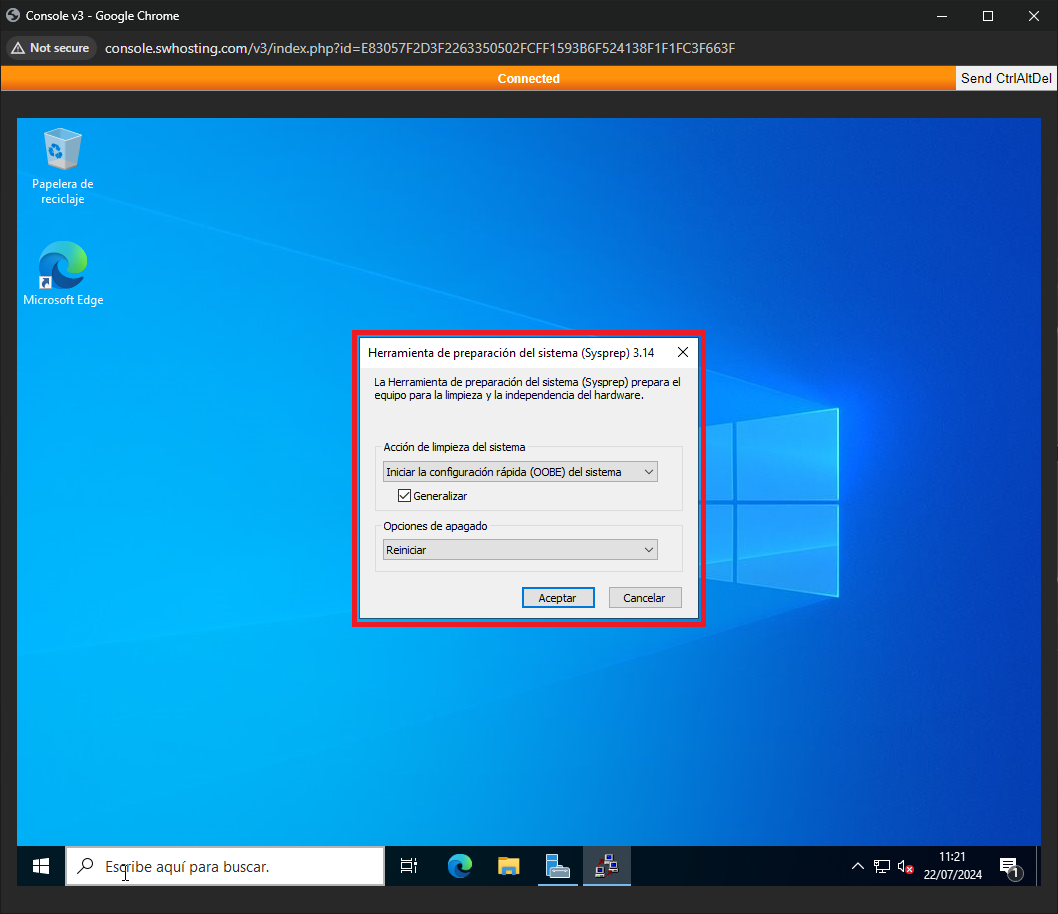
Then a new tab will open in which we will have to select:
- Start the quick configuration (OOBE) of the system.
- Generalize
- Restart
This process allows to prepare the Windows server with unique identifiers so that it does not enter in conflict with the cloned Windows. This action is necessary to avoid operational problems.
⚠️ Important: The sysprep process deletes the configuration of the Administrator user, as well as his files. If it is important not to lose them, we recommend to make a backup copy before executing the process. Here is a link with the information about the Windows sysprep process -> https://learn.microsoft.com/es-es/windows-hardware/manufacture/desktop/sysprep--system-preparation--overview We strongly recommend reading the document before running the process.
To finish and start the process, select “OK”:
Then the computer will restart and we will see that we will lose access to the console. After a few minutes, we will be able to open the console again and we will see that the following window will open:
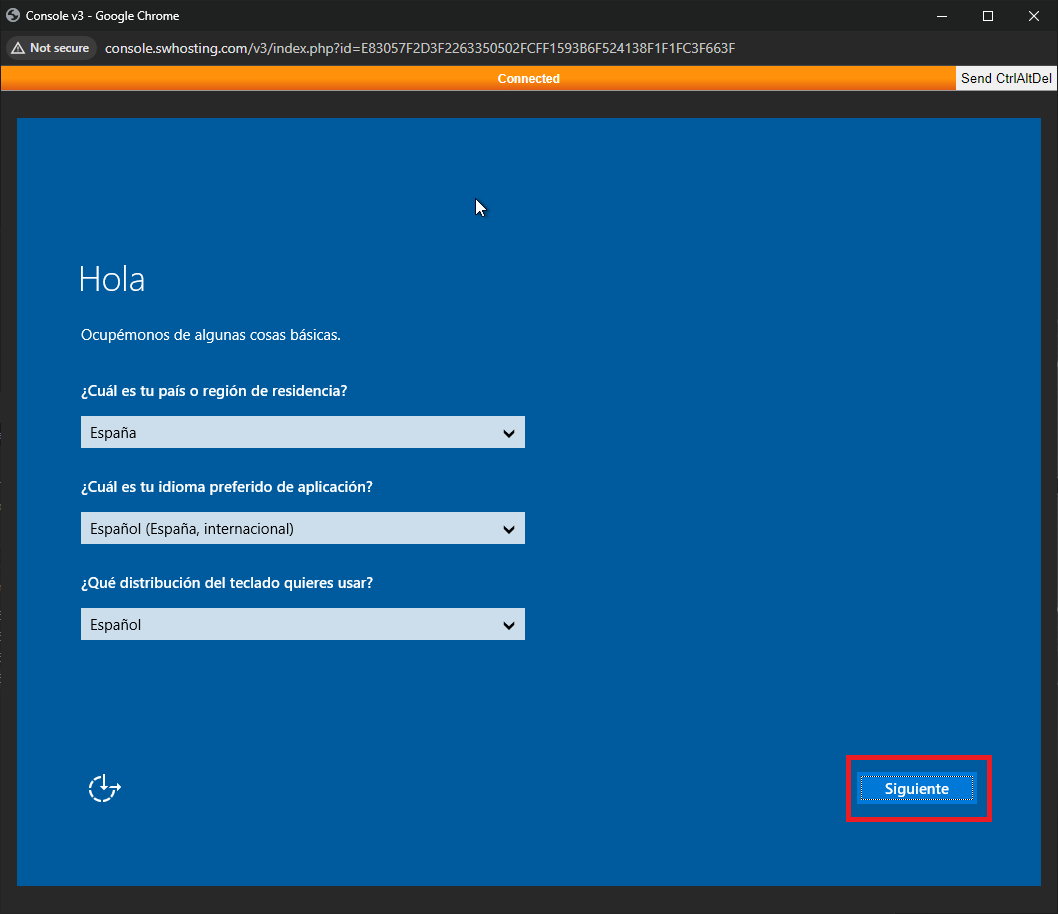
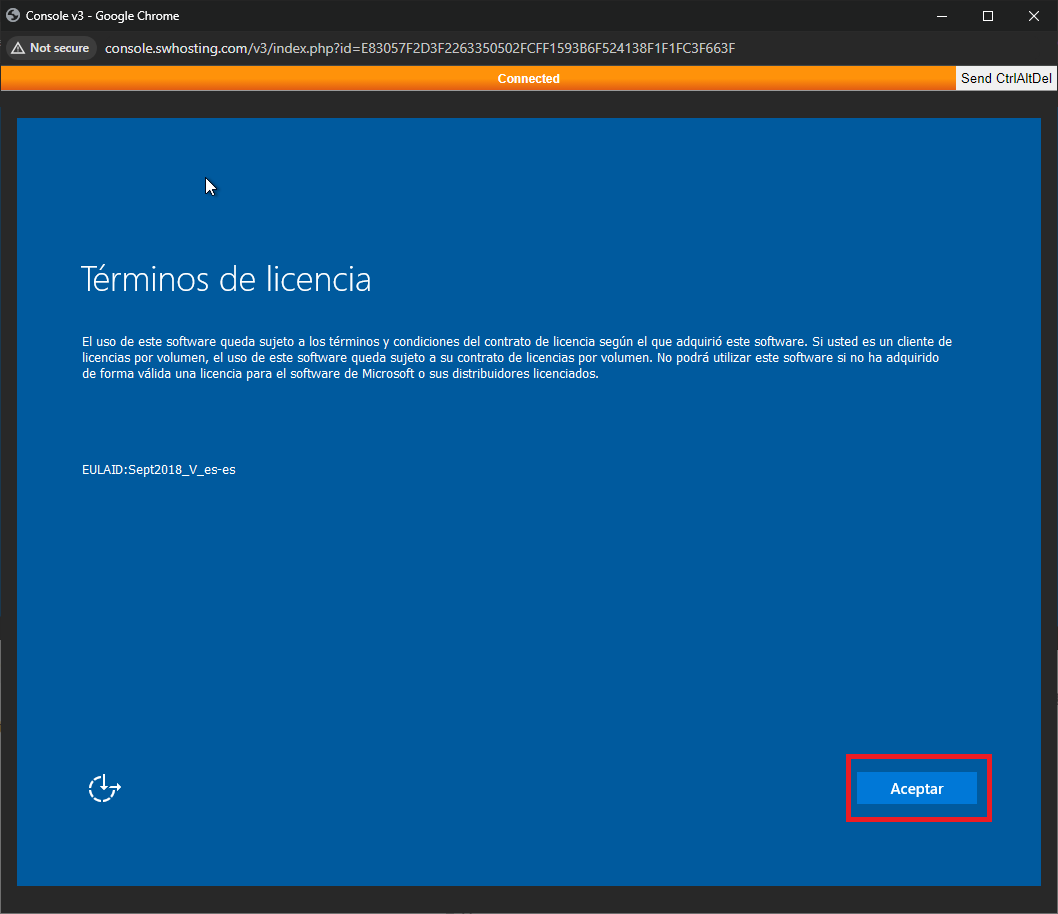
We leave the default options and select “Next”. In the next window we will have to accept the Windows terms and conditions. We will click on “Accept”:
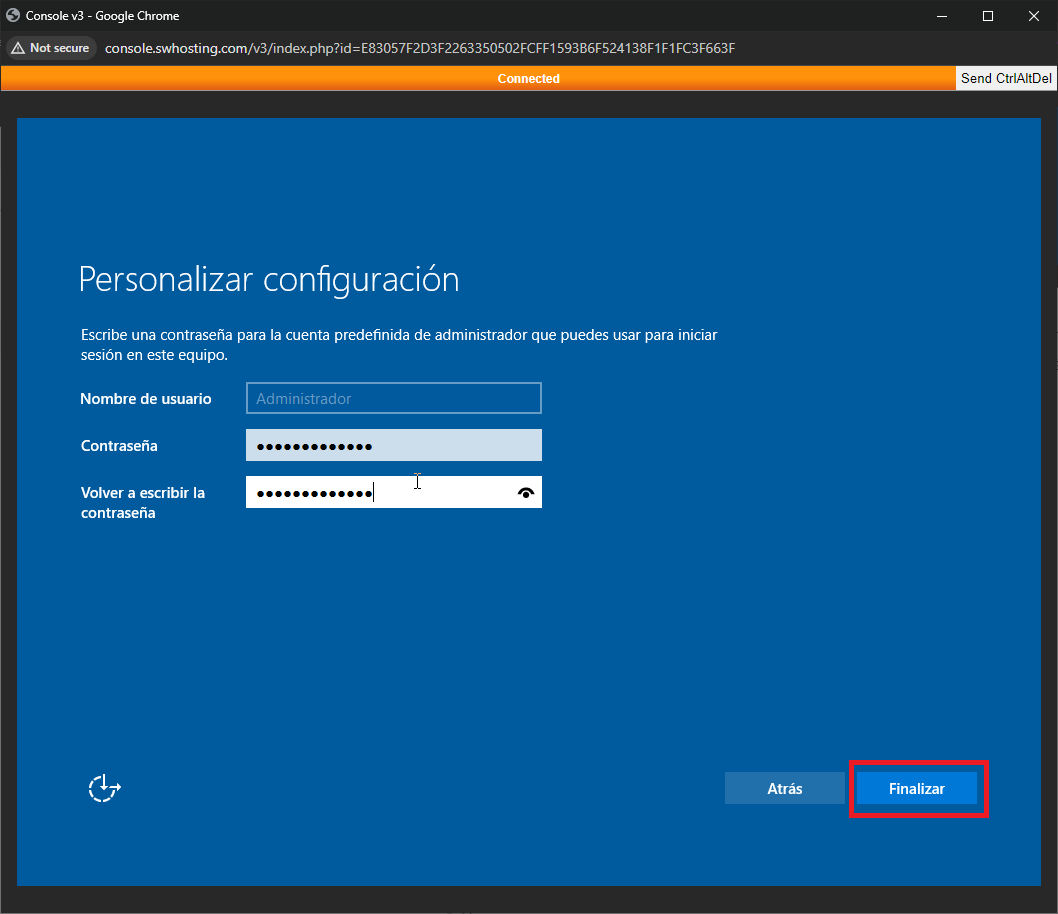
Finally we will be asked to specify a new password for the “Administrator” user. This password must be the new password you received in the email. Basically it is the credentials of the cloned machine, not the original machine:
Specify the password and click “Finish”:
Windows will finish the configuration and we will return to the login screen, where we will have to enter again the access credentials. Remember that the access credentials are those that you have specified in the previous point.
Now it remains to change the specific configuration. That is:
Change the network
We need to change the network to specify the IP of the machine itself. To do this, click on the Windows icon -> Run and specify:
ncpa.cpl
Here we right click on the network adapter and select “Properties”. Then select “Internet Protocol version 4 (TCP/IPv4) and click on ‘Properties’.
A new tab will open in which we will see that the network is in DHCP protocol. We must check the manual option (Use the following IP address” and specify the IP that we have received by e-mail. The subnet mask is set to “255.255.255.0” and the “Default Gateway” is set to the default value. As for the DNS, we specify “81.25.112.78” and “81.25.112.9”. If the cloud is located in ROOM B (with IP 185.X.X.X.X) “185.61.124.25” and “185.61.124.26” must be specified as DNS. Other DNS can be specified if desired.
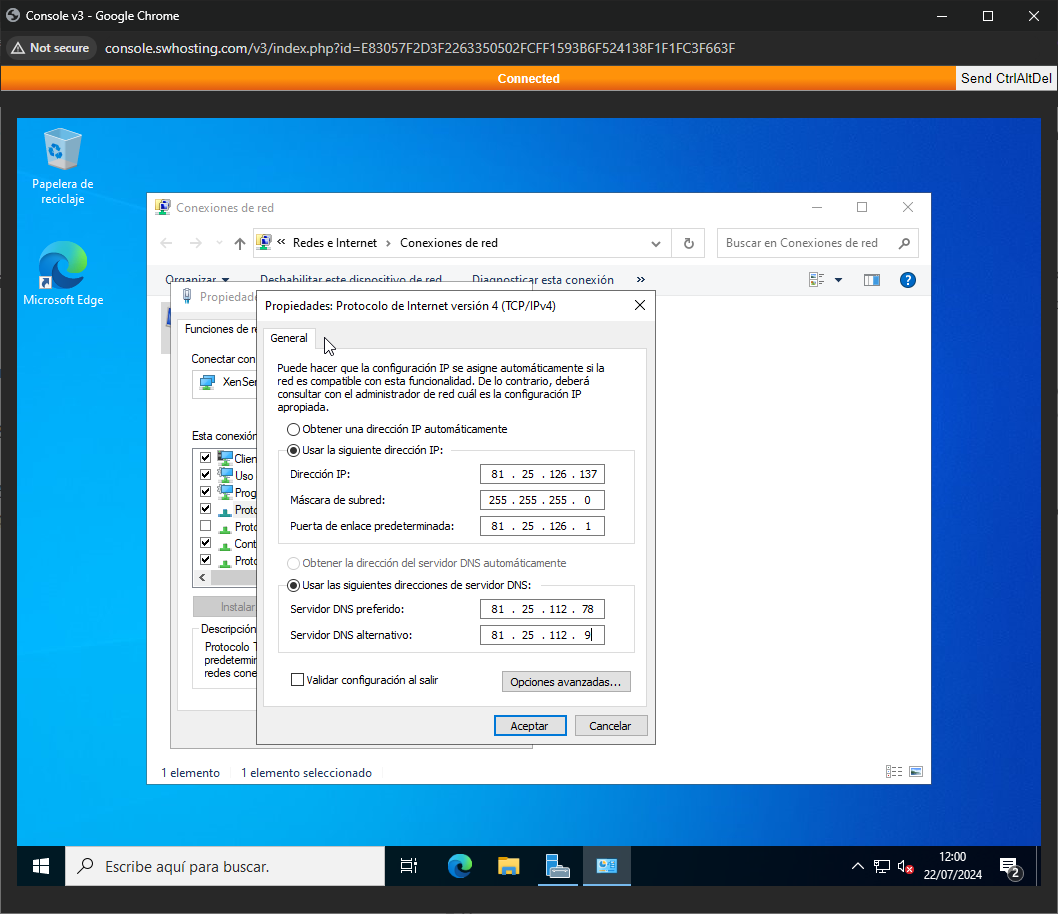
Click “Accept” and the network will be configured.
Change the hostname
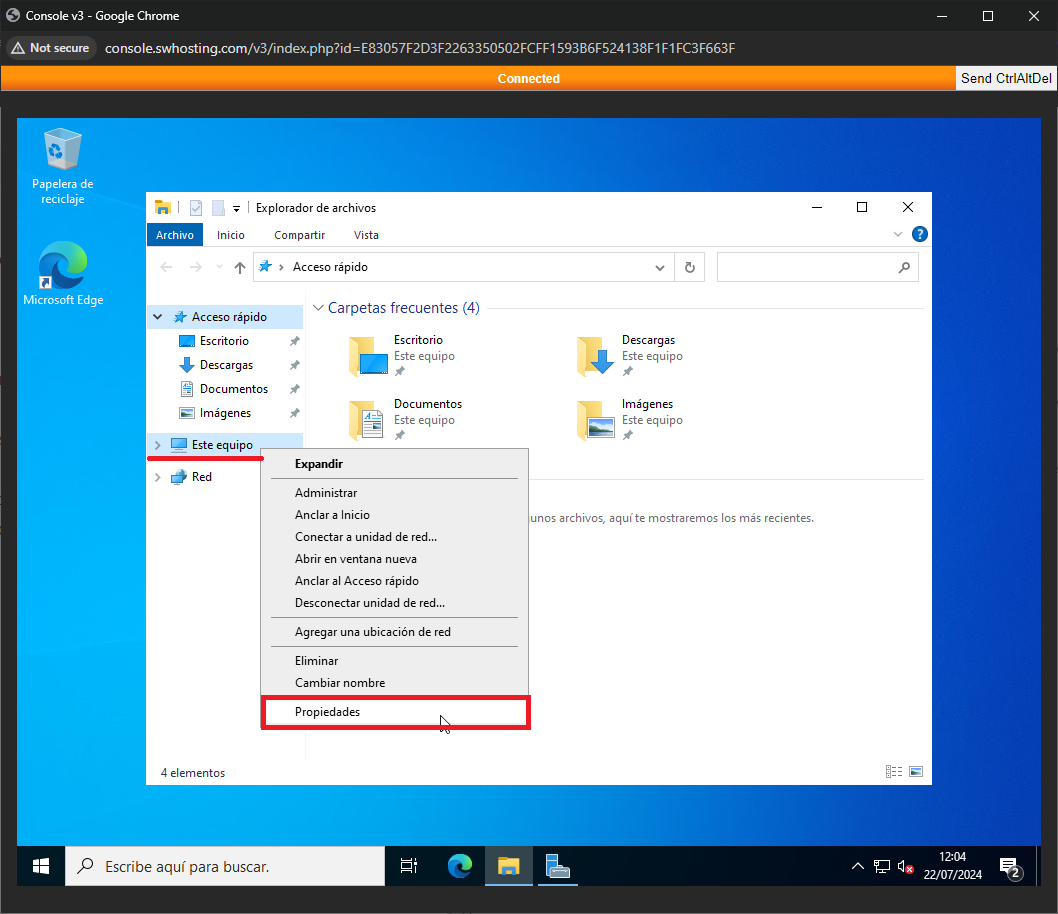
Another step to carry out is to change the hostname, since the sysprep process applies a random hostname. We access the server and, in the Windows icon, we look for “run”. In the new tab we specify “explorer.exe”. A new tab with the “Windows Explorer” will open. In the left side menu, select “This computer”, right click and select “Properties”:
Then a new tab will open. Here we will have to scroll down until we find the option “Rename this computer”. Click on it and specify the new name (it has to be the same as the one in the e-mail with the login data. The name must be set without the “dnssw.net”):
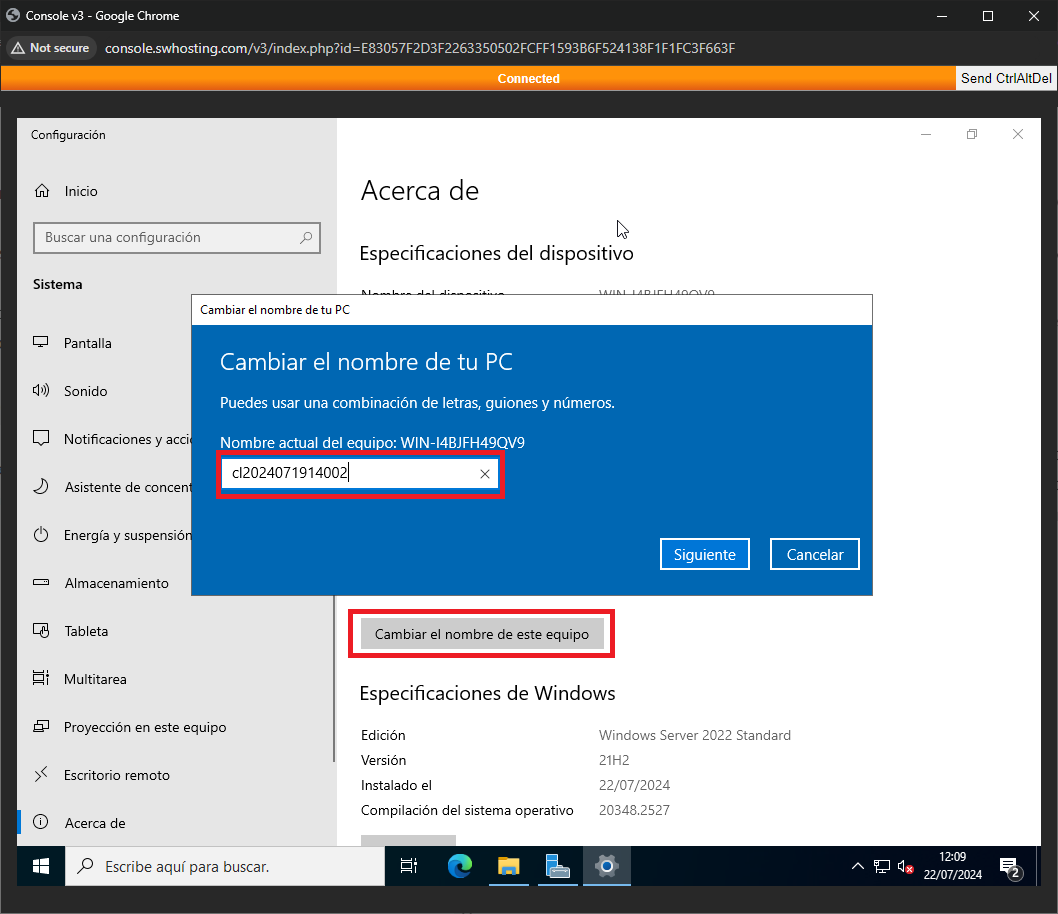
Click “Next”. When prompted, select “Restart now”.
Once the steps have been completed, the new cloned machine will have the same IP, with its corresponding Administrator name and password, completing the cloning process and starting up the cloned server.