Content
Categories
- General SWPanel (38)
- Administration (14)
- Database (14)
- SSL Certificates (15)
- Cloud (59)
- Cloud Storage (2)
- Containers (1)
- Backup Copies (6)
- Mail (33)
- DevOps (55)
- Domains (33)
- FTP (6)
- Hosting (32)
- Migrate Services (6)
- DNS Registers (13)
- Security (12)
- Services (7)
- Support (5)
- Users and privileges (2)
- Web (15)
- WordPress (23)
Web Verification Guide to be performed, applicable to the process of changing servers in a Hosting Template.
In this manual we will see the checks that we must perform before and after making a server change in a Hosting template to ensure that everything continues to function properly.
Checks before changing the server(s)
Before starting with the redefinition, we will make sure that all the Hosting services are working correctly. This way, if any problems are detected after making the server(s) change, it will be easier to resolve.
1. Check that the Web site points correctly to your Cloud
The first check to perform will be to check that the server that displays the website is the one assigned in SWPanel.
info If your web server is not in SW Hosting, you should also check that the propagated data of the DNS zone is correct.
Sometimes different servers are used to display the web, mail and database, so you should check that your web is served by your web server.
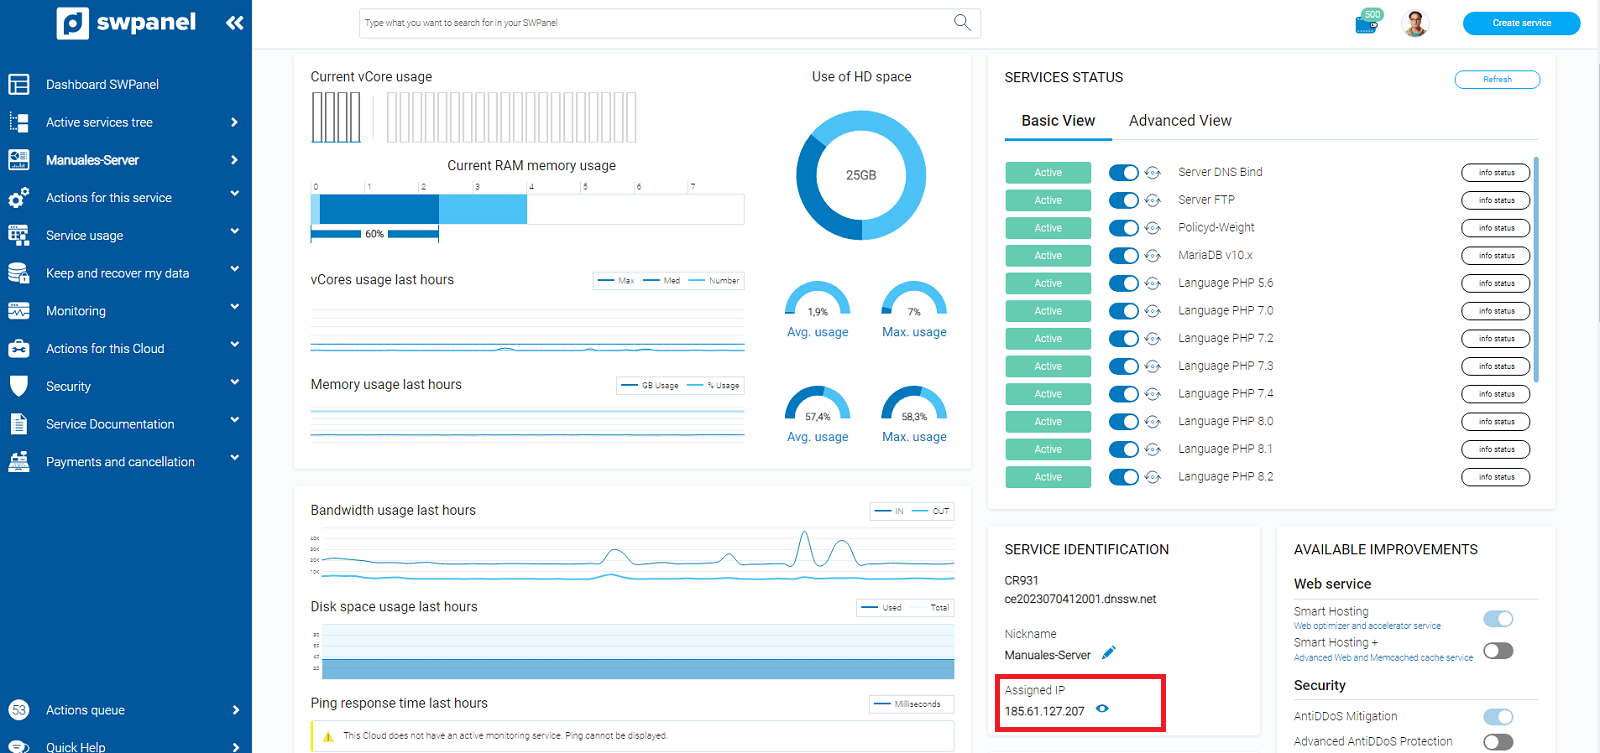
First, we will need to know the IP address of the Web server. To do this, access your server's dashboard and, in the "Service Identification" section, you can find the IP address assigned to the server:
Using a DNS record lookup tool, such as WhatsMyDNS, check that your domain's A record points to your server's IP:

info In case the propagated information is not correct, the web should not load when looking it up in a browser. To resolve this, modify the A record of the DNS zone to the correct IP of your Web server: "Gestionar registros DNS"
2. Check that the Web site loads correctly
As a second check, you should check if your website responds correctly to the requests made by users. In this way, we will make sure that before changing servers, the website works correctly and we do not drag a problem from one server to another.
If after the change of servers, the web stops responding, we will know for sure that before the process it was responding correctly.
info To solve possible problems with your website, you can see the section "Checks to be made after the server change".
Check also the navigation through the different pages of your site.
info You can test the functioning of the website to detect possible errors How to test the performance of your Hosting website in SWPanel"
3. Check the operation of the mail
In case you want to make a change in the mail server, it is advisable to check that it can send and receive mail properly before starting.
It is advisable to do this step from the mail manager that you usually use, with the mail account of your domain, and from the Webmail.
To access Webmail you can use mail.yourdomain.com/webmail
info You can make a test of the functioning of the mail to detect possible errors "How to make a test of the functioning of the mail of your Hosting in SWPanel"
4. Check the licenses of the target servers
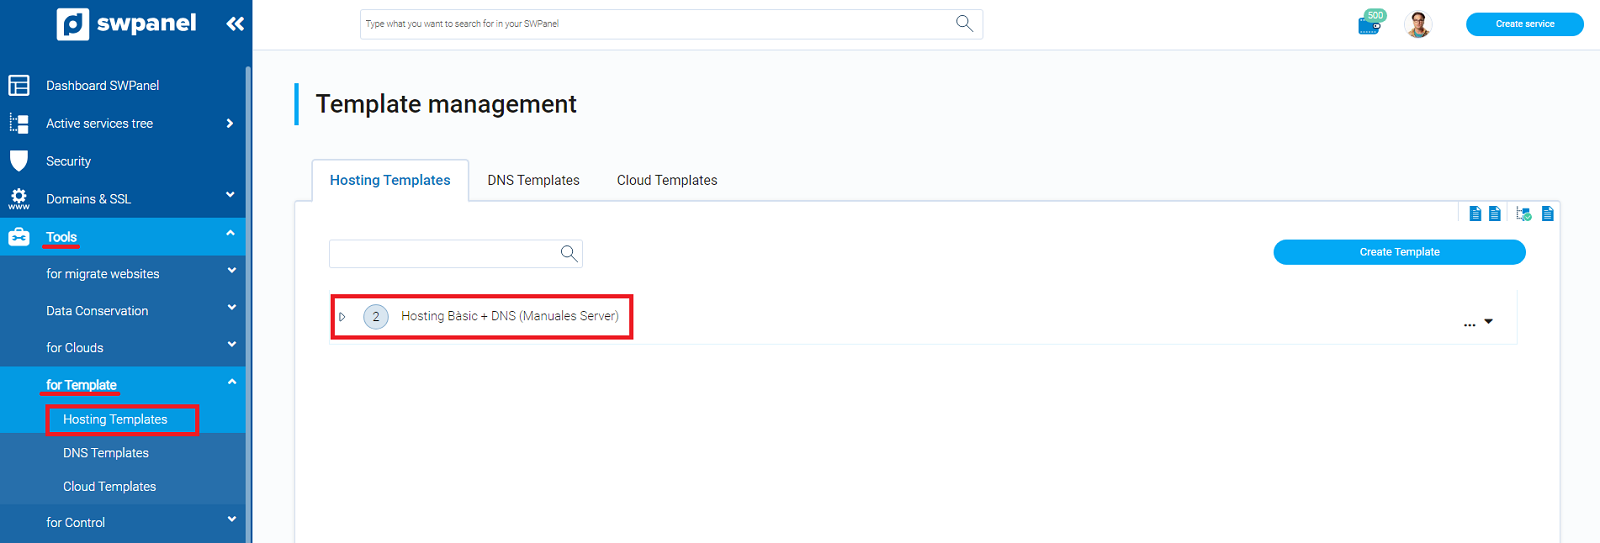
The Clouds with SWPanel have three types of licenses D5, D25 and Unlimited Hostings. You must check that the number of services associated with the template to be modified are compatible with the license of the target server. Otherwise, you will have to extend the license to be able to host them.
To do so, we will check the number of services assigned to the template:
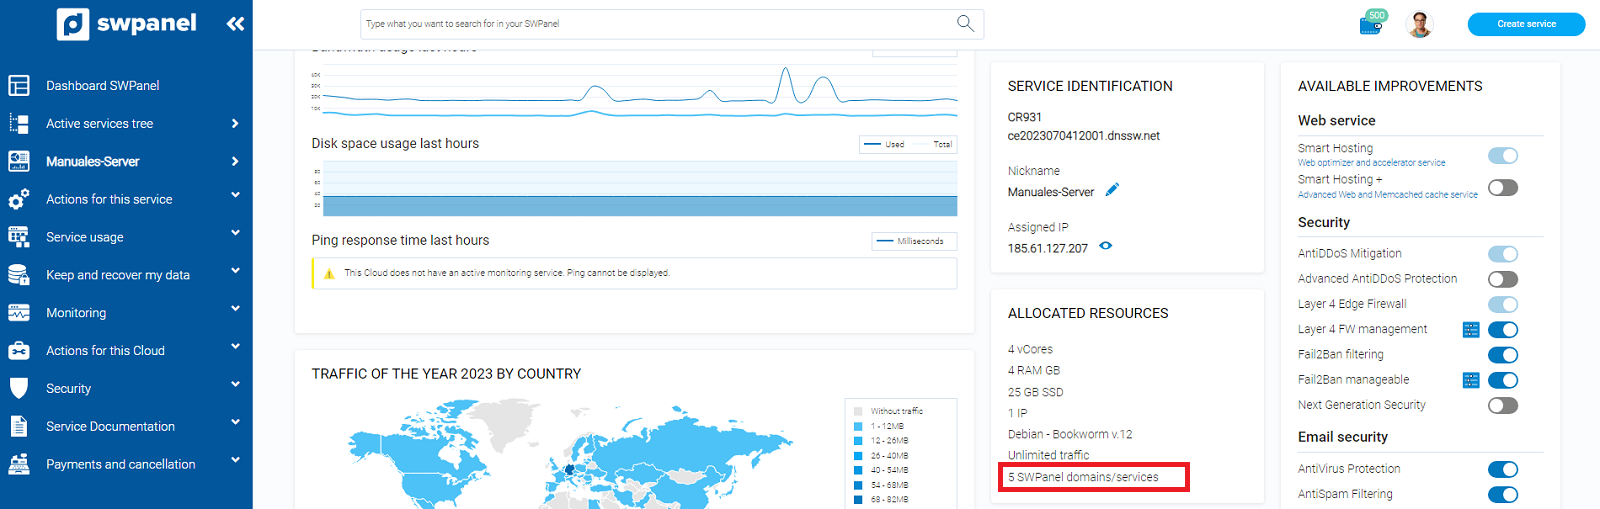
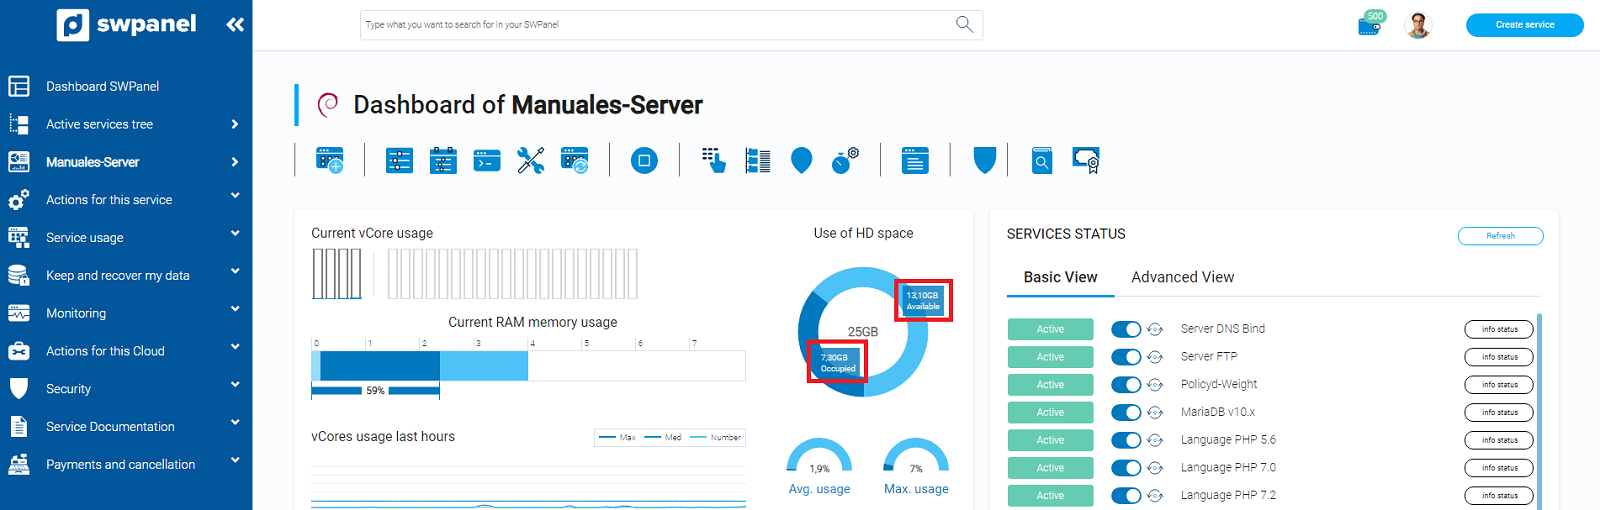
To check the server's license, access the dashboard of your Cloud server and, in the "Assigned Resources" section, you can find the license assigned to the server:
info To extend the license of your cloud server, you can follow the manual "Increase and decrease resources of my Cloud"
5. Check that the destination server has enough space to host the services.
As we are going to move the content between servers, it is advisable to check the total amount of data that we are going to move and that the destination server has enough space to host them.
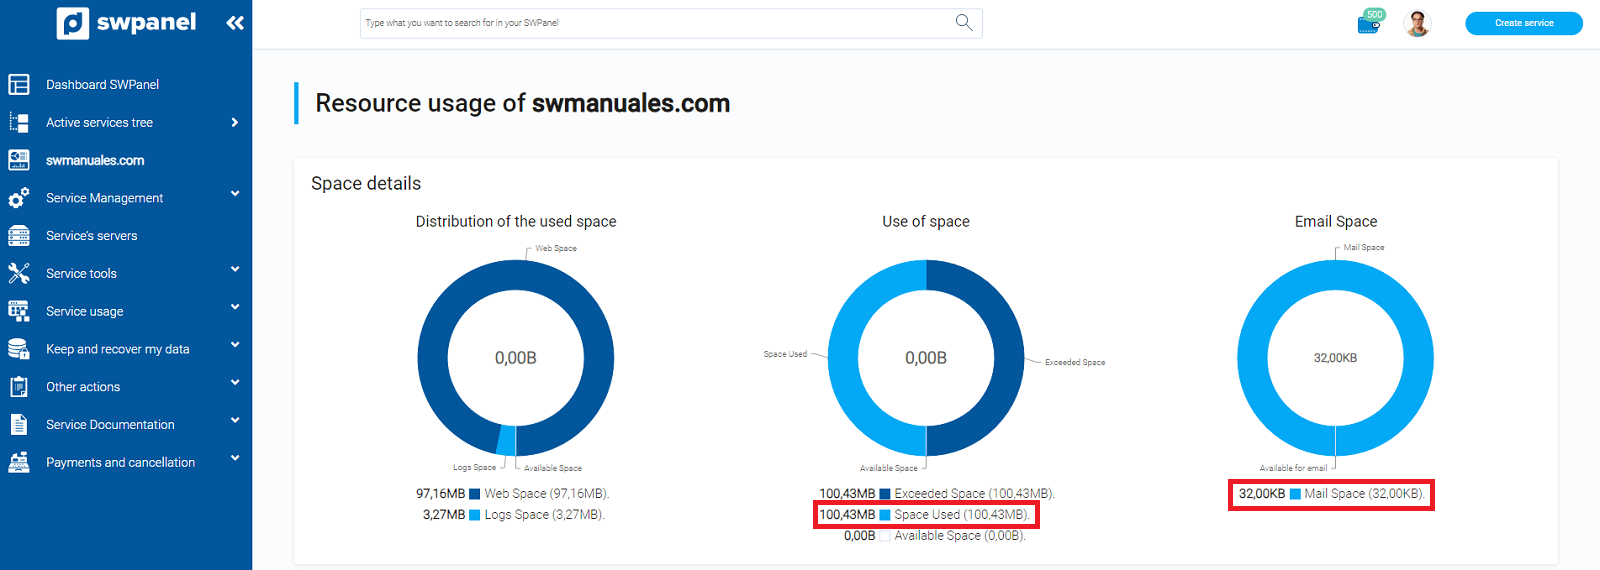
To visualize the space occupied by a Hosting service, you can do it from the Hosting service dashboard -> Service usage -> Resource usage:
To see the available space on a Cloud server, you should access its dashboard and check the "HD Space Usage" graph:
info To increase the disk space allocated to the server you can follow the manual "Increase and decrease resources of my Cloud"
Post server change checks
Once the server change process has been completed, we will perform another series of checks to make sure that everything is still working correctly.
1. Check that the Web site loads correctly
As a first check, we will check that the website loads correctly. At this point different scenarios can appear, especially if the server that we have changed has been the Web server. We will comment the most common cases:
1.1 When loading the web page, the browser displays a DNS error - "DNS_PROBE_FINISHED_NXDOMAIN" or "Not Found " error:

In this case, since we have moved the web from one server to another, we will have to check that the A record of the DNS Zone is updated to the new server.
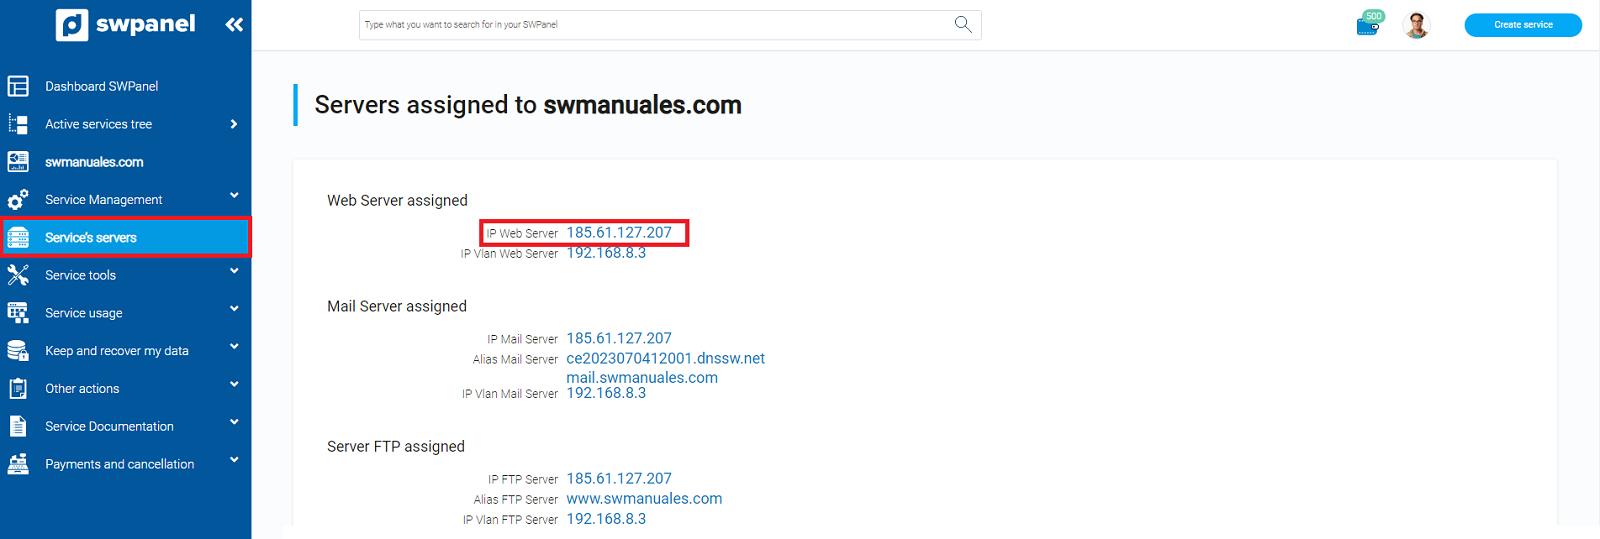
To do this, we will access the dashboard of our Hosting service and, from the side menu, we will go to the "Service Servers" section to see the IP address assigned to the Web server:
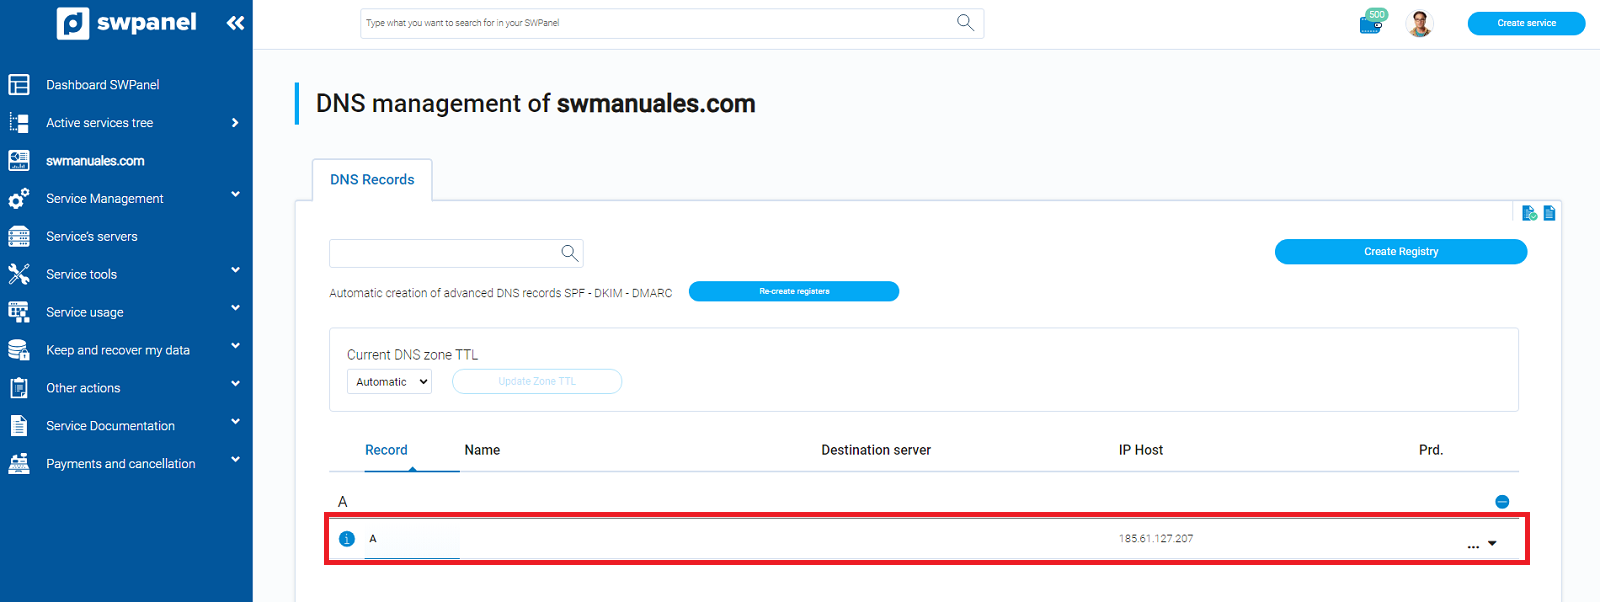
Subsequently, from "Service management" -> "DNS management", we will check that the IP configured in the A record is the same as the one we have seen in the previous section:
If the above checks are correct, it should be noted that changes in DNS Zones may take between 24 and 48 hours to propagate to the rest of the DNS servers in the world.
info To check the propagation status we can use DNS record lookup tools such as WhatsMyDNS
1.2. When loading the web page a database connection error is displayed.
In the case of experiencing connection problems against the database, check the point "2. Check the connection string against the database server " where we will see how to check the configuration of the database server in WordPress, Moodle and PrestaShop.

1.3.The page does not load in HTTPS
In case you see that the page has stopped loading in HTTPS, check point 4. SSL and TLS certificate check.
info You can test the operation of the website to detect possible errors "How to test the operation of your Hosting website in SWPanel"
2. Check the connection string against the Database server
In the case of changing the Web server or the Database server, it will be necessary to check that the data configured to make the connection against the Database server match once the server has been changed.
First of all, we must know the IP address of the database server assigned to the service.
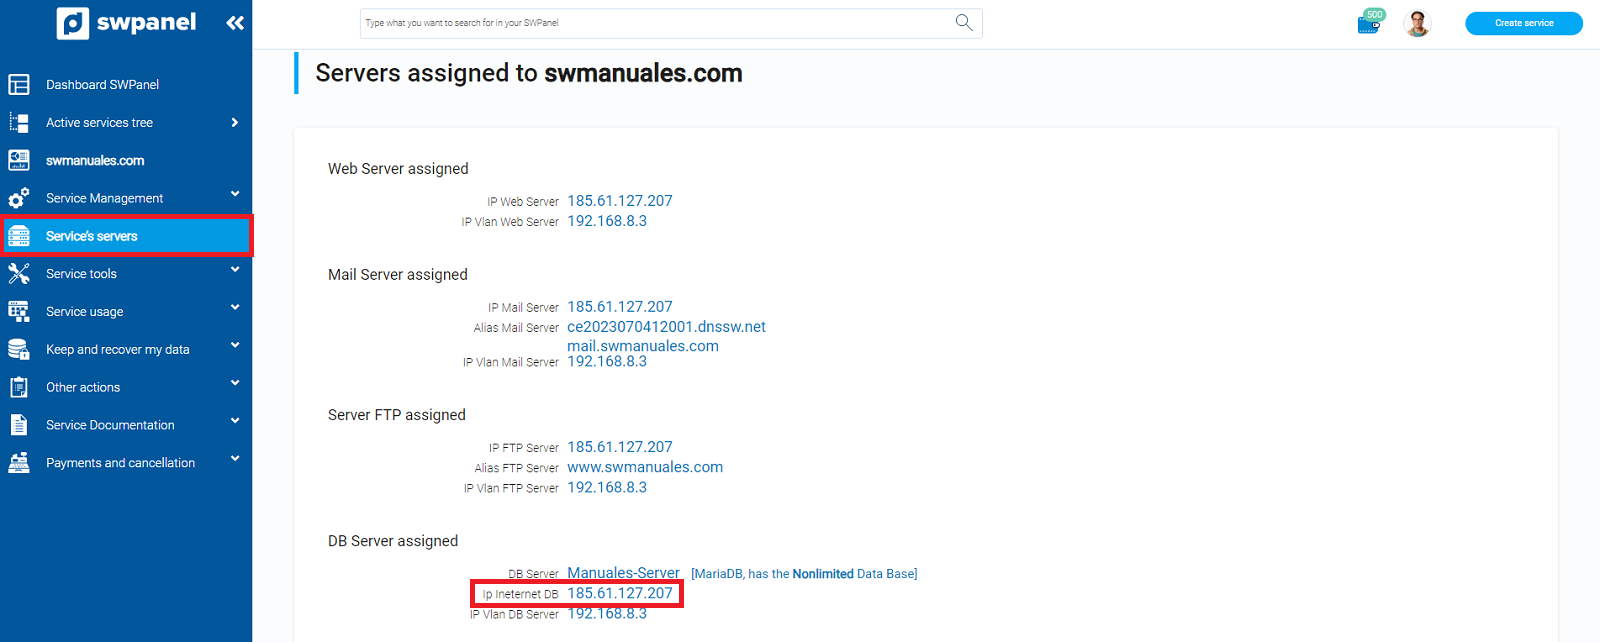
To do this, from the Hosting service dashboard, click on "Service Servers" in the blue side menu. In the "Assigned DB Server" section we will be able to see the IP address of the Database server:
2.1. Reviewing the connection string in WordPress.
To review and modify the connection string in a WordPress, we will access the dashboard of our Hosting service and click on the File Manager icon:

We will go to the datos/web/ directory and edit the wp-config.php file. In the following section we will have to modify the value of "Database hostname" by the IP address of the assigned server.
   // ** Database settings - You can get this info from your web host ** //
/** The name of the database for WordPress */
define( 'DB_NAME', '*****' );

/** Database username */
define( 'DB_USER', '*****' );

/** Database password */
define( 'DB_PASSWORD', '******' );

/** Database hostname */
define( 'DB_HOST', '185.61.127.207' );
2.2. Reviewing the connection string in Moodle
To review and modify the connection string in a Moodle we will access the dashboard of our Hosting service and click on the icon to access the File Manager:
We will go to the data/web/ directory and edit the config.php file. We will have to modify the value of "dbhost" by the IP address of the assigned server.
$CFG->dbhost = '185.61.127.207'; // eg 'localhost' or 'db.isp.com' or IP
2.3. Reviewing the connection string on PrestaShop
To review and modify the connection string in a PrestaShop, we will access the dashboard of our Hosting service and click on the icon to access the File Manager:
We will go to the data/web/web/app/config/ directory and edit the parameters.php file. We will have to modify the value of "database_host" by the IP address of the assigned server.
'database_host' => '185.61.127.207',
3.Sending and receiving mail
Both from the mail manager you normally use, with your domain's mail account, and from Webmail, we will try to send and receive mail from a mailbox external to the domain.
To access Webmail you can use mail.yourdomain.com/webmail
At this point, if the server we have changed has been the Mail server, we may experience that the mail manager cannot connect to the server.
First of all, as the mail server associated with the domain has been changed, we will check that both the MX record and the CNAME 'mail' have been updated.
To do this, we will access the dashboard of our Hosting service and in the side menu we will click on "Service Servers". In the section "Assigned Mail Server" we will be able to find the name of the mail server assigned to the service:
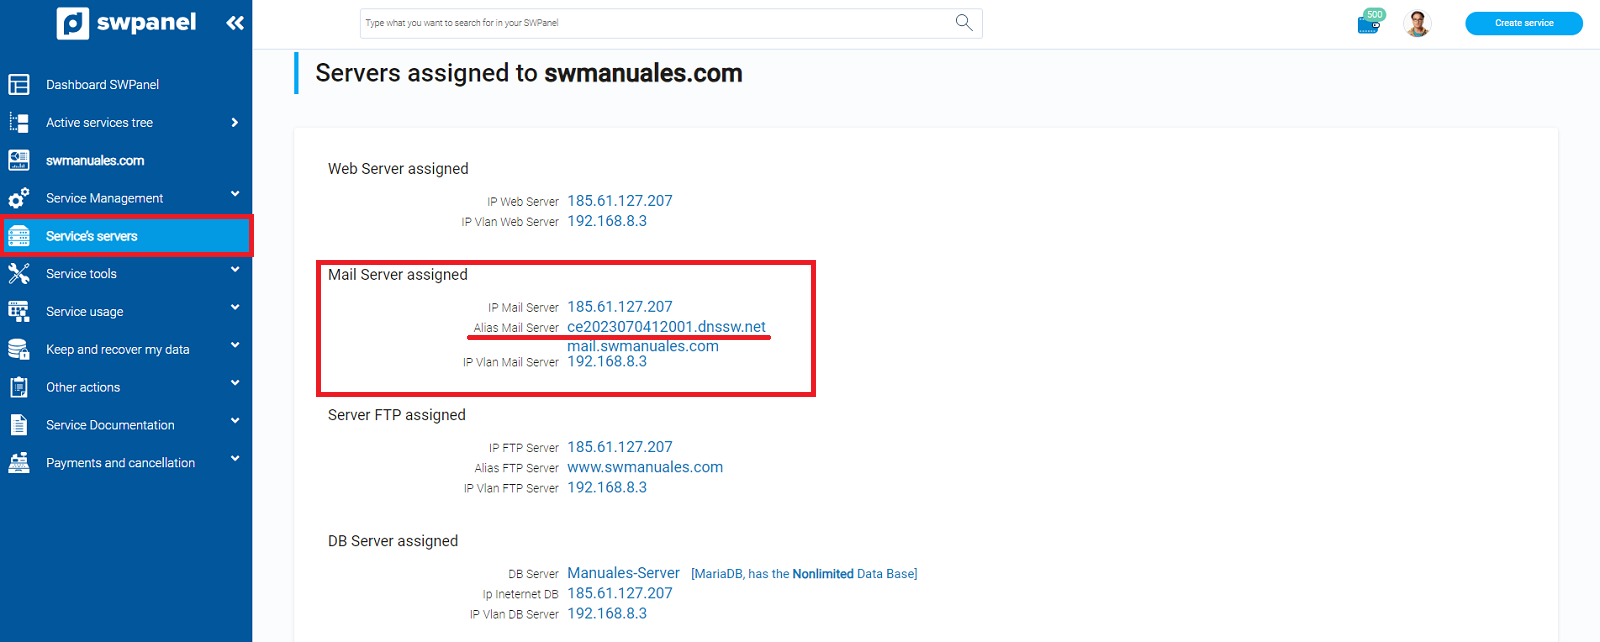
Subsequently, from "Service Management" -> "DNS Management" we will check that both the CNAME mail record and the MX record are pointing to the assigned server:

If the above checks are correct, it should be noted that changes in DNS Zones may take between 24 and 48 hours to propagate to the rest of the DNS servers in the world.
info To check the propagation status we can use DNS record lookup tools such as WhatsMyDNS
As a second check, if your mail manager is configured to connect to the server through secure ports, but the Hosting service does not have a TLS certificate, it is likely that the manager cannot connect to the server.
If this is the case, you can check the section "4. SSL and TLS certificate check ".
info You can make a test of the mail functioning to detect possible errors "How to make a test of the functioning of the mail of your Hosting in SWPanel"
4. Checking SSL and TLS certificates
In case SSL and TLS certificates have not been installed in your Hosting service, once the change of servers is done, your web will not load securely with HTTPS and you will not be able to connect encrypted to the mail server.
To check that both certificates are installed, you must access the dashboard of your Hosting service. In the "Security and SSL" section you can check that both the certificate for the web (SSL) and the certificate for the email (TLS) are correctly installed:

Otherwise, if they are not installed, you can do so by following the manuals below: