Content
Categories
- General SWPanel (38)
- Administration (14)
- Database (14)
- SSL Certificates (15)
- Cloud (59)
- Cloud Storage (2)
- Containers (1)
- Backup Copies (6)
- Mail (33)
- DevOps (55)
- Domains (33)
- FTP (6)
- Hosting (32)
- Migrate Services (6)
- DNS Registers (13)
- Security (12)
- Services (7)
- Support (5)
- Users and privileges (2)
- Web (15)
- WordPress (23)
Restore a backup copy to my Cloud
The time has come. You have contracted the backup copy in case something happens... and it's time for data recovery!
cta:cloud_app_swpanel_smart_d5
Procedure
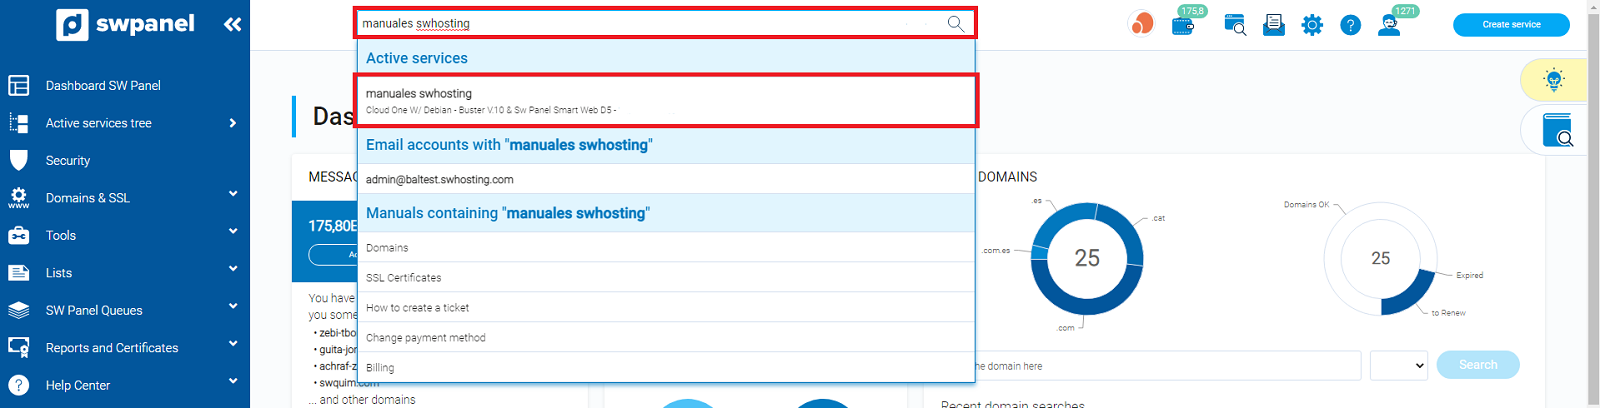
Inside your SWPanel use the search engine to find your Cloud, ours is called SWHosting Manuals and yours will have a different name. Once you find it, select it.
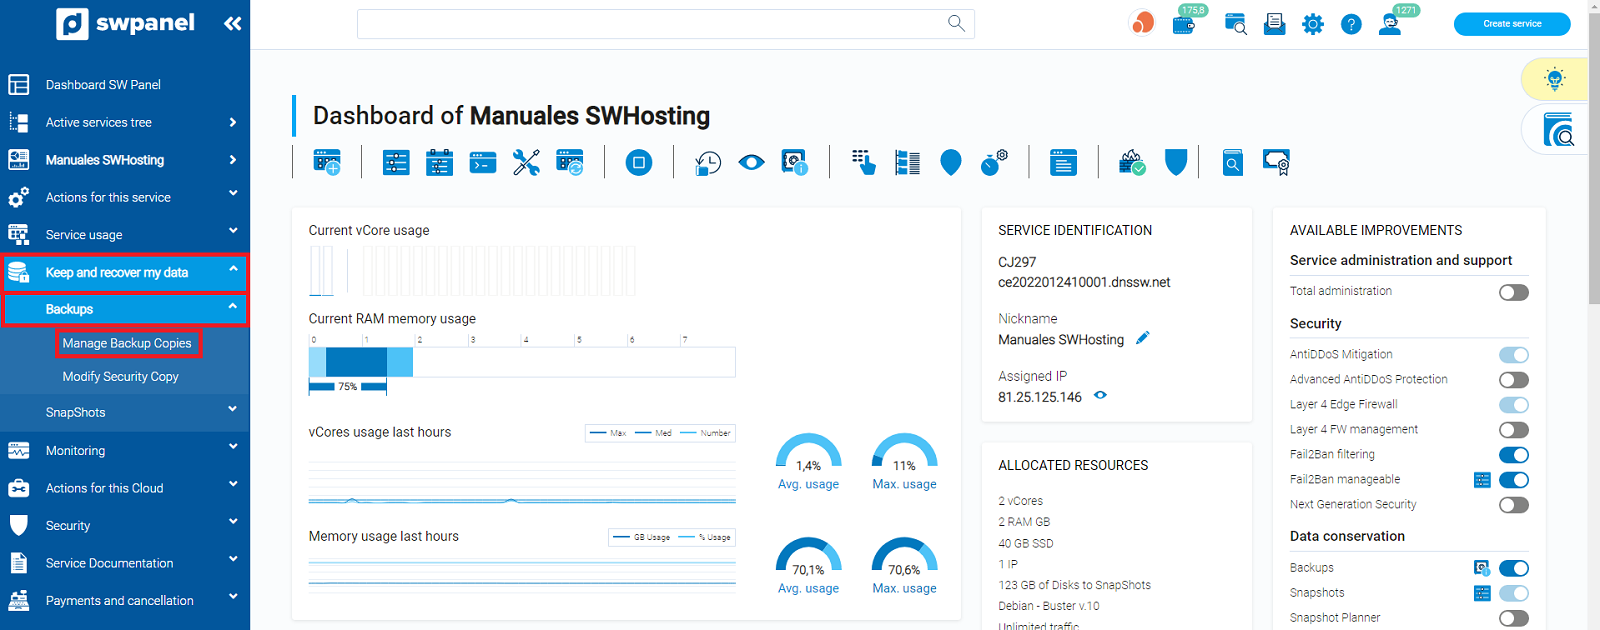
Go to Save and recover my data > Backups > Backup management (left menu):
A list with the last backups performed will appear. Click on Restore Backup:
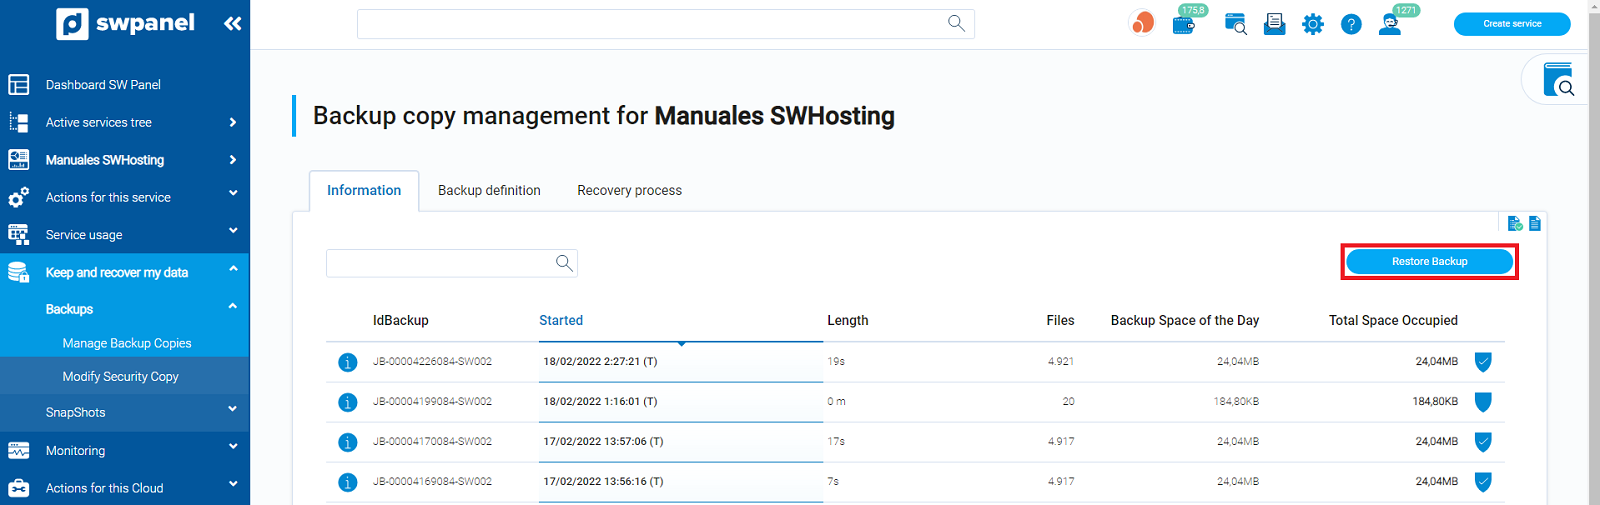
When you click on this button, the following screen will appear:
cta:cloud_app_swpanel_smart_d5
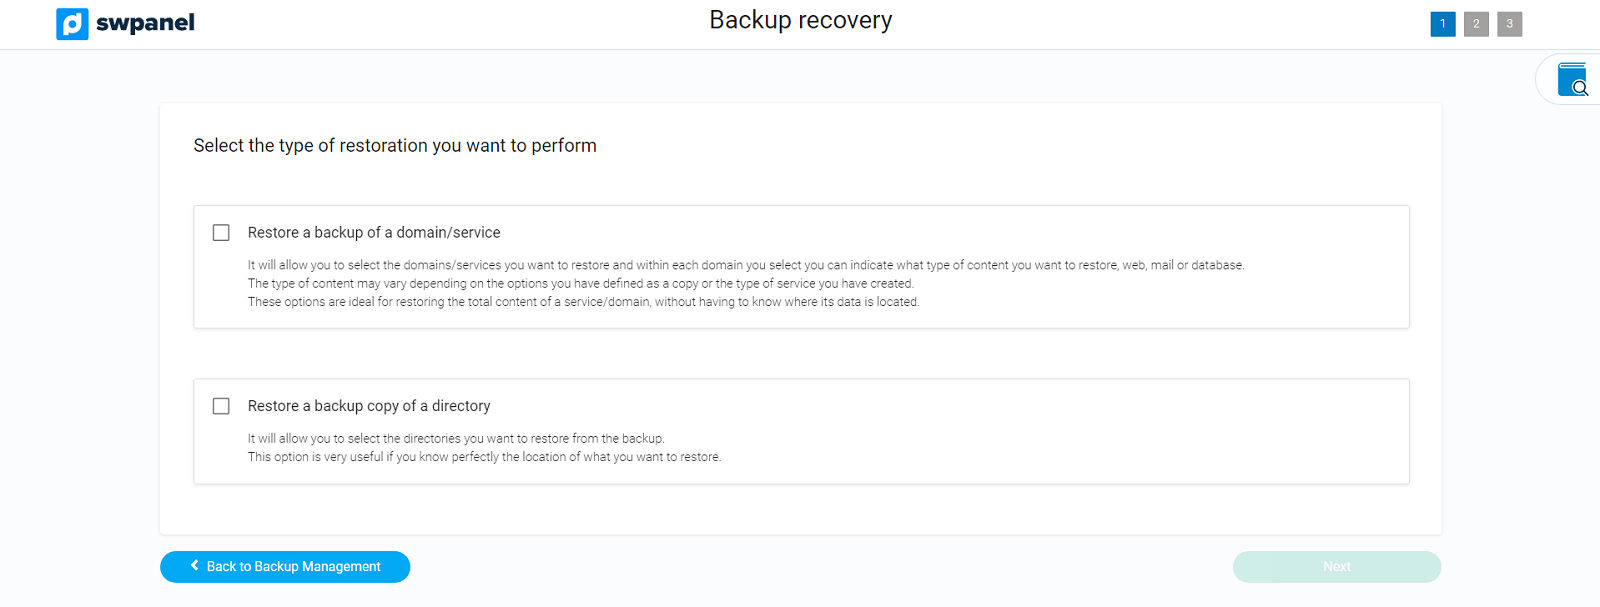
Restore a copy of a domain/service
With this option we will be able to restore a domain or a complete service. We will be able to choose between the different available copy dates and what content we want to restore (web, mail or database):
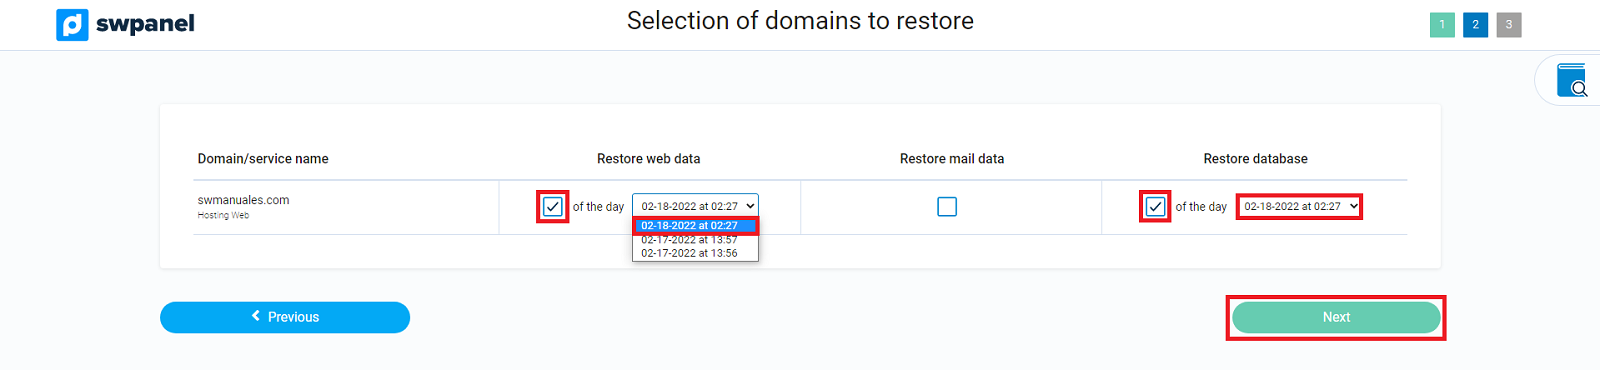
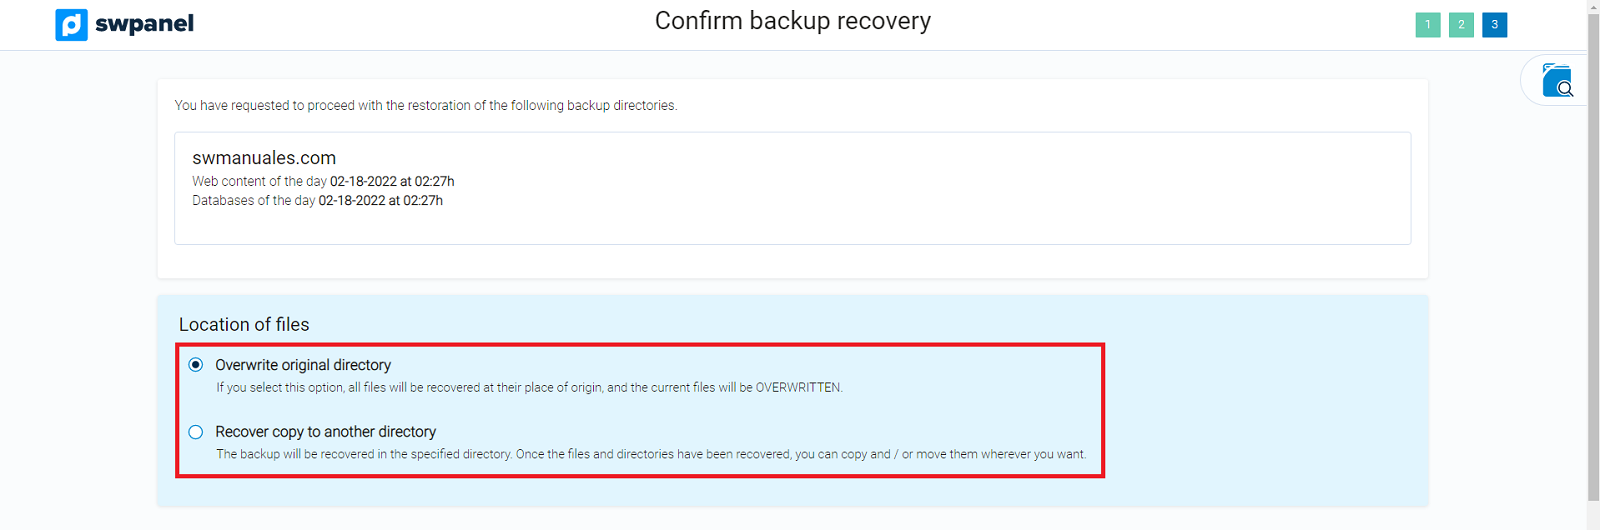
Once the backups have been selected, you must decide whether you want the copy to be overwritten in the original directory or recovered to a different directory.
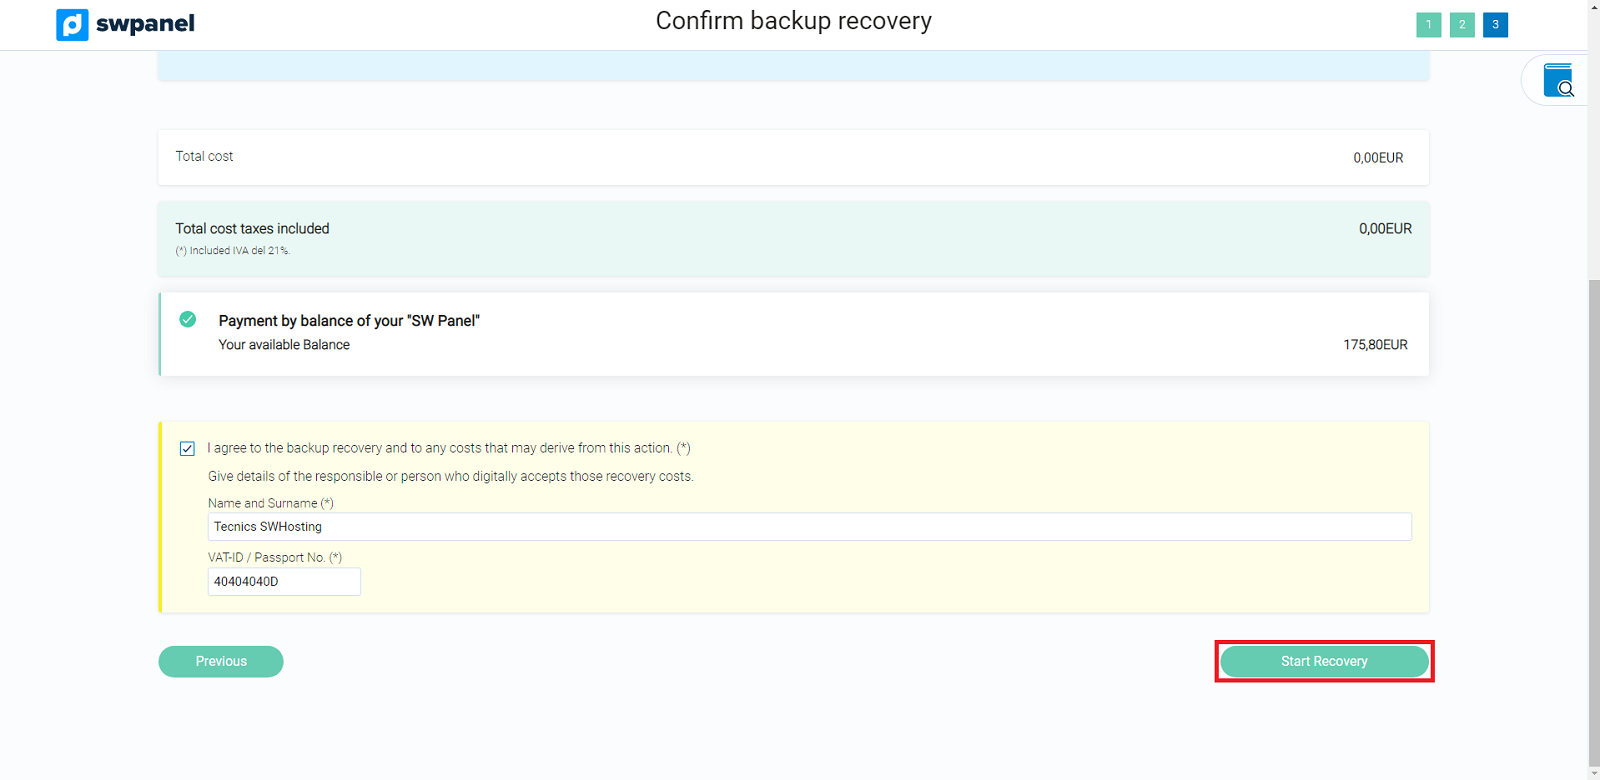
To start the restore process, just click on the Start Recovery button.
Restore a copy of a directory
With this option we will be able to restore a complete directory and we will be able to choose between the different dates of available copies. Once the directories and the date have been selected, click on the Next button.
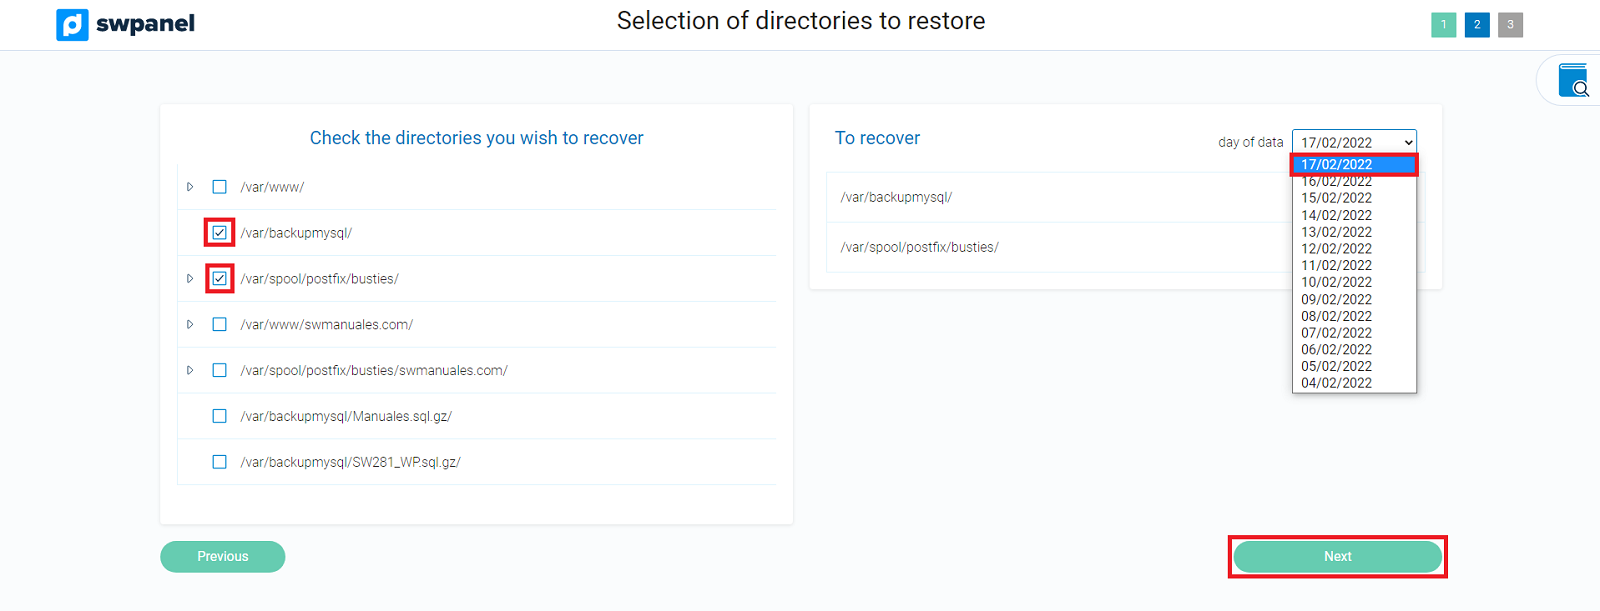
The backups of all databases are located in "/var/backupmysql/", so if you need one, you will have to check this directory. In the restore directory a ".sql" file will be generated for each of the databases you restore, but you will have to dump the content of that sql file to your database, this is not done automatically.
The backups of all email are located in "/var/spool/postfix/postfix/busties/". In this directory you will find a folder for each mail domain and, within them, a folder for each mail account, so you can choose to restore all the mail, a complete domain or a single account.
In the following page you will see a summary of the directories to restore, the date of origin and the location where the files will be restored:
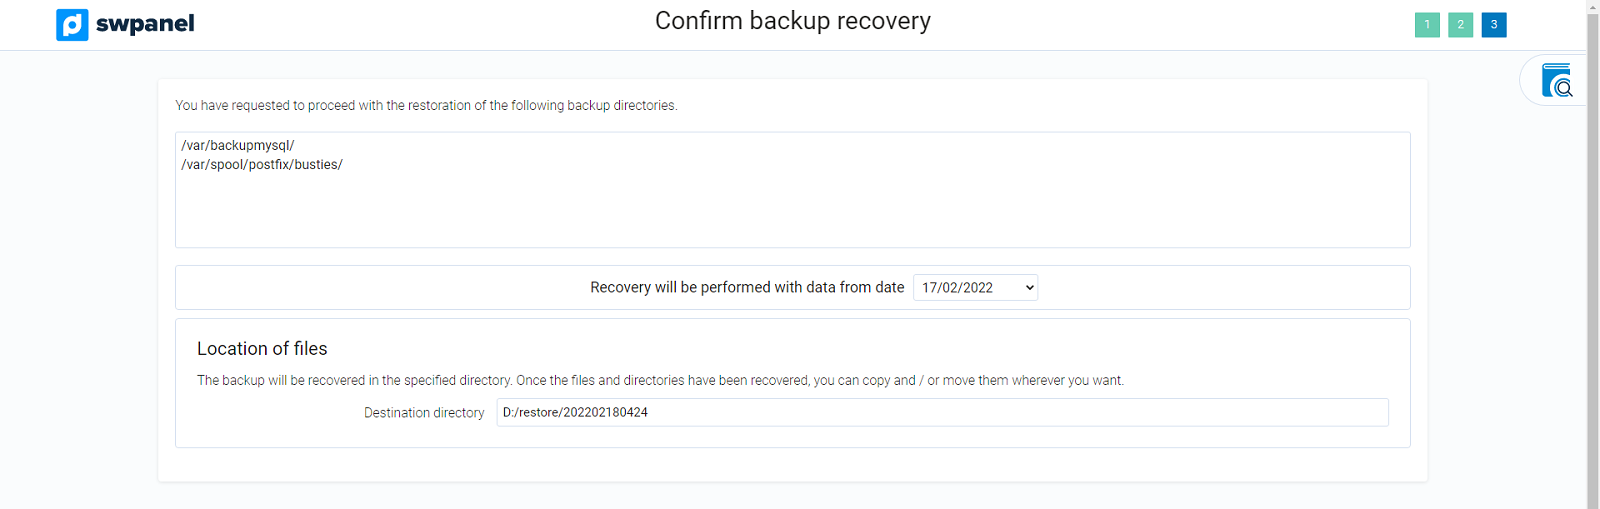
You must take into account that the copies are made once a day and from 01:00 hours.
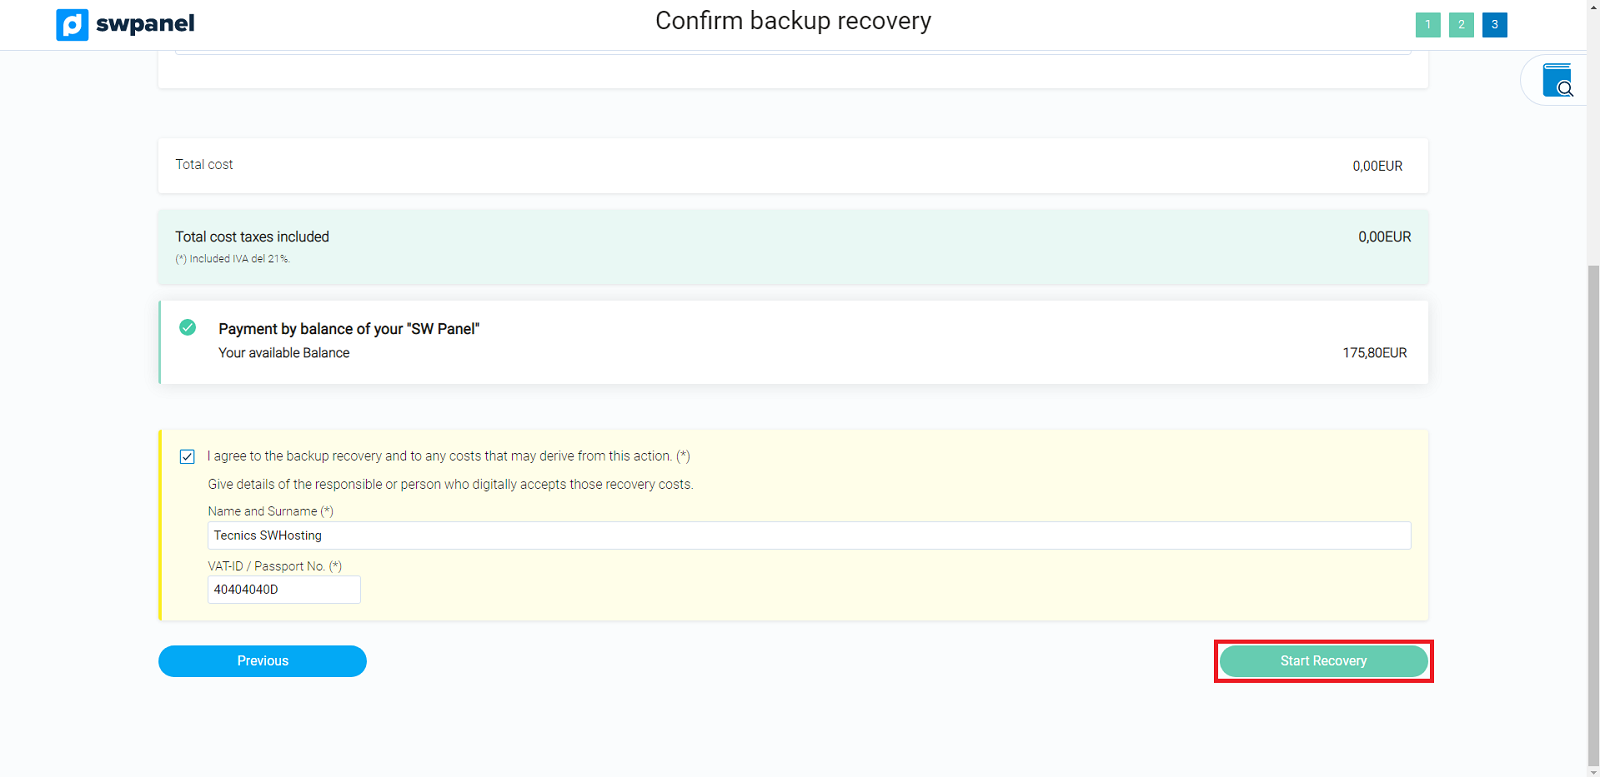
To start the restore process, just scroll to the bottom of the page and click on the Start recovery button.
In a matter of minutes, you will find the restored data in the directory shown in the last step, which you can access in the usual way via FTP or SSH. You can move or copy the recovered files, but you will have to keep the users and permissions of them for everything to work correctly.
Remember that you have the web database manager "phpMyAdmin" to perform any import, as well as other tasks. The access address is the following:
https://IP_de_tu_cloud/phpmyadmin
The access credentials to phpMyAdmin correspond to the username and password of your database.
cta:cloud_app_swpanel_smart_d5