Content
Categories
- General SWPanel (38)
- Administration (14)
- Database (14)
- SSL Certificates (15)
- Cloud (59)
- Cloud Storage (2)
- Containers (1)
- Backup Copies (6)
- Mail (33)
- DevOps (55)
- Domains (33)
- FTP (6)
- Hosting (32)
- Migrate Services (6)
- DNS Registers (13)
- Security (12)
- Services (7)
- Support (5)
- Users and privileges (2)
- Web (15)
- WordPress (23)
SW EasyWeb - How to contract and create your website in 1 minute
Contract SW EasyWeb
To contract your Sw EasyWeb from the SW Hosting website is very easy, you must access the URL.
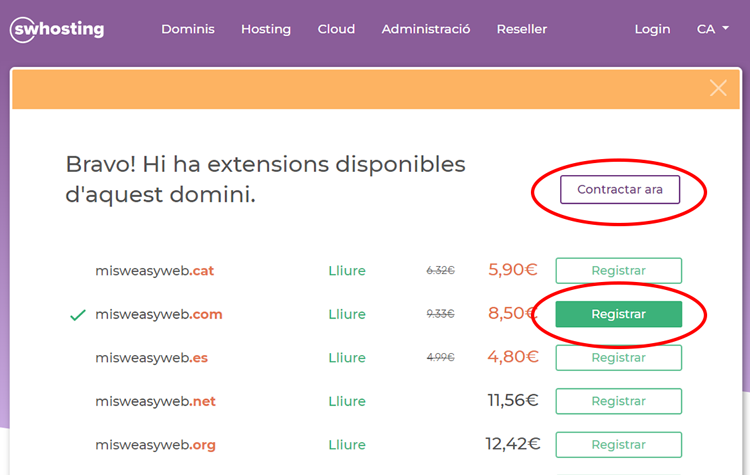
You search the domain you want to register or transfer, then the result will appear on the screen, with the status of "Register" (in case it is free) or "Transfer" (in case it is already registered) and its price, without VAT. Click on one of the two options, and once you have selected the domain, click on "contract now":
Now, you need to enter a valid email address that will be used to create your customer account, and that is where you will receive important notifications about your contracted domains or services. Click on "Create account":

If you already have a customer account, click on "Login" and access with your credentials:
In the next screen you can deactivate the auto-renewal (by default it is activated) and you can create an email account with the name of your domain

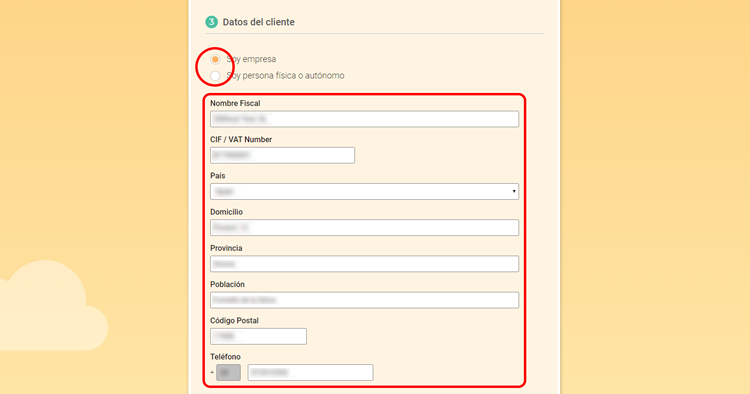
Add the requested customer data for companies or individuals (self-employed are included here):
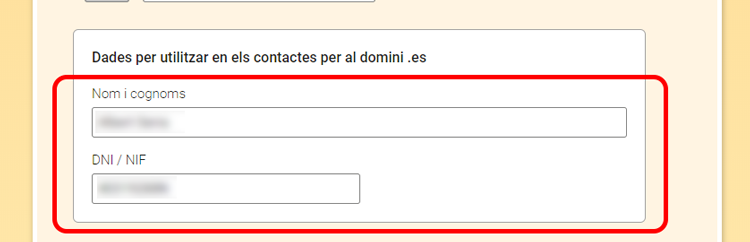
If the domain you want to register is a .ES, you will have to fill in some additional data, since it is essential that the administrative and technical contact for a .ES domain is made by a natural person, and not by a company.
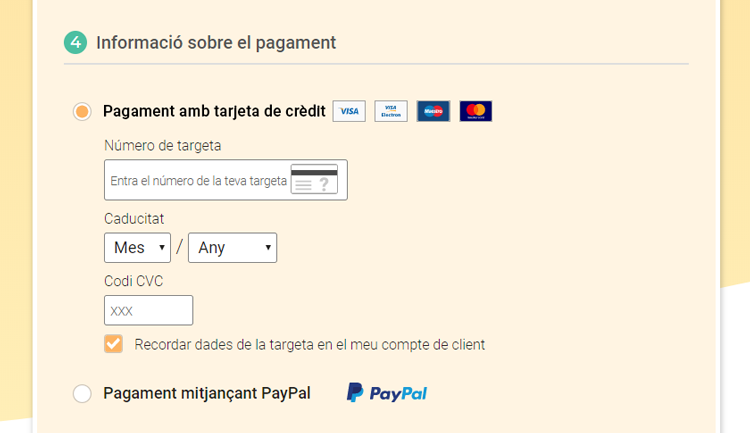
Once the fields are filled in, you must enter your card details to formalize the contract, or choose the PayPal payment method. Remember that loading credits using PayPal has a commission applied by PayPal. The credit that will be added to your SWPanel will be the result of the requested charge less the amount of the commission charged by PayPal.
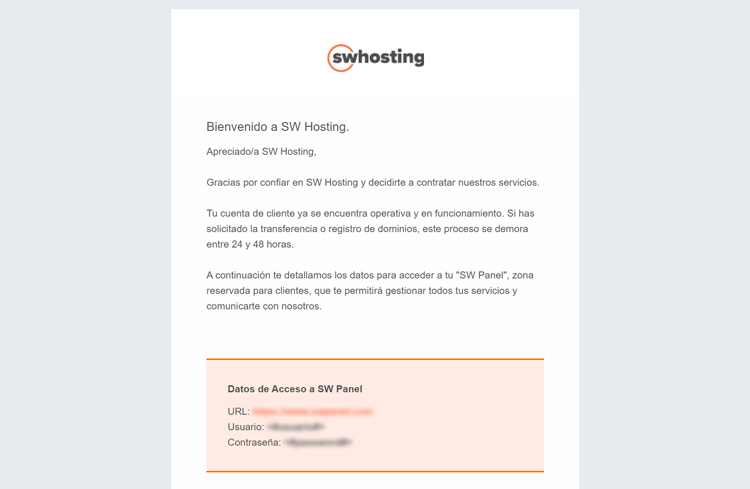
You will receive two emails, one with the welcome data to access your SWPanel, your private client area, and start managing your domains and/or services:
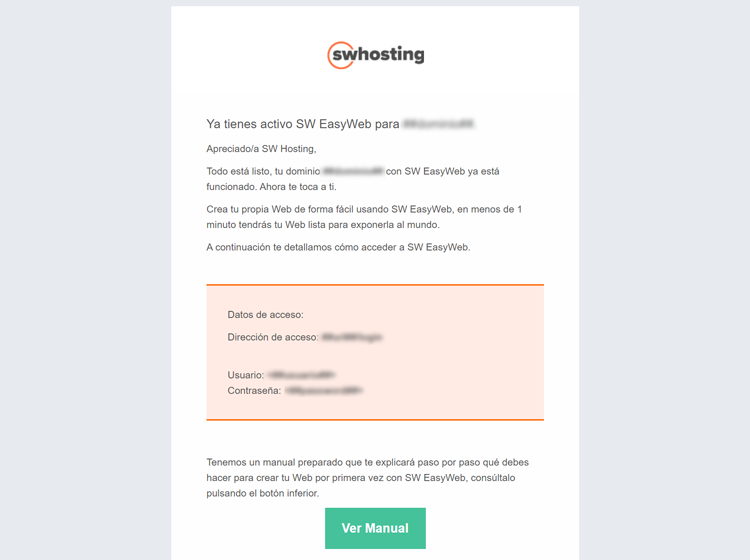
And another where you will find the access data to your SW EasyWeb:
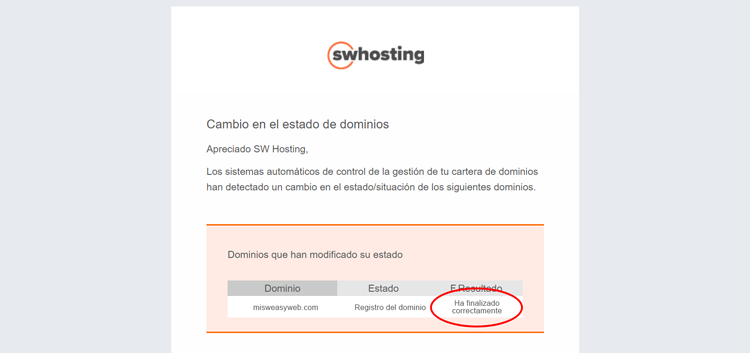
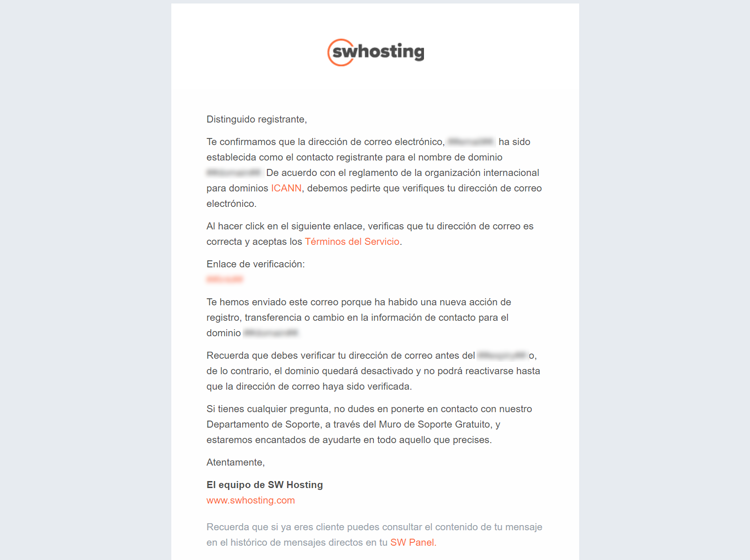
When the domain is registered, you will receive an email, at the address indicated above, notifying the status of the domain.
Also, in accordance with the regulations of the international organization for ICANN domains, and as explained in the Whois Accuracy, you will receive another email with a link for you to verify your email address. It is very important to attend this email and validate said address within the established period of time (15 days), otherwise the domain will be deactivated until it is verified. Verification email example:
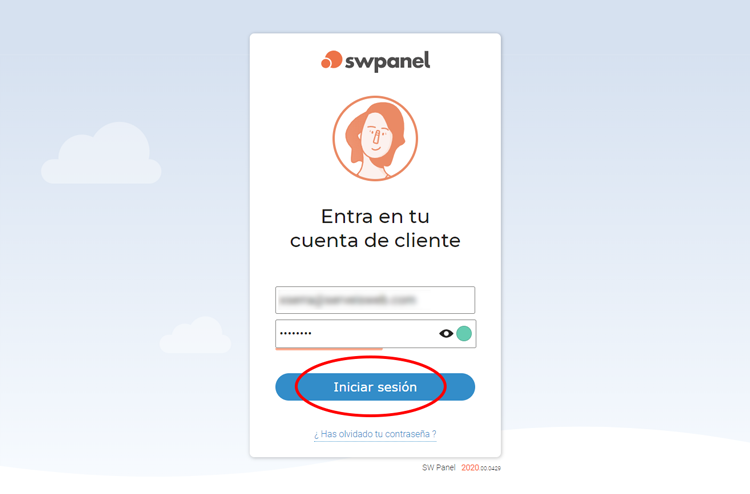
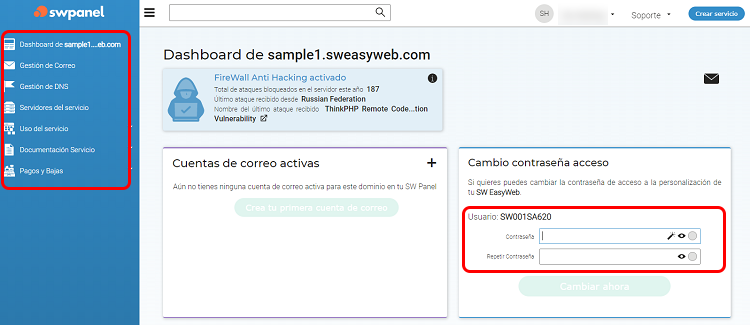
SWPanel
To access your SWPanel, click on the following link.
You will have to use the data sent in the welcome email you received when registering your domain. Through the SWPanel you can manage all the services you have contracted, in addition to being able to change your access password to SW EasyWeb.
To access your EasyWeb again, you just have to write your domain name followed by / login, example: yourdomain.com/login
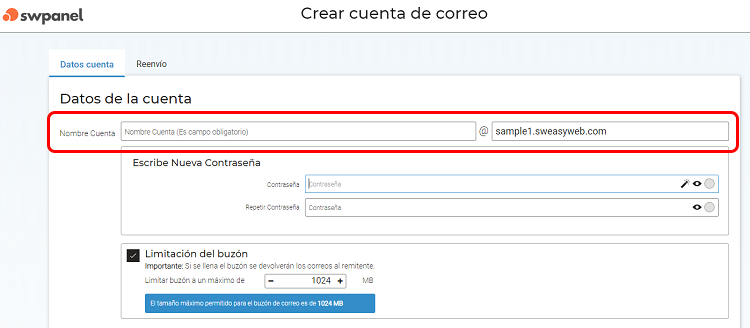
You can also create your email account of the type [email protected]
How to create your website in 1 minute
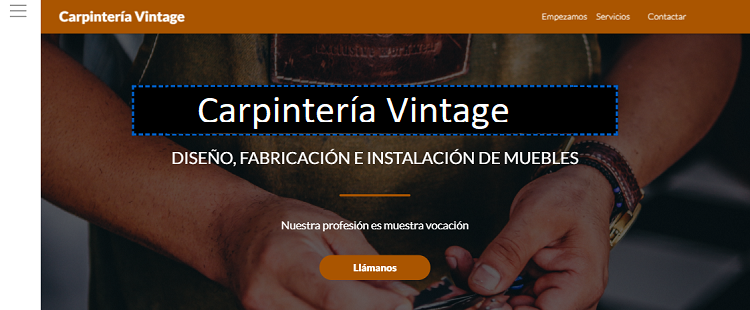
In the SW EasyWeb welcome email, you have received the necessary information to access the administration of your website. Once you identify yourself and access in edit mode you will find two clearly differentiated sections:
On the left, the "Configuration Panel" where you will find the necessary tools to customize the design of your page.
In the central part, you can see your design and by clicking on the desired text you can edit it.

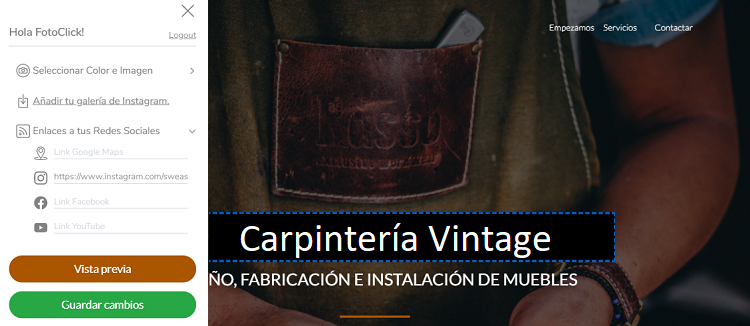
Settings panel
It is made up of 3 sections:
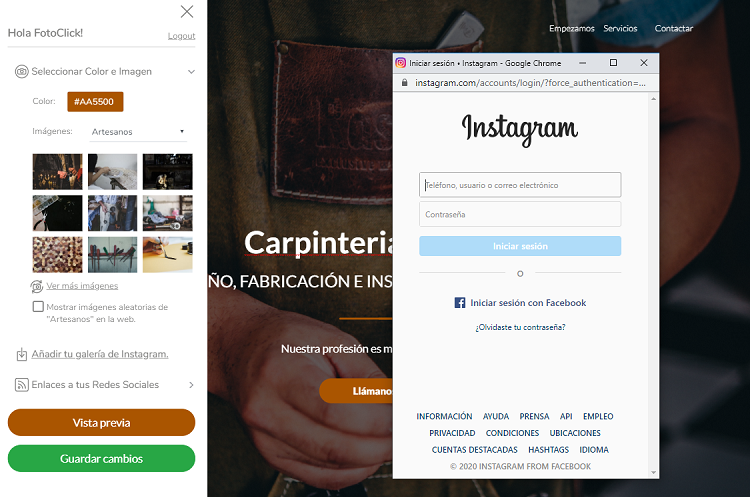
1. Select color and image
- Color:
Select the color that you like the most, try different combinations and if none of them suit your needs, you can create it yourself using hexadecimal code.
- Images:
Search for an image that identifies you, there are hundreds of options to choose from.
Select a sector, once selected, photographs related to it will be loaded.
You can see more images by clicking on "See more images".
If you prefer that each time your website is loaded, it shows a different image, select "Show random image".
2. Add your Instagram gallery
Your website with your portfolio.
If you want to add your Instagram photos, click on "Add your Instagram gallery", a window will open where you must log in and give permission to the application to link your account to SW EasyWeb.
3. Links to your social networks
Add your social networks: Instagram, Facebook, Youtube and link your location using Googlemaps.
To include the icons of your social networks at the bottom of your website, you only have to write the corresponding links to each one.
Once all the changes have been made, by clicking on the "Preview" button you will be able to view the result of your website.
Edit texts
Modify the texts on the web:
To easily modify the texts with your own content, click on the text to be modified and a black box will be displayed where you can edit it.
Once everything is to your liking, you just have to click on the "save changes" button and your website is ready to be published.
Congratulations, you already have your SW EasyWeb!
For more information follow this link.