Content
Categories
- General SWPanel (38)
- Administration (14)
- Database (14)
- SSL Certificates (15)
- Cloud (59)
- Cloud Storage (2)
- Containers (1)
- Backup Copies (6)
- Mail (33)
- DevOps (55)
- Domains (33)
- FTP (6)
- Hosting (32)
- Migrate Services (6)
- DNS Registers (13)
- Security (12)
- Services (7)
- Support (5)
- Users and privileges (2)
- Web (15)
- WordPress (23)
Activating and deactivating the Antivirus service in a Cloud
How does it work?
On all SW Hosting servers with SWPanel, ClamAV is implemented as an integral antivirus service. Its main function is to filter every email that enters or leaves the server to evaluate the possibility that the content includes some kind of virus or malware. This scanning capability is based on the use of a database, updated on a regular basis, which contains exhaustive lists of all known threats.
Each time an email is sent or received, ClamAV performs a thorough comparison between the content of the email and the information stored in the database. In this way, the system can determine whether there is any indication that the content of the email is a virus or malware.
Procedure
You should know that to activate this service on a specific domain, it must first be activated on the main server.
-
First you must locate your server, for this, we recommend you to use the search engine located at the top of your screen:
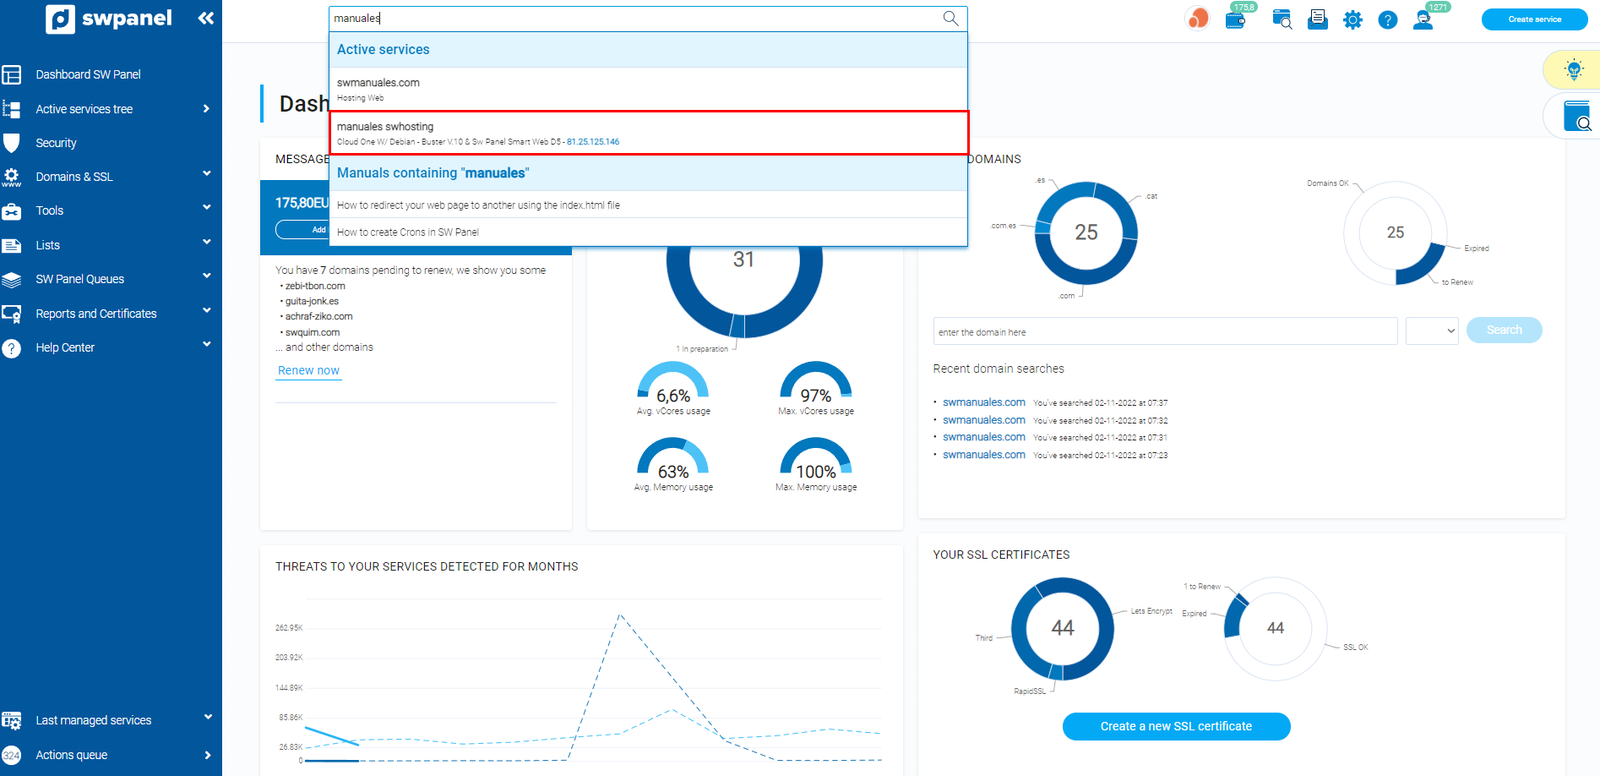
-
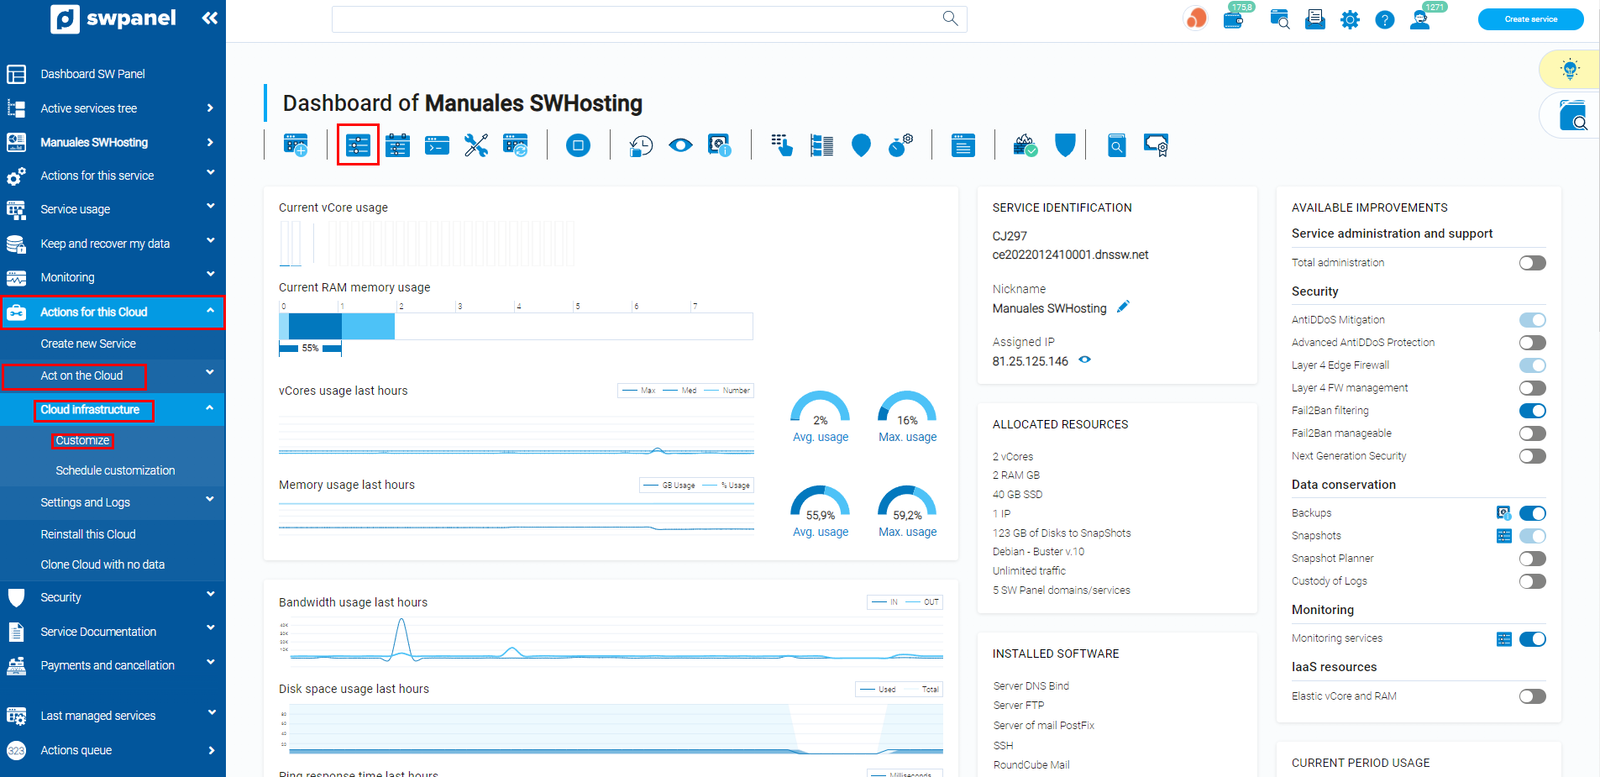
Once inside your Cloud server, you have two paths:
- Click on the "customize" icon:
- Drop down the "Actions for this Cloud" tab -> Customize.
-
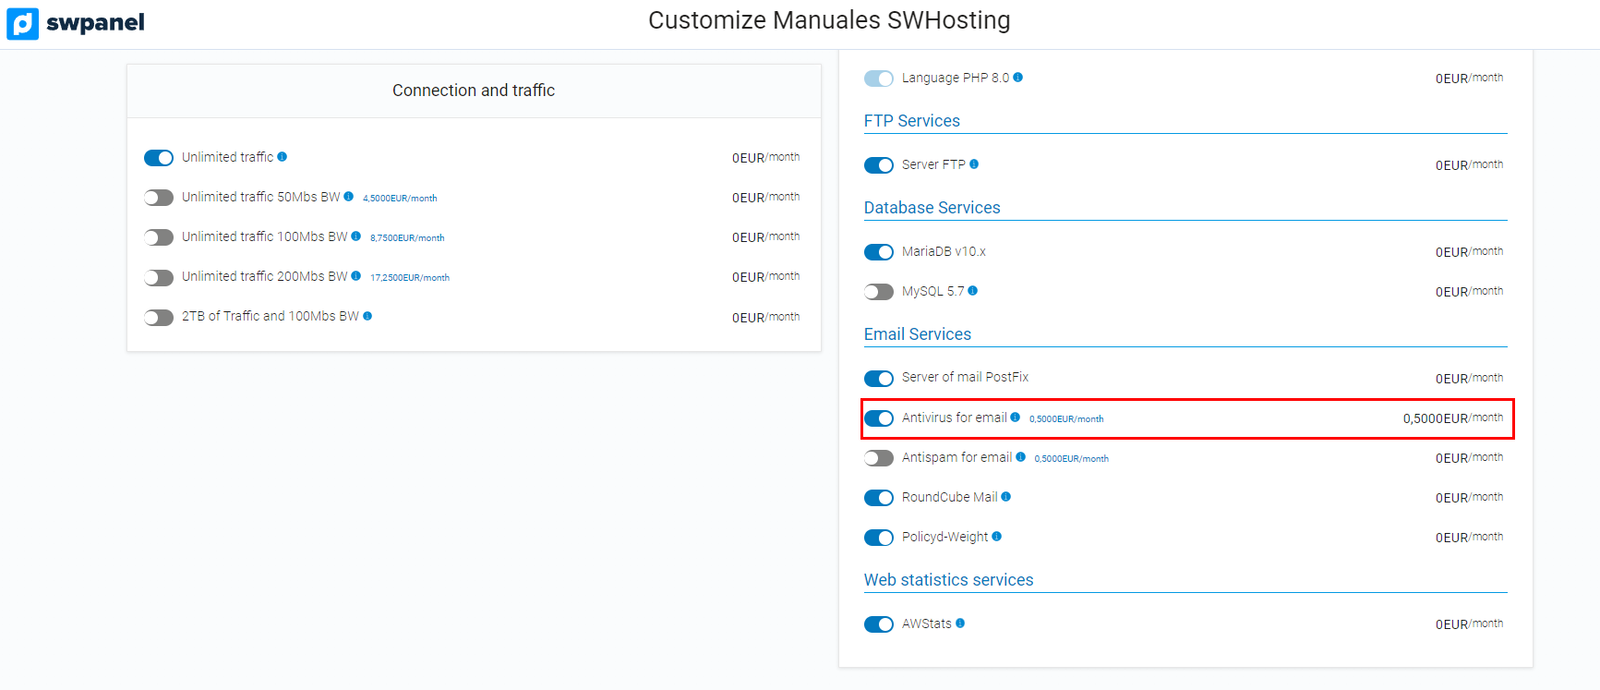
Now that you are inside the "customize" section, you must scroll until you find the option: Customize installed software or services,then Mail Services -> Email Antivirus Services and activate it.
-
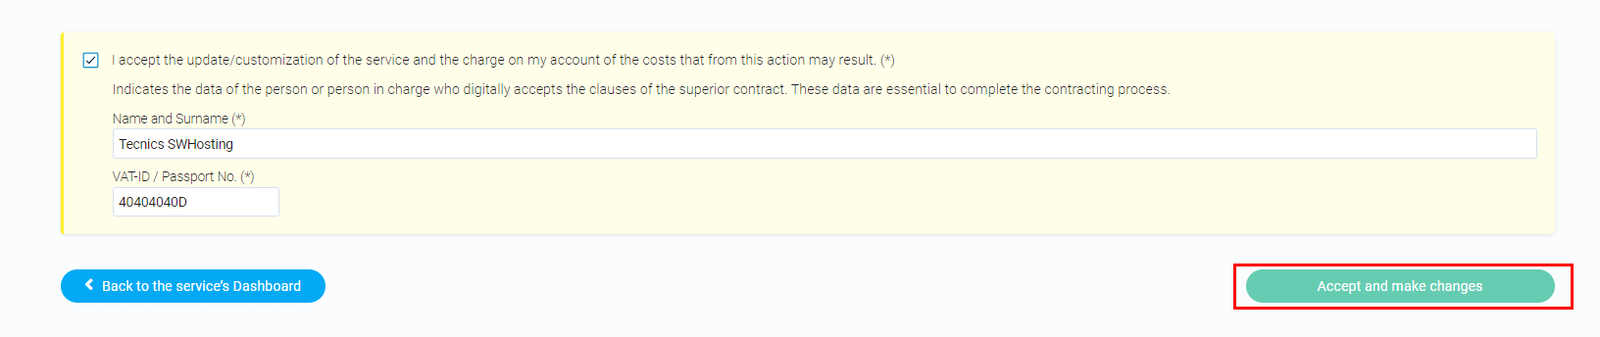
Then, you must accept the costs derived from the contracted extra, enter the required data (name and NIF) and Accept and formalize changes:
Once the Antivirus service has been activated in the main Cloud Server, we will proceed to activate it within a hosting service hosted in this same Cloud following the following manual:
Activate and deactivate the Antivirus service in a Hosting
Remember that you must repeat this process with each of the services that hang from the main Cloud server that you want to have the Antivirus service activated.
Disable Antivirus service
To deactivate the antivirus service, you must follow these steps:
-
First you must locate your server, for this, we recommend you use the search engine located at the top of your screen:
-
Once inside your Cloud server, you have two paths:
- Click on the "customize" icon:
- Drop down the "Actions for this Cloud" tab -> Customize.
-
Now that you are inside the "customize" section, you must scroll until you find the option: Customize installed software or services,then Mail Services -> Email Antivirus Services and uncheck the option.
You will have to go back to "Accept and formalize changes" and the Antivirus scan will be disabled.