Content
Categories
- General SWPanel (38)
- Administration (14)
- Database (14)
- SSL Certificates (15)
- Cloud (59)
- Cloud Storage (2)
- Containers (1)
- Backup Copies (6)
- Mail (33)
- DevOps (55)
- Domains (33)
- FTP (6)
- Hosting (32)
- Migrate Services (6)
- DNS Registers (13)
- Security (12)
- Services (7)
- Support (5)
- Users and privileges (2)
- Web (15)
- WordPress (23)
Configure my Hosting email accounts in Outlook
Microsoft Outlook is one of the most widely used programs in offices and personal computers, as a mail manager, for corporate mail accounts or personalized mail.
info The configuration shown in this manual requires the installation of a TLS security certificate for your Hosting email
The data that we must take into account for the configuration of the mail account are the following ones:
-
Incoming mail server: mail.domain.com
- IMAP port: 993
- POP3 port: 995
-
Outgoing mail server: mail.domain.com
- SMTP port: 465
-
E-mail account
- Password
- Protocol: SSL/TLS
info To view the connection data of your email account from SWPanel, you can check this manual.
First, let's see how to configure Outlook if it is the first time you access it. Later, we will see how to configure it if we already have an account configured.
Configuring an email account for the first time
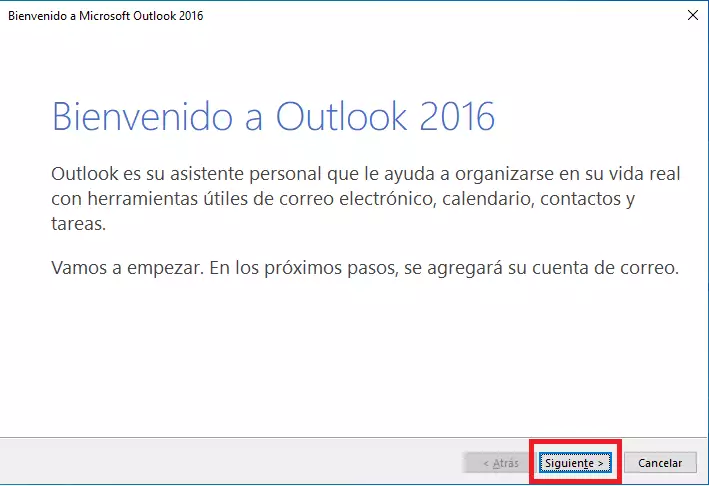
Open the application. The Outlook welcome message will open. Click on next:
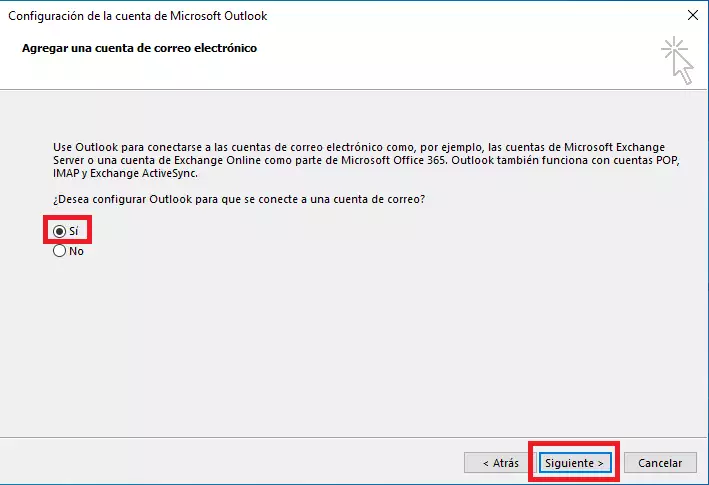
It will ask us if we want to configure our Outlook account to connect to an email account. We mark yes and click on next:
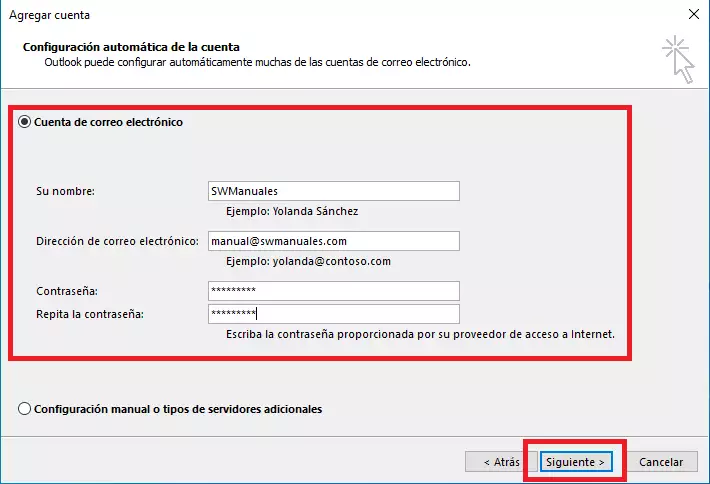
The automatic configuration of the account will open, we will have to fill it with the requested fields, Name (it is not necessary to specify any concrete data, we can put the name that we want), the email address to configure and the password of access to the account:
info We remind you that from SWPanel you will not be able to see the information about the password of the email account, because, in compliance with ISO 27001, LOPD and RGPD, we do not store or provide personal passwords and we do not have access to the passwords of email accounts.
Once the automatic configuration is completed, an alert message will be displayed specifying that it has been successfully configured. The account, by default, will be configured in IMAP. In order to verify that the configuration has been carried out correctly or to be able to modify the configuration of the account to POP3, we click on the box “Change account configuration” and press Next:
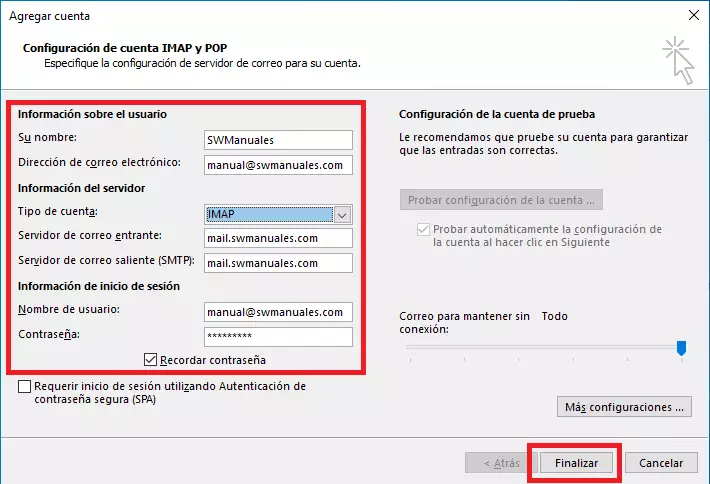
 The configuration screen will open where we will define the type of account (IMAP or POP), the name of the Incoming/Outgoing servers and the account user and password. Then click on the “More Settings... ” button and check the tab on the Outgoing Server configuration, and the next tab on the Advanced Parameters of the Incoming/Outgoing server where we will indicate the incoming mail ports (993 for IMAP - 995 for POP3) - for outgoing mail (SMTP - 465) and the type of encrypted connection (SSL).
Subsequently, click on the Accept button:
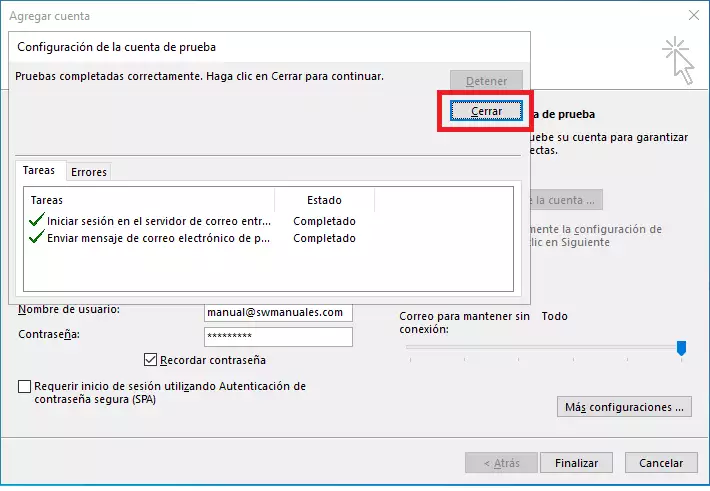
Once back in the configuration window we click on the Finish button, the system will perform a configuration test to ensure correct operation.
Once the verification is finished we must click on Close:
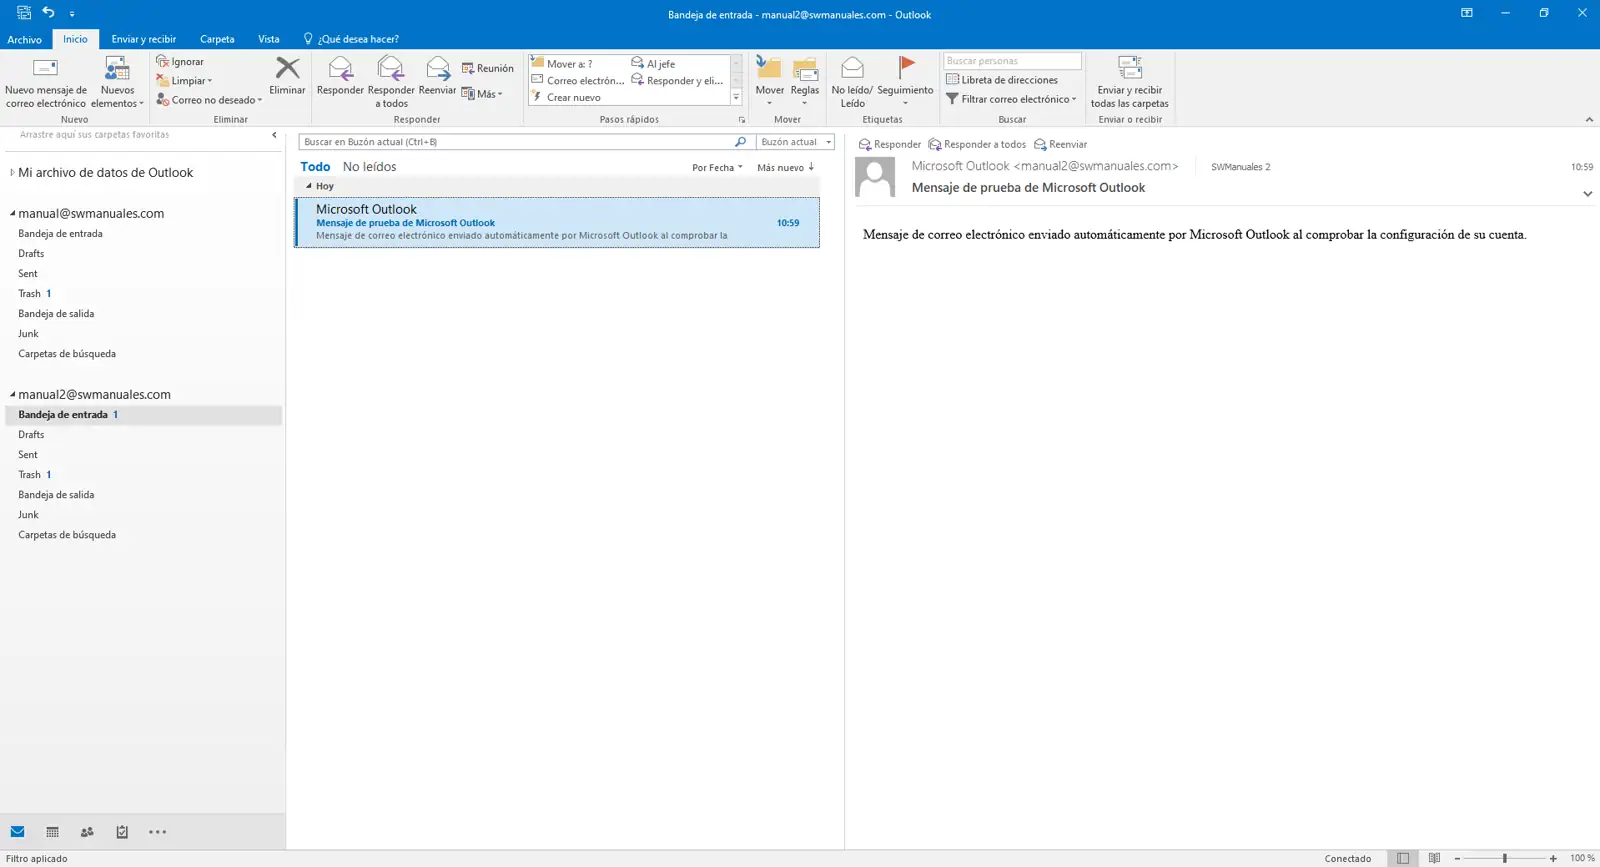
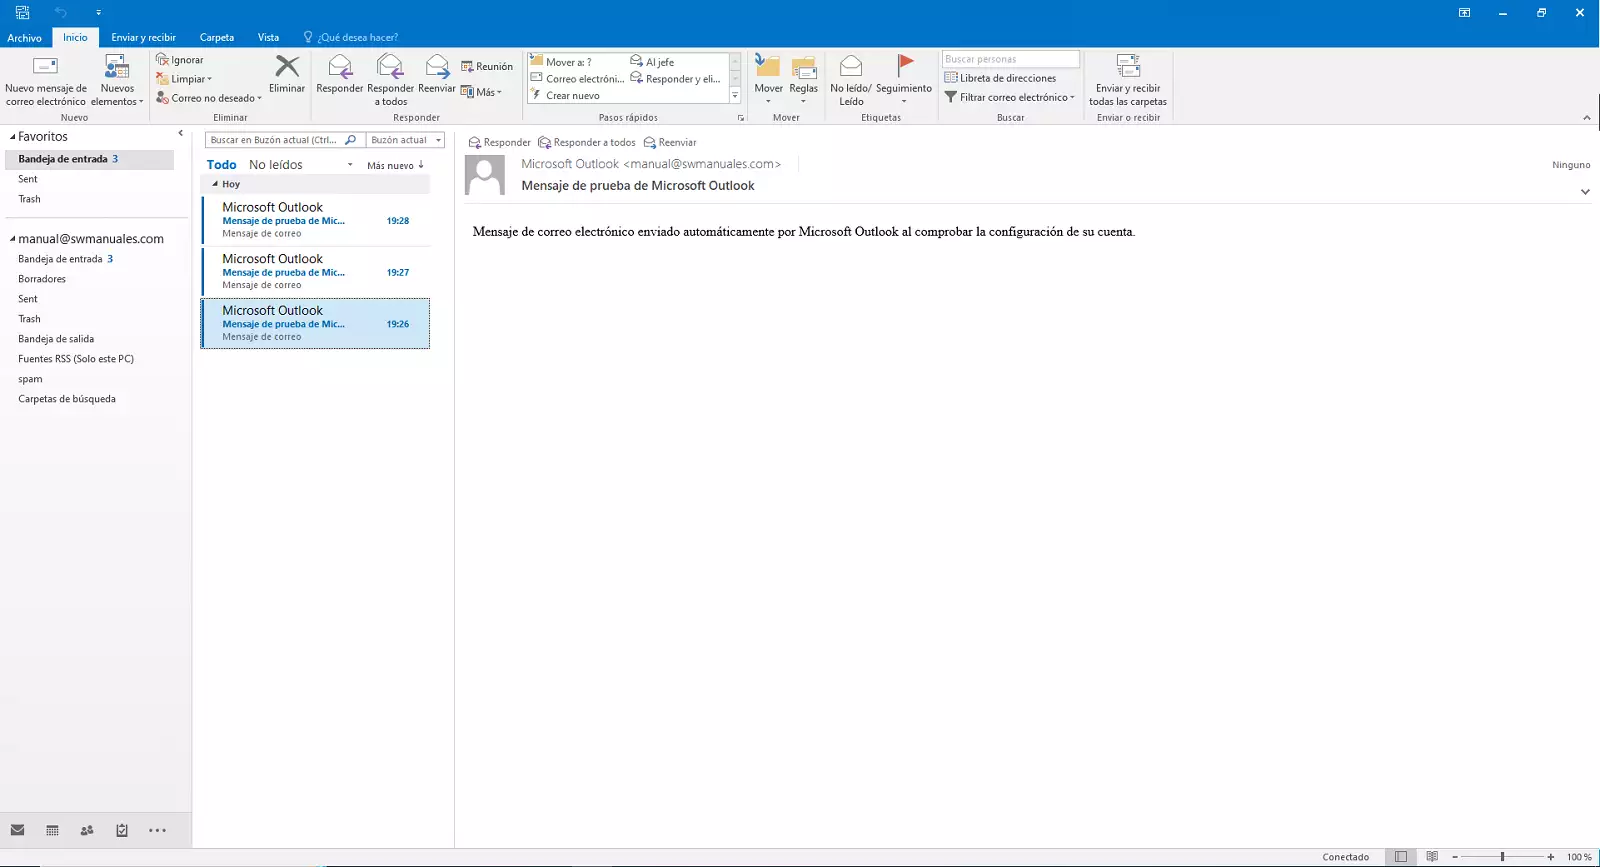
Now we will be able to visualize our mail account configured in Outlook:

Configure another email account when there is already another configured one
To be able to configure an additional email account when we already have an account configured in Outlook, we must follow the following steps.
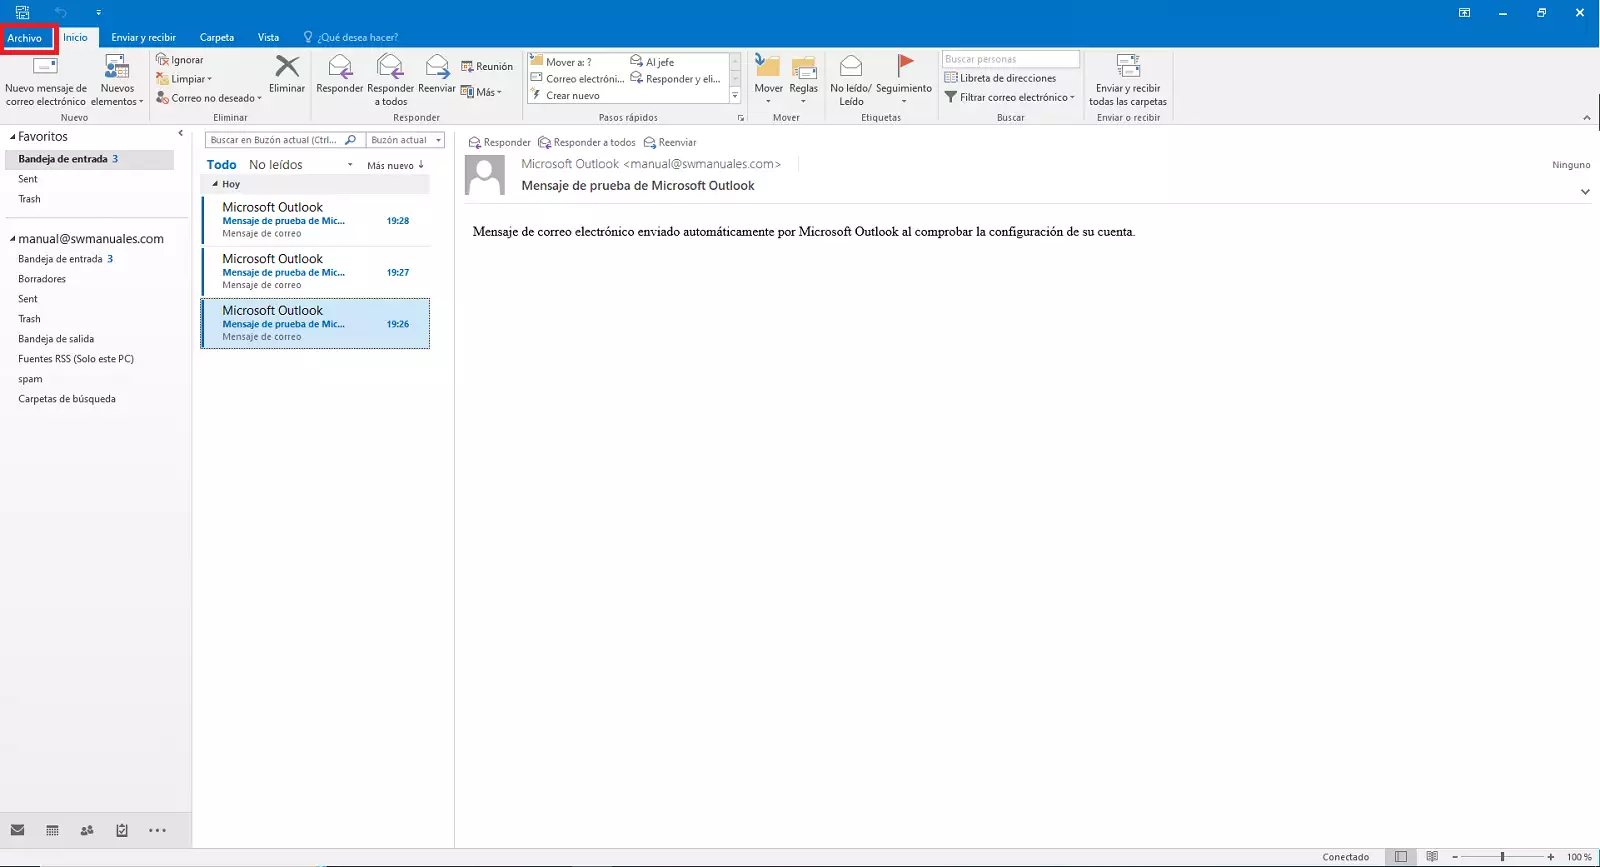
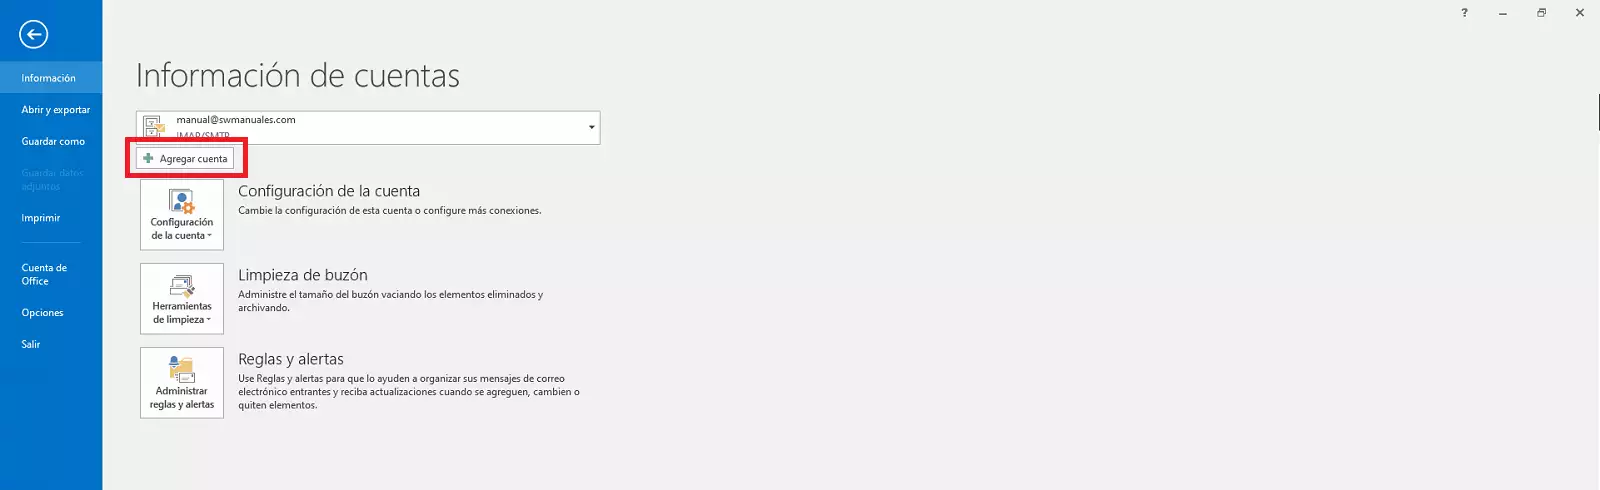
First of all, we will access the Outlook application and click on the “File” tab, located on the top left:
In the next window click on the "Add account ” button.

The automatic account configuration will open, we must fill in the fields requested, Name (it is not necessary to specify any specific data, we can put the name we want), the email address to configure and the password to access the account and press the "Next ” button.

info We remind you that from SWPanel you will not be able to see the information about the password of the email account, because, in compliance with ISO 27001, LOPD and RGPD, we do not store or provide personal passwords and we do not have access to the passwords of email accounts, much less provide them.
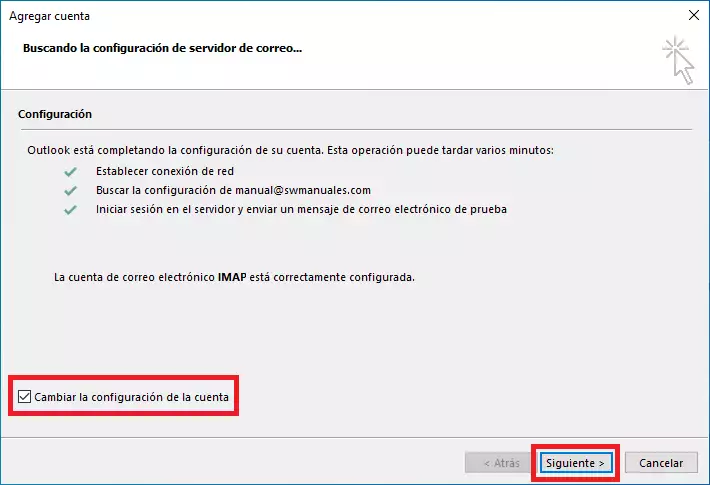
Next the configuration screen will open where we will define the type of account (IMAP or POP), the name of the Incoming/Outgoing servers and the user and password of the account... then, we will click on the button “More Configurations... “ and check the tab on the Outgoing Server configuration, and the next tab on the Advanced Parameters of the Incoming/Outgoing server where we will indicate the incoming mail ports (993 for IMAP - 995 for POP3) - for outgoing mail (SMTP - 465) and the type of encrypted connection (SSL).


When you click on Finish, the system will perform a configuration test to ensure correct operation. Once the test has been completed, click on Close:


Finally, we will be able to visualize our new additional mail account configured in Outlook: