Content
Categories
- General SWPanel (38)
- Administration (14)
- Database (14)
- SSL Certificates (15)
- Cloud (59)
- Cloud Storage (2)
- Containers (1)
- Backup Copies (6)
- Mail (33)
- DevOps (55)
- Domains (33)
- FTP (6)
- Hosting (32)
- Migrate Services (6)
- DNS Registers (13)
- Security (12)
- Services (7)
- Support (5)
- Users and privileges (2)
- Web (15)
- WordPress (23)
SWPanel migration tool
In the following manual we are going to learn how to migrate services from another hosting provider to SWHosting with our native migration tool.
In the new version of SWPanel we have added a new feature to make it easier for our customers to transfer web content from an external provider to SWPanel. The "Web Migration Tool".
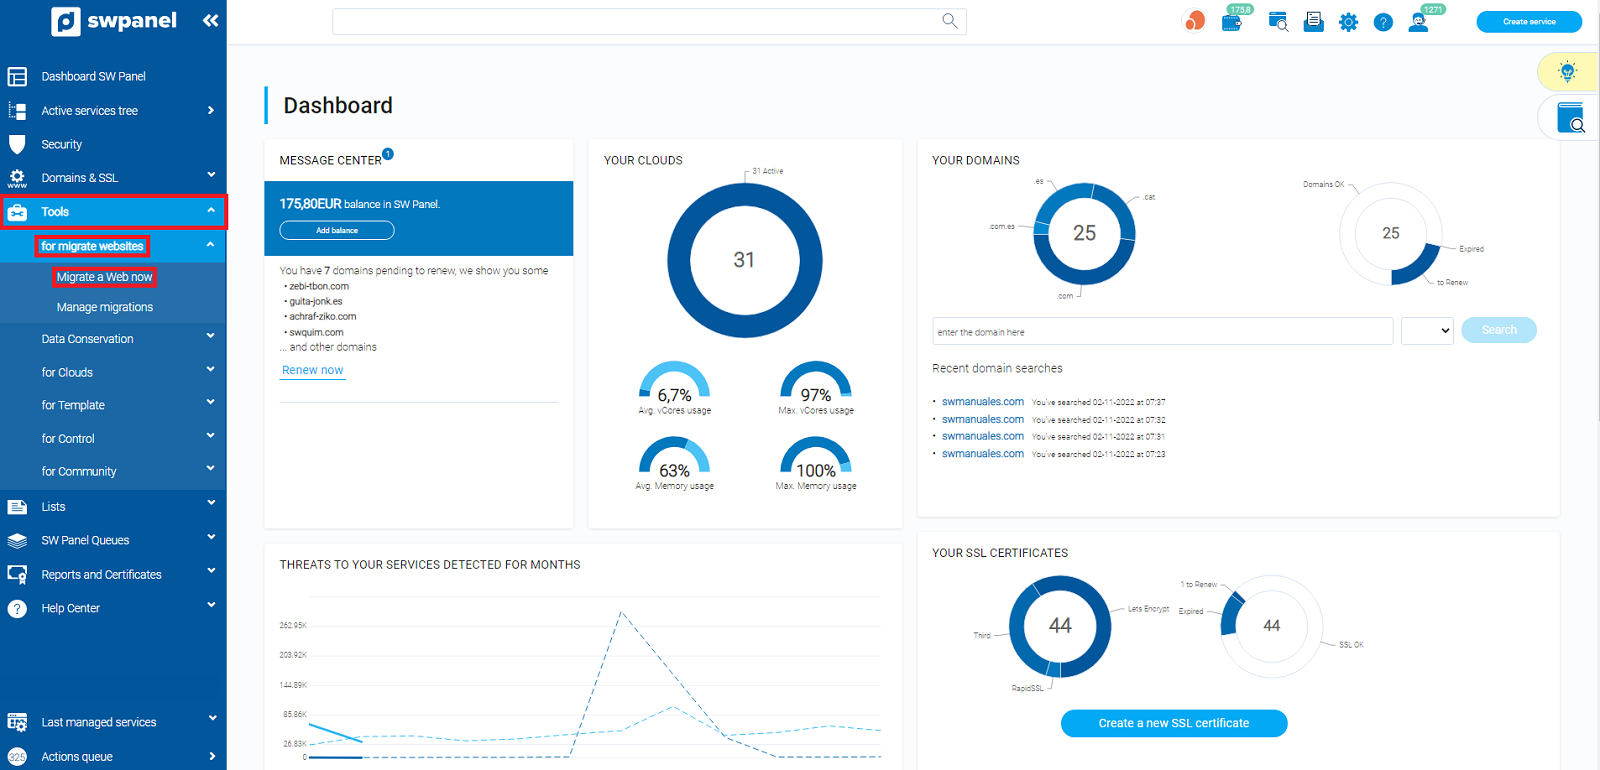
First, you must access the main SWPanel Dashboard. To do this, click on the SWPanel logo or custom logo at the top left of the screen:

From the main SWPanel Dashboard, in the blue side menu, select the drop-down "Tools"-> "Web Migration Tool" and click on "Migrate a website now":
You will access the migration wizard:
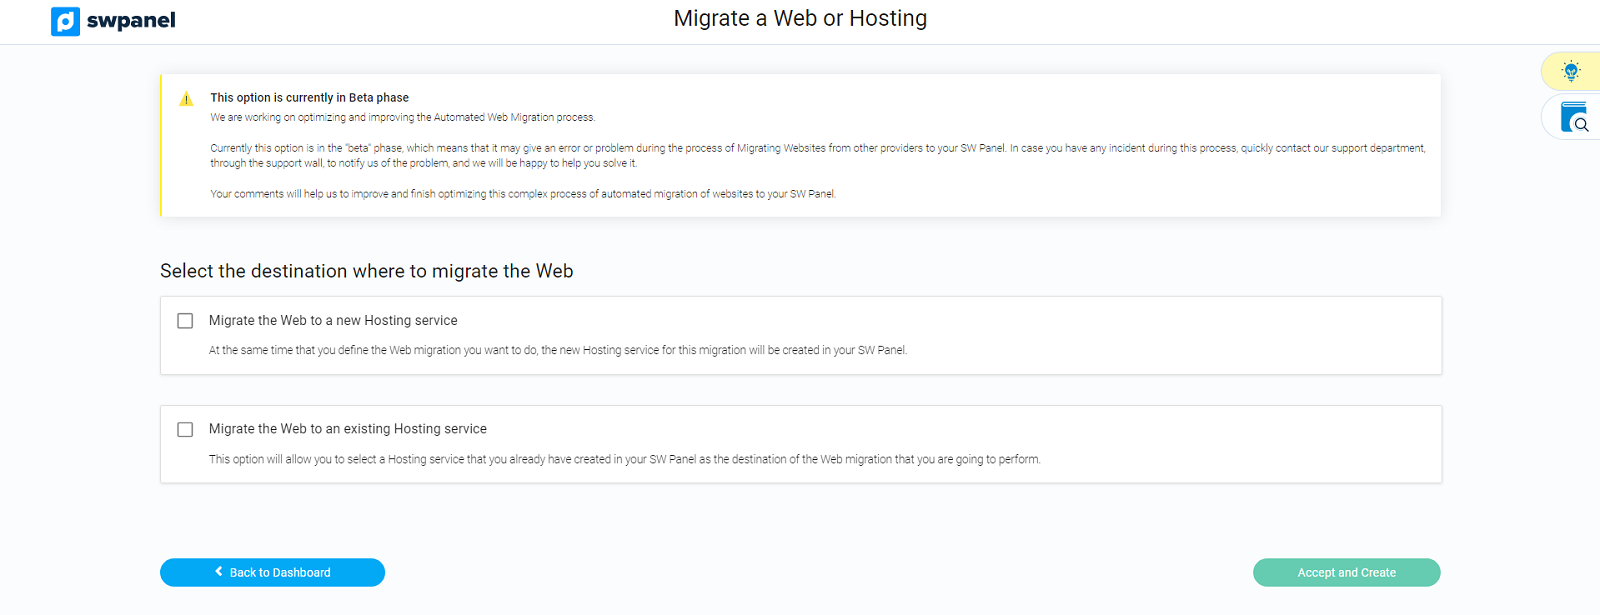
At this point you can select whether you want to migrate the data to a new Hosting service or an existing Hosting service. In this manual, we are going to migrate to an existing Hosting service. To see how to create a Hosting service we recommend you visit our manuals on how to create a Hosting service and how to create a Web Hosting on my Cloud.
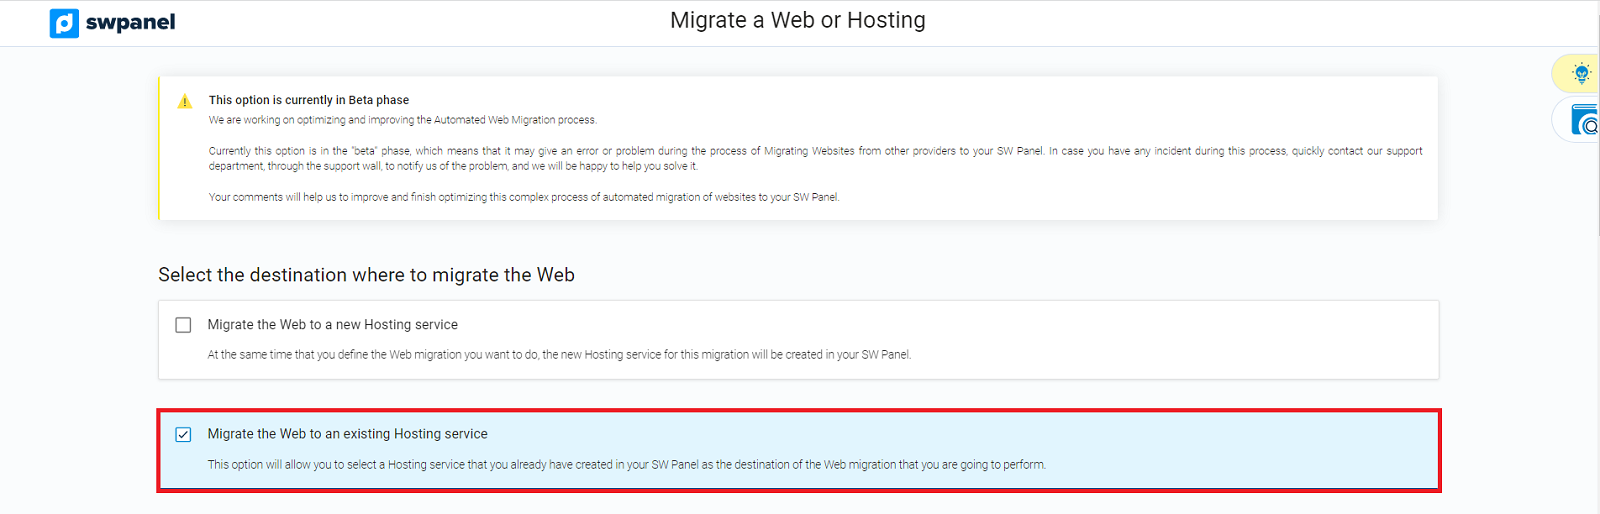
Migrate the Web to an existing Hosting service
Select "Migrate the Web to an existing Hosting service":
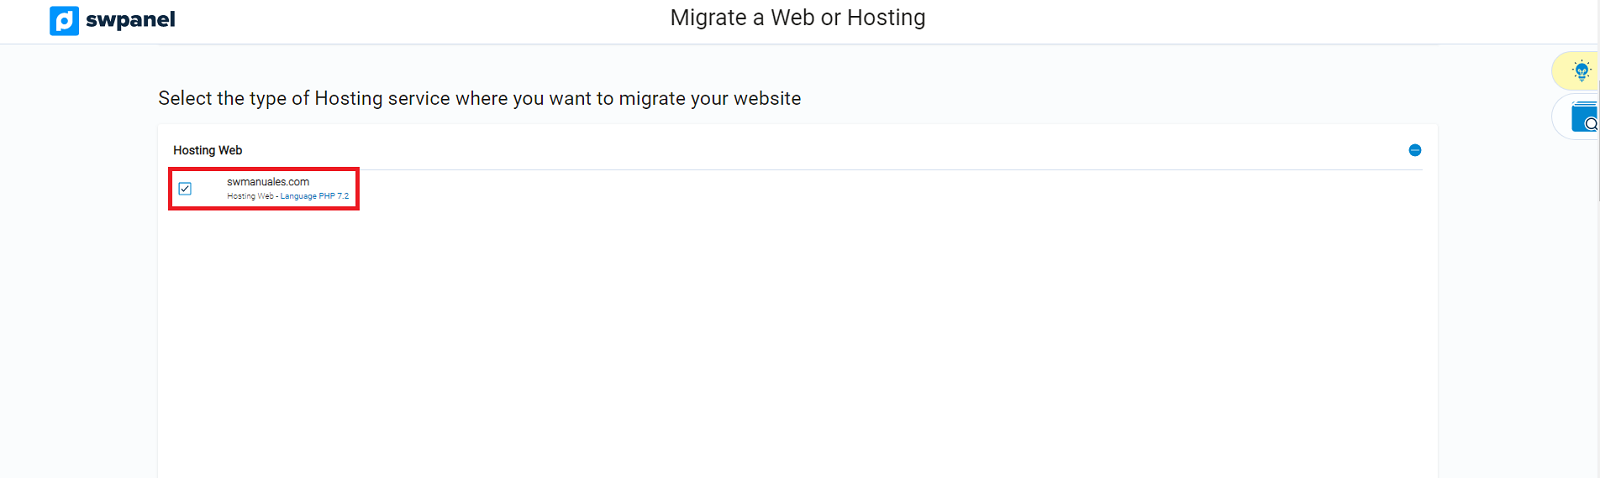
A drop-down will open in which you will have to select the service you want to migrate to.
danger For the migration to be successful, the Hosting service must be empty. That is, There can be NO CMD (WordPress, Prestashop or Moodle) installed, there can be no Database and no FTP accounts Created. There can also be no mail accounts.
In this case, select the previously created service, "swmanuales.com ":
Synchronize Web Content
Enter the necessary data to migrate the web content. If there is no website to migrate, you must uncheck the "Check" next to the name "Synchronize Web Content":
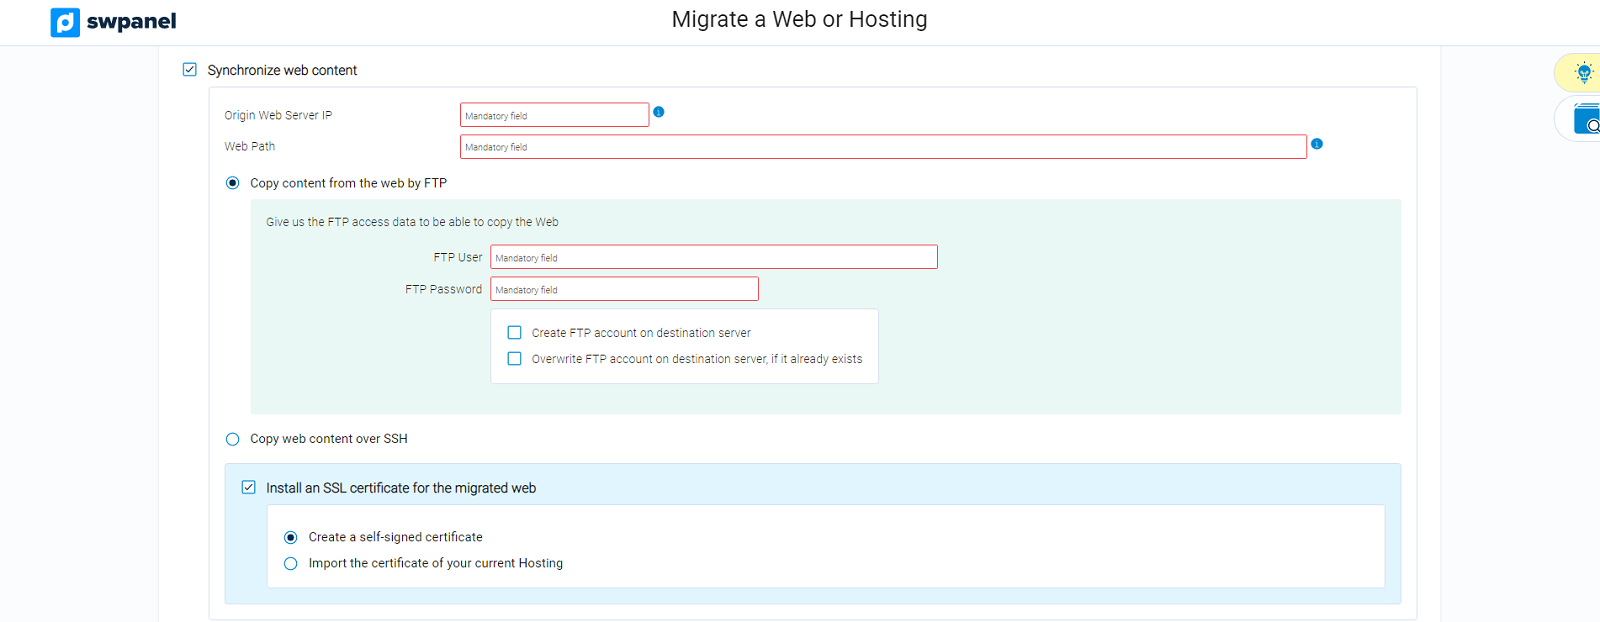
The data you will need for this step are:
IP of the Origin server
The IP you have assigned to your website with your current provider. You can check the IP of your website from the administration panel you currently have with your service provider.
Web Path
In which directory or FTP folder your website is located. Depending on which root folder is assigned and the management panel you use with your current provider, the Path will be different.
danger Note that depending on where your FTP points to, the path you need to synchronize may vary. That is, if your FTP points directly to your root directory, you will have to specify the path where the web content is located (e.g. cpanel -> "/public_html", plesk -> "/httpdocs", etc...). However, in case your FTP already points to the web directory, you only need to enter the path "/".
Copy Web content via FTP/SSH
You can perform the migration via FTP or SSH connection directly.
To migrate via FTP
To do this, you need:
- FTP account user
- FTP account password
Click the "Check" corresponding to "Create FTP account on target server". Although we recommend that there is no FTP account already created on the Hosting service, you can click on "Overwrite FTP account on target server, if it already exists".
To migrate by SSH
To do this, you need:
- SSH user
- SSH login password
- SSH connection port
Install an SSL certificate for the migrated Web
You can install a self-signed certificate for your website or you can import a certificate that you currently have installed with your service provider, if you have one.
In order to import a certificate, you need to copy its CRT, CA and KEY keys.
In this case we have chosen in the configuration to perform the migration by FTP and we have decided to import the certificate from another hosting provider. It would look like this:


Synchronize Databases
Enter the necessary data to migrate the database. If you have no database to migrate, you must uncheck the "Check" next to the name "Synchronize Databases":
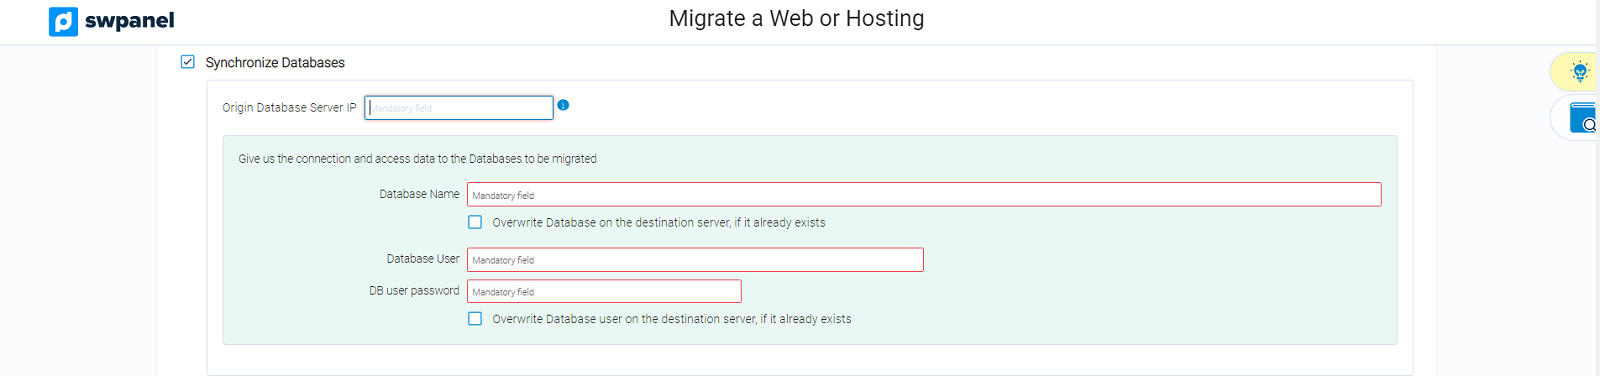
The data you need for this step are:
IP of the Source Database Server
The IP you have assigned for your database server at the current provider. You can check the IP from the administration panel you currently have with your service provider.
Connection and access data to the Databases to migrate
To do this, you need:
- Database Name
- Database User
- Database user password
It is very important that this data is exactly the same as you have in your source database.
danger You must take into account that the remote access to synchronize the database from an external connection must be enabled, so be sure to open port 3306 for the IP 81.25.112.90 (which is our server in charge of said process) beforehand. In case it is not possible to open the port, this part of the migration will have to be unchecked and done via import (you can use PHPMyAdmin, or HeidiSQL, etc...).
To make sure that your port is enabled, you can check the following manuals:
- How to open port 3306 in cPanel.
- How to open port 3306 in Plesk
In our example configuration, it would look like this:

Synchronize e-mail accounts
Enter the necessary data to migrate the email accounts. If you have no email accounts to migrate you must uncheck the "Check" next to the name "Synchronize email accounts":

The data you need for this step are:
IP of the Originating Email Server
The IP you have assigned for the email sending server at the current provider. You can check the IP from the administration panel you currently have with your service provider.
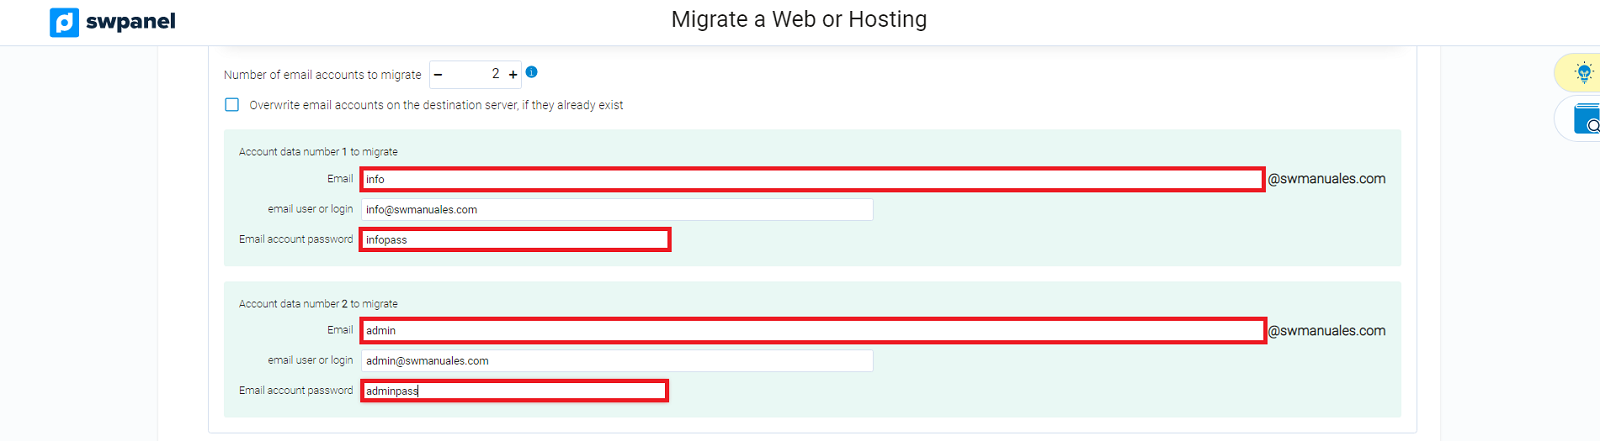
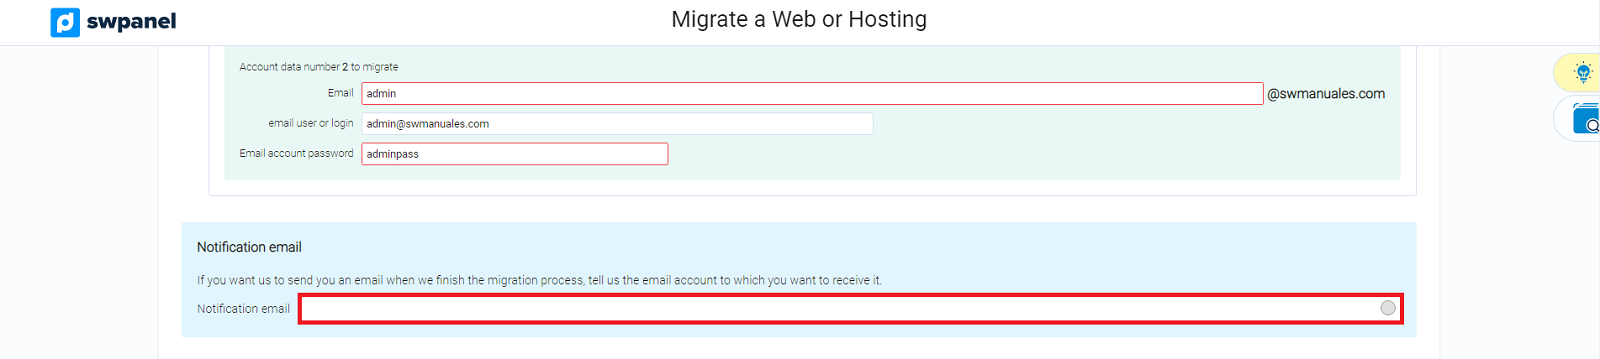
Number of email accounts to migrate Number of email accounts to migrate. Proceed to indicate how many email accounts you wish to migrate. *In our case, it will be two email accounts:
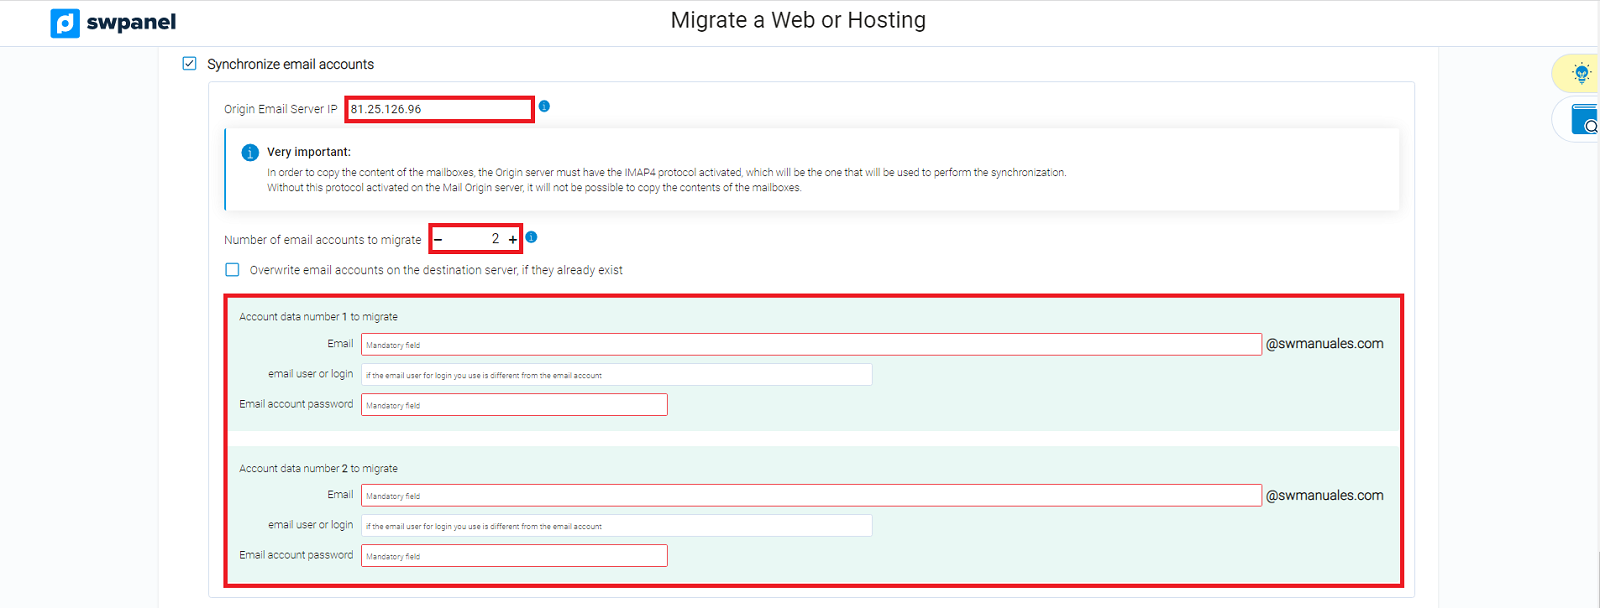
As soon as we select the number of email accounts, the tool will ask you to specify specific data for each existing email account:
- Mail account. You only have to specify the name of the account without having to add "@domain", as it is automatically auto-written.
- Email user or login**. This field is automatically autofilled. You just have to check that it is correct.
- Email account password**. The access password.
*In our configuration case it would look like this:
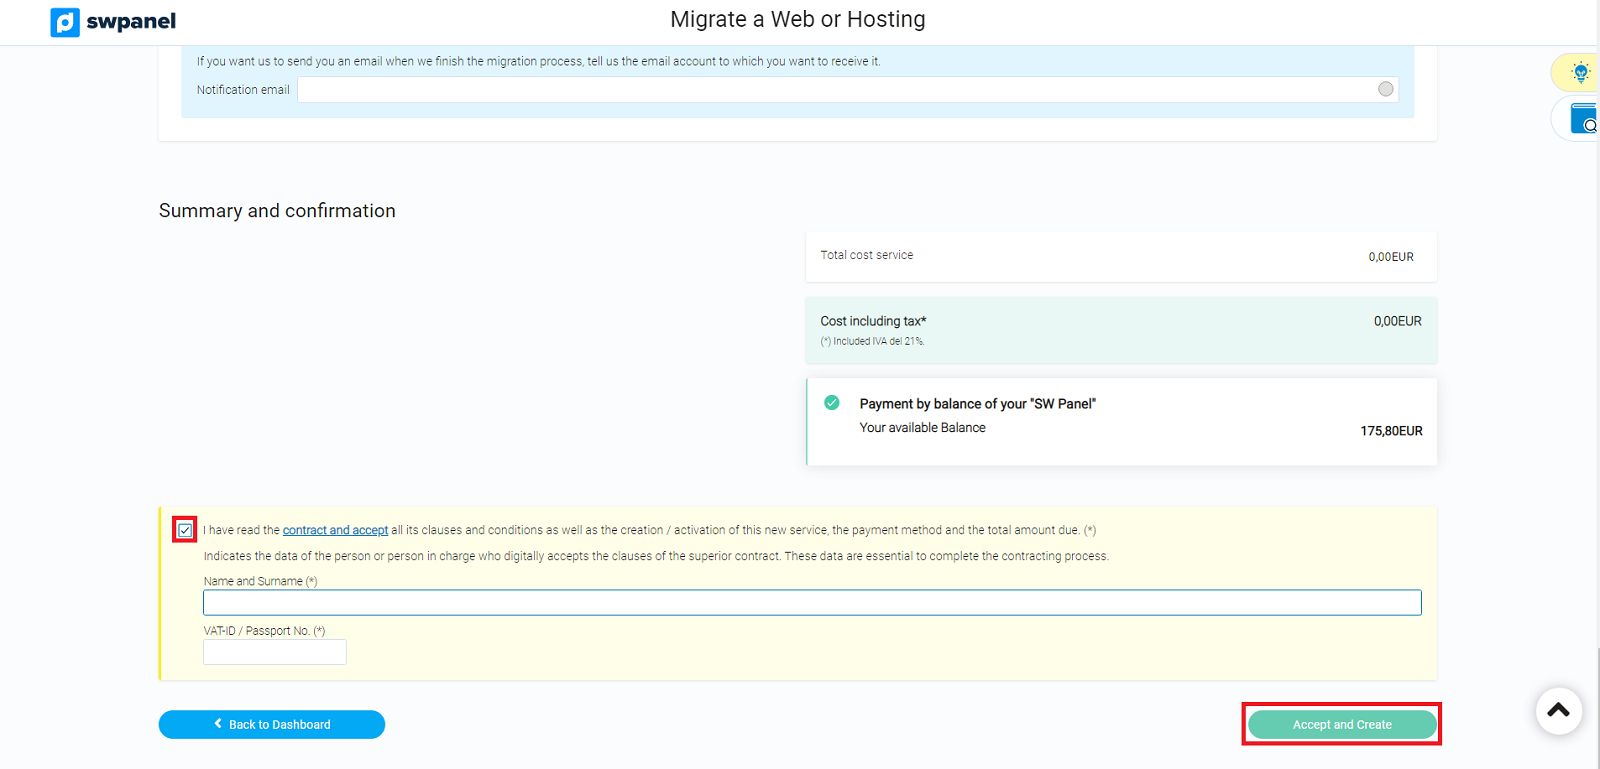
If you wish, you can specify an e-mail account to be notified of the completion of the migration:
Summary and formalization
Finally, check again that all the data is correct, click on the "Check" to accept the contract and the terms and conditions and click on "Accept and create".
The migration has no cost, so the "Total service cost" will be 0€.
danger During the migration preparation process you cannot and should not leave the SWPanel loading screen. Once the migration has started, you will be redirected to your SWPanel and the migration will take place in the background.
Once the migration is finished, you will return to the SWPanel home Dashboard and you will be able to proceed to check the correct functioning of the website by modifying your Hosts file.