Content
Categories
- General SWPanel (38)
- Administration (14)
- Database (14)
- SSL Certificates (15)
- Cloud (59)
- Cloud Storage (2)
- Containers (1)
- Backup Copies (6)
- Mail (33)
- DevOps (55)
- Domains (33)
- FTP (6)
- Hosting (32)
- Migrate Services (6)
- DNS Registers (13)
- Security (12)
- Services (7)
- Support (5)
- Users and privileges (2)
- Web (15)
- WordPress (23)
Let's Encrypt certificate installation in One Click App NextCloud
⚠️ This is basic configuration information based on the configurations available in the official NextCloud documentation, but with the routes and accesses of the installations that are carried out from SW Hosting. We remember that from SW Hosting we do not give direct support for third-party applications. ⚠️
Let's Encrypt certificate installation in Cloud One Click App NextCloud
In this manual we are going to guide you so that you can configure a Let's Encrypt SSL certificate in your NextCloud without having to consult any external guide, with all the routes and configurations that do work from our NextCloud One Click App.
However, we remember that this is only a clarifying guide, since from SW Hosting we do not include support for third-party applications. Following this guide carries out the aforementioned configurations, however, NextCloud configurations other than this or any other question related to the platform, should always be consulted through guides, manuals, forums and official documentation.
Precautio
Before starting with the server configuration, there are a few things to keep in mind:
- Certificate settings can only be made for a single domain. That is, you cannot secure access to NextCloud through a domain and at the same time through the name of the Cloud or by IP.
- Before installing the certificate in your domain, you must have in the DNS zone configuration of your domain, an A record that points to the Cloud and the name of the domain included in the NextCloud configuration file.
If the corresponding configuration is not carried out correctly or the instructions to be taken into account are not followed, NextCloud could lead to errors, causing an access failure and the corresponding need to reinstall the Cloud, thus losing all the data of the Cloud.
From SW Hosting we will give all the necessary information to be able to carry out the configuration taking into account the corresponding indications.
Deploying your Cloud with NextCloud
The first is the first. We cannot configure our NextCloud without first having it contracted, so we are going to carry out the deployment of the service. To do this, follow the following steps that we show you below.
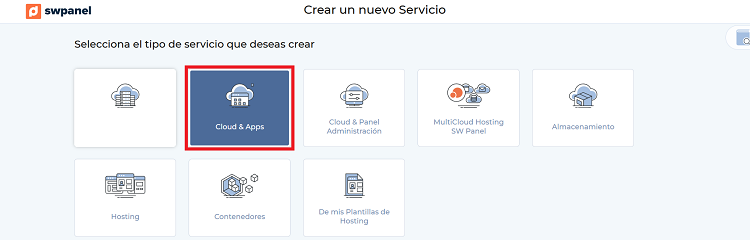
From anywhere in your SWPanel, access "Create service":

Click on "Cloud & Apps":
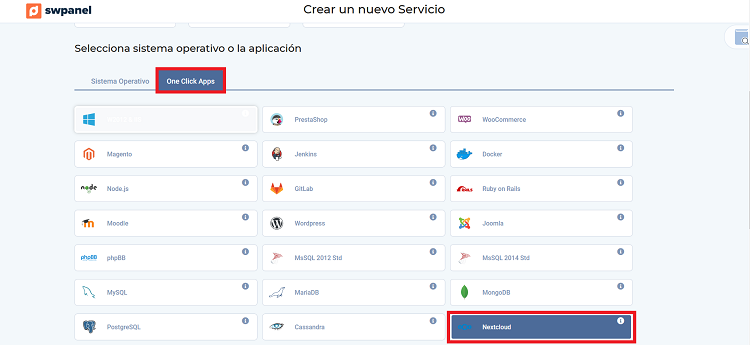
Click on the "One Click Apps" button and then select the option "NextCloud":
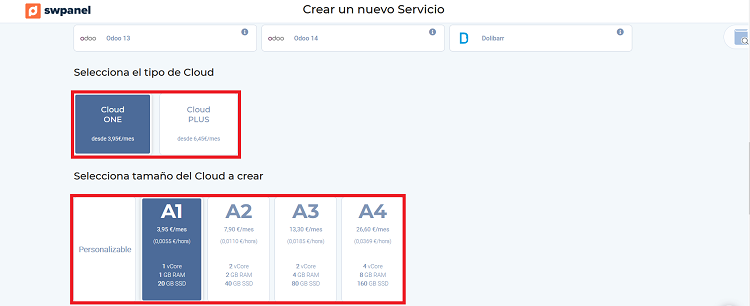
Select the type and size of Cloud you want. We have selected a Cloud ONE A1, the most basic of all:
Finish the customizations (we have not configured any extras), go to the bottom of the page and click on "Accept and create" to formalize the deployment of the Cloud:

As soon as the wizard is finished, the Cloud will begin automatic deployment. Be patient, the process can take several minutes.
Access configuration by domain in your NextCloud: define the domain
Before verifying that NextCloud is accessible, please do these settings. In this way, you make sure that you perform all the steps correctly and that everything works correctly.
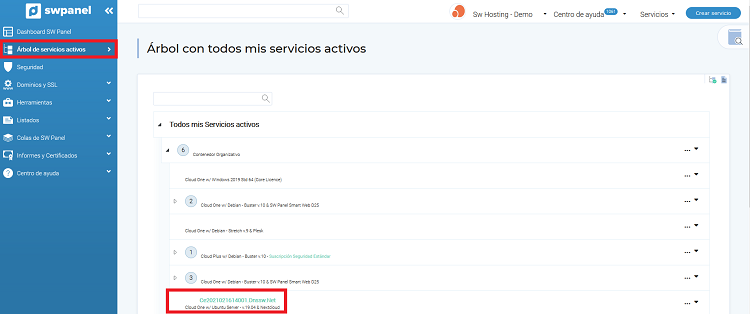
First of all, check the IP of your new Cloud. To do this, access the service tree, find the corresponding server and click on it:
Once inside the Cloud, in its Dashboard, you will be able to see its assigned IP:
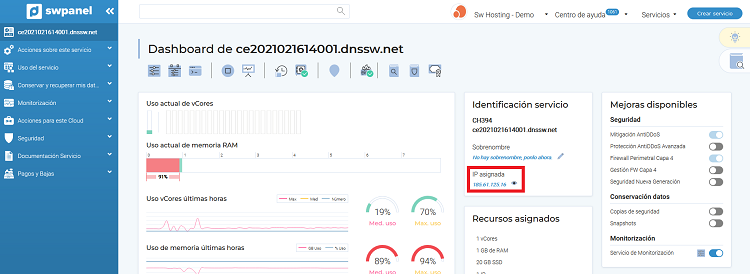
This is the IP you will need to continue configuring access by domain.
The next and most important step: you must have a contracted domain!
In order to carry out the configurations of this step, you need ** to have a domain in your property**. If you wish, you can contract a domain with us from SWPanel, or you can also transfer a domain to SW Hosting from SWPanel.
Once you have your domain, you must create a service associated with it (you can create a service within a Cloud with SWPanel or create a shared Hosting service) and access the DNS zone to configure a new record that points to your NextCloud.
Access the DNS management of the service:
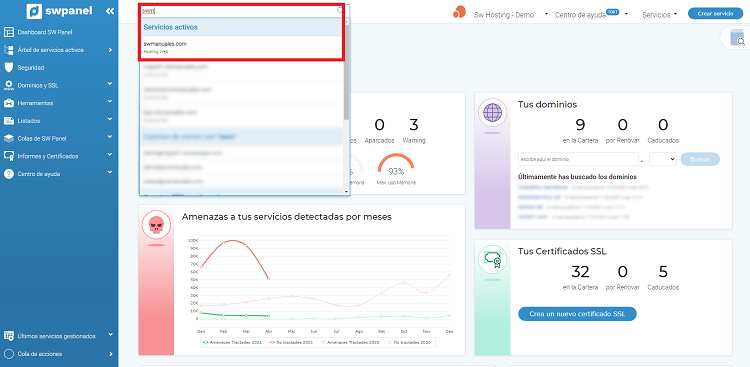
First of all, from anywhere in the SWPanel, in the search bar at the top, search for the service name:
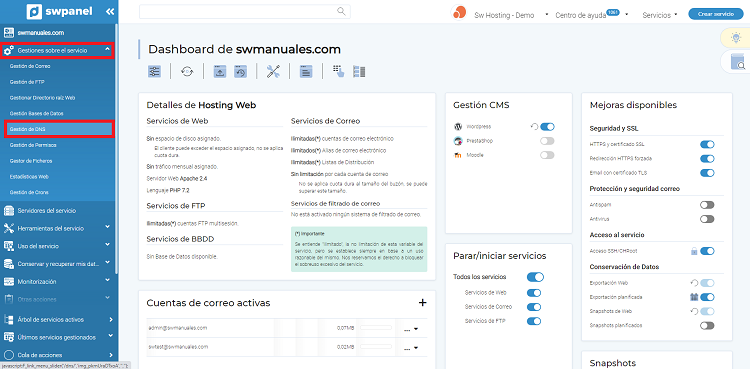
Then go to "Service management"> "DNS management":
Within DNS management, click on "Create record":
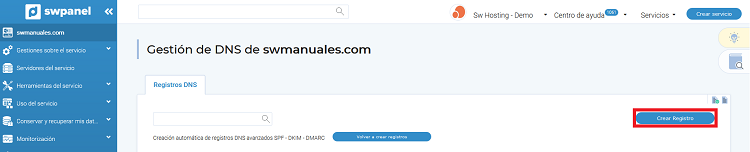 Select "Record A (Host)". In "Hostname", put an alias of your choice. We have set "nextcloud", so the access to the Cloud will be "nextcloud.swmanuales.com". You must also specify the IP of your Cloud, which you have searched for in the previous step. Finish by clicking on "Create registration":
 We always recommend checking DNS propagatio before proceeding with the following steps, to ensure that everything is correct.
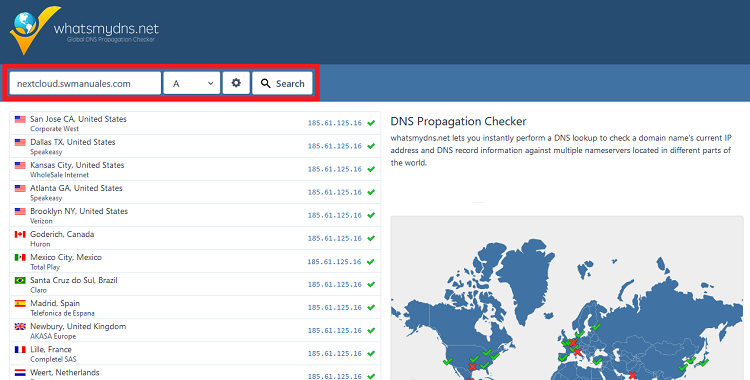 When all the items in the list are "OK", the propagation is successful. It is possible that there is a point with a red cross, but it will still be able to propagate correctly.
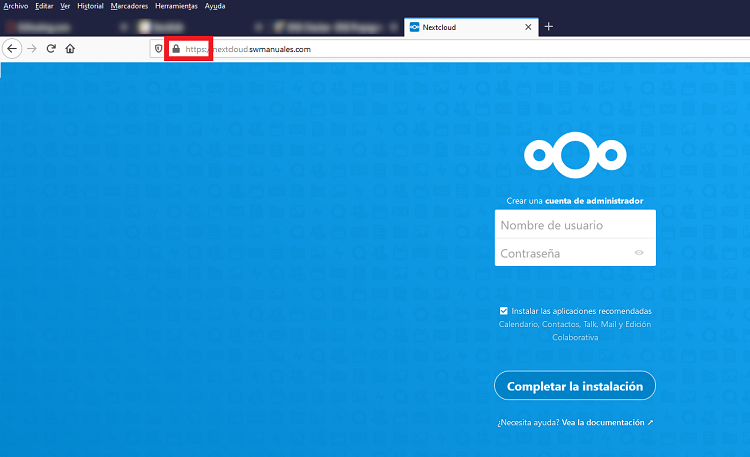
Once it is propagated properly, it is time to access your NextCloud for the first time through the link you have defined, in our case "nextcloud.swmanuales.com". Enter the URL and check access:
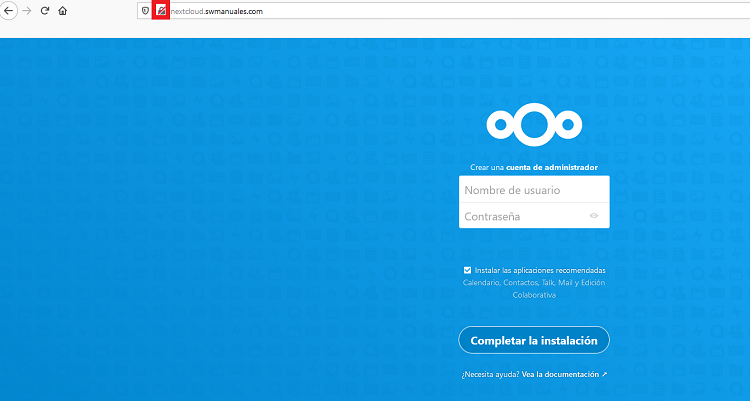 You should be able to log in correctly, but you won't see any certificates yet, so the page will show as unsafe.
In case you already have the NextCloud active and you have accessed it on some occasion, you will have to make some modifications to its configuration. We also recommend checking the settings even if you have followed the steps so far.
Now, check out the NextCloud configuration file.
Access configuration by domain in your NextCloud: configuration file
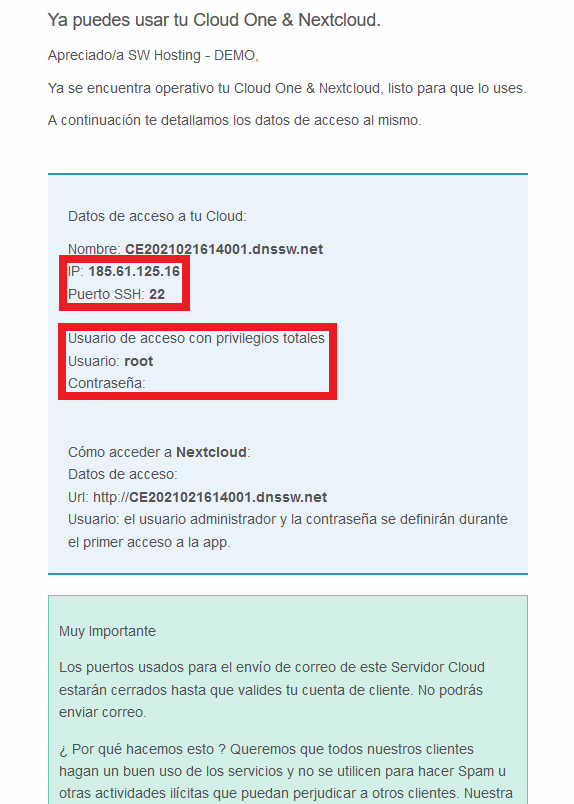
In order to continue with this step, you must access the Cloud by remote SSH connection. To do this, you need the access data that is received by mail at the time of deploying the Cloud, similar to the one shown below:
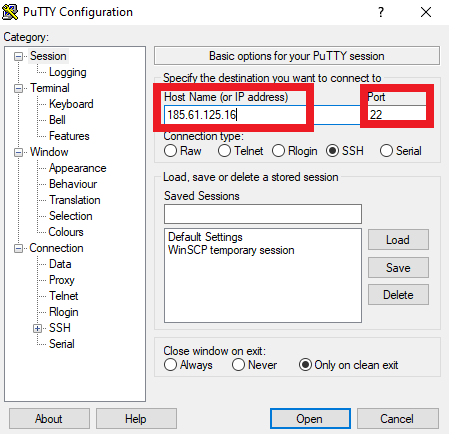
The remote connection is made with a specific application for this purpose, such as PuTTY.
Enter the access data to the service and click on "Open":
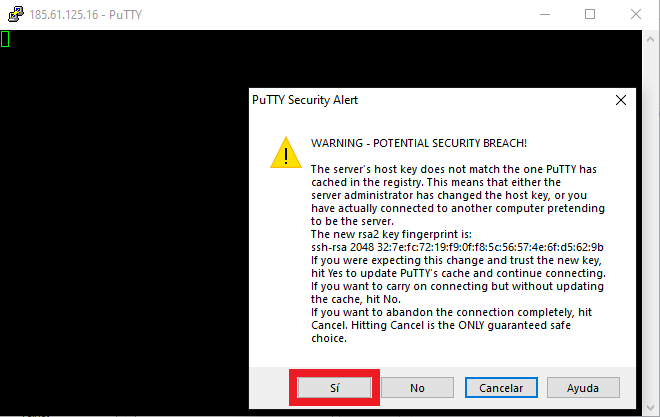
Click "Yes" to accept and access:
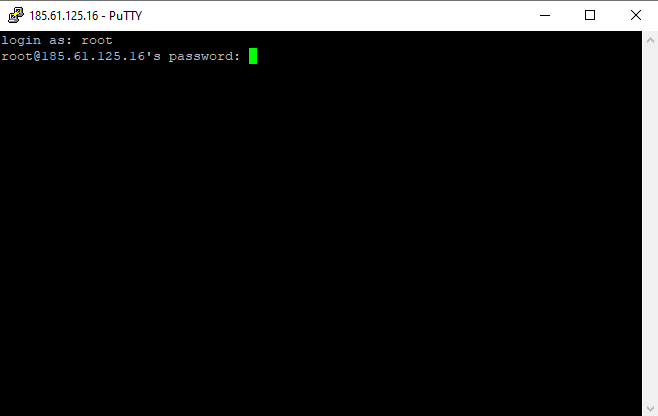
Enter the username, press enter and enter the password. You must pay attention because, even if you are typing or copying something, the access key will not be displayed at any time, so we recommend copying and pasting it directly. To paste the key into the console you must click with the right mouse button on the screen. Press enter again to access:
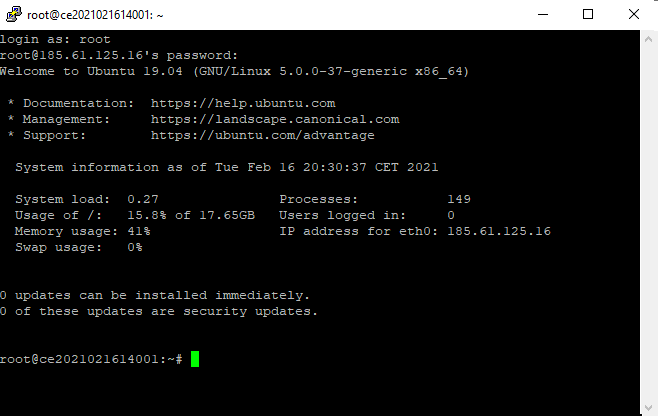
Once inside the console, you should see something similar to the following image:
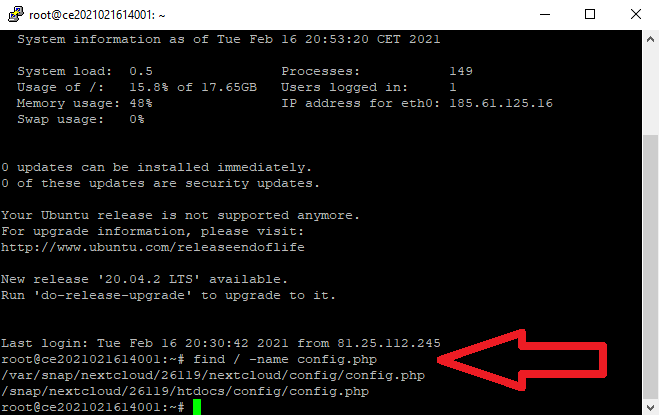
Next, you should look for the NextCloud configuration file "config.php", which is in a similar path to this, but with some numbers instead of the asterisk:
/var/snap/nextcloud/*/nextcloud/config/config.php
In order to find it, you must copy the line that we show below and paste it in the console (to paste, you must use the same method that we have used with the key, a click with the right mouse button):
find / -name config.php
Then you will see something similar to this image:
Copy the route that appears, which is similar to the one described above. To copy, simply select. Next, type "nano" in the console followed by the path, so that it would be something similar to:
nano /var/snap/nextcloud/*/nextcloud/config/config.php
You should see something similar to this:
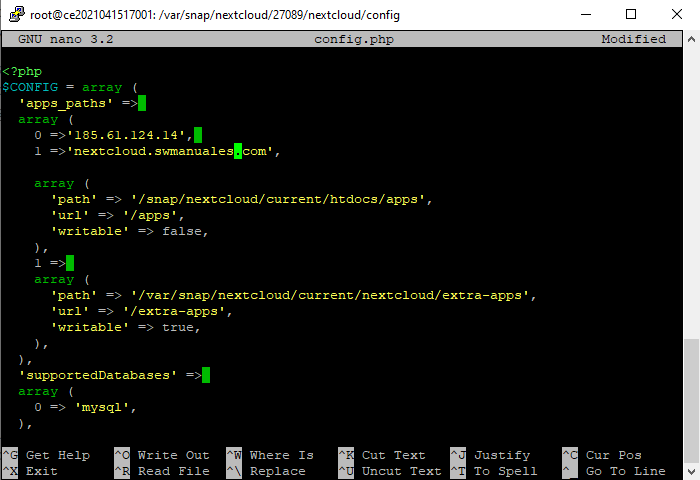
You should make sure that the following lines appear:
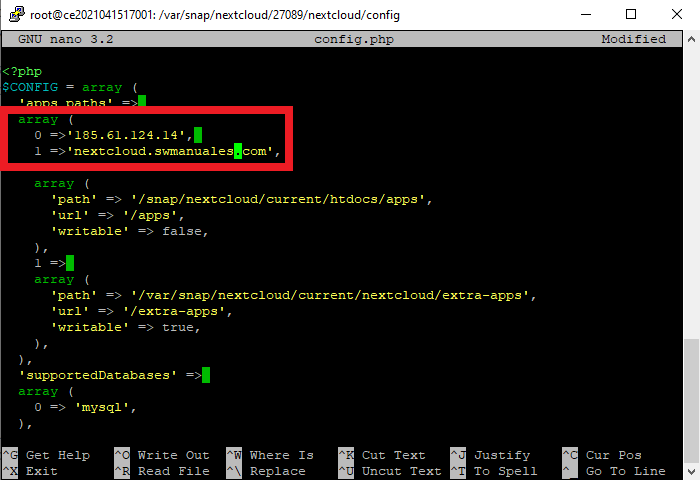
Edit by moving with the keyboard arrows and typing directly. Once it is correct, save the changes as follows:
- Control + X keys
- Y key
- Press Enter
You don't have to take any further action (reboot, etc.). Now you can simply check access with your URL again. You already have all the previous steps necessary for the installation of an SSL certificate and subsequent access to NextCloud in a secure way.
Certificate installation
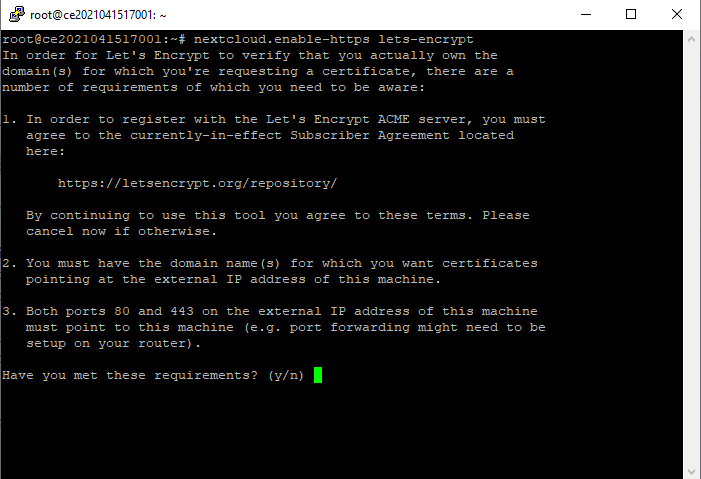
Without disconnecting the SSH access that you have open, proceed to the installation of the certificate.
Paste, in the console, the following line:
nextcloud.enable-https lets-encrypt
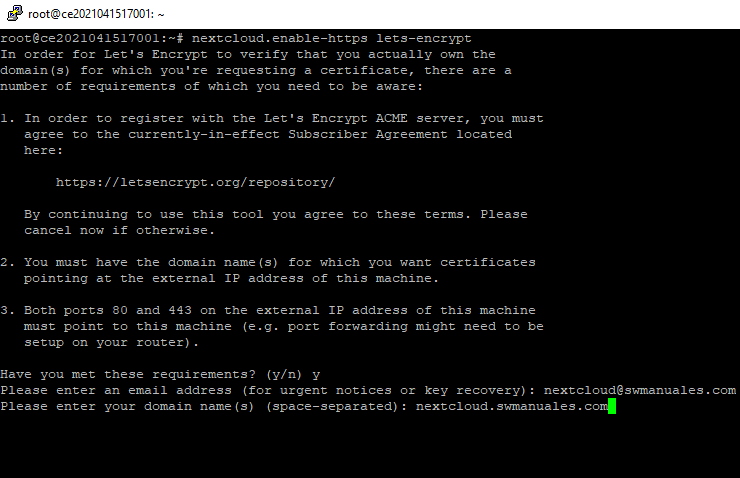
This will start the certificate installation process. First, you will see the Let's Encryt pre-install verification message. Accept the message by pressing the "y" key and then "Enter":
At this point you will have to start writing the data corresponding to your certificate. You must write the content they request and press enter until the installation is complete. Below, you will see a translation of what you should write and our example for reference:
- Please enter an email address (for urgent notices or key recovery). You must write a valid email in case you need to make a recovery. As an example, we have written "[email protected]":

- Please enter your domain name (s) (space-separated). You must specify the domain of access to NextCloud. Continuing with our example, nextcloud.swmanuales.com:
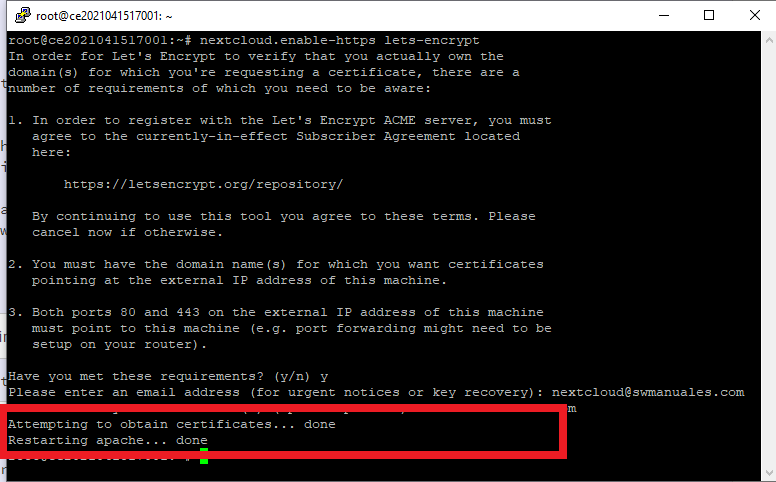
The message "Attempting to obtain certificates ..." will appear, which means that the installation process has started. Once finished, it will appear as "Done" and you will see a new line "Restarting apache ...". When finished, it will appear as "Done" and you will have the certificate installed.
You should see it like this:
Check the correct installation
The last step is to access NextCloud again through the URL you have indicated, emptying the cache or through an incognito window, to verify the correct installation of the certificate: